What you describe is more like a greater than / lesser that mode.
In the halftone filter I mostly treat the texture as a noise image and add it to the source image: result = source + (texture - 0.5). But in the extreme cases where the intensity is near 0 or 1 I do some other computations (similar to the overlay but not the same) so that adding the image with the texture don’t produce values less than 0 or greater than 1.
Then some postprocessing is applied to control the contrast of the result but that’s not relevant in this discussion.
Wow, did not realize the reworked halftone filter was capable of this kind of texturing. Quite powerful.
1 Like
@Tiar: Very encouraging to hear you’d like to help out here.
Here’s my thinking on how this should work. I’ve run into a problem with the “softness” value and don’t have time to think it through right now, maybe someone else has time to help there?
I think we’re all pretty much in agreement that the pattern should essentially be treated as a heightmap and pen pressure should control the cutoff. @Deevad 's explanation is very clear.
I believe we can get this done by using the pressure value to set the blackpoint of the pattern.
Here’s a visualization of what I mean.
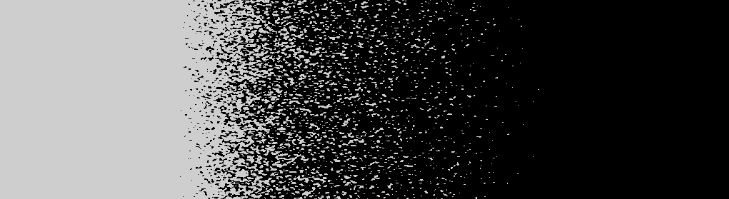
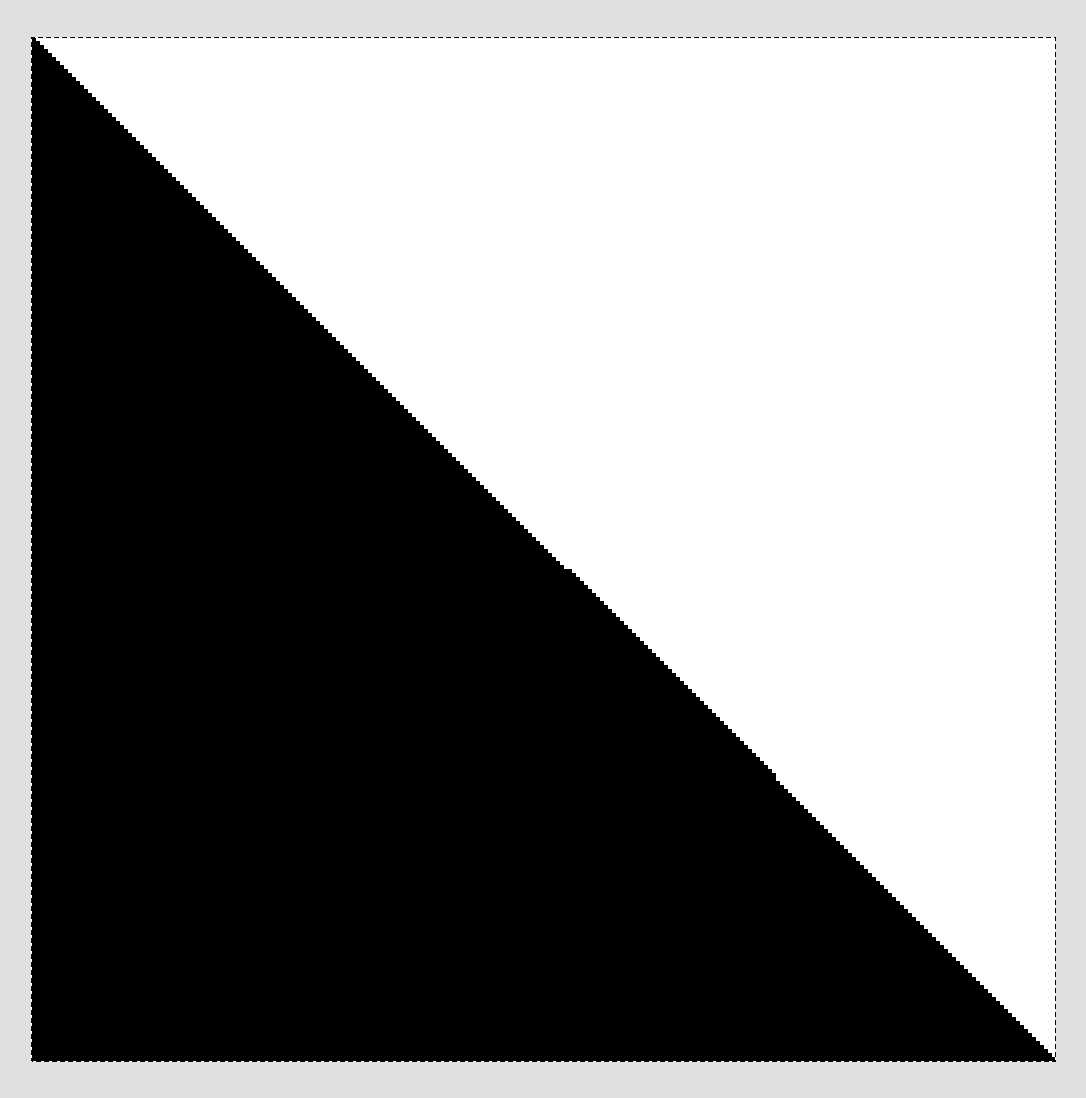
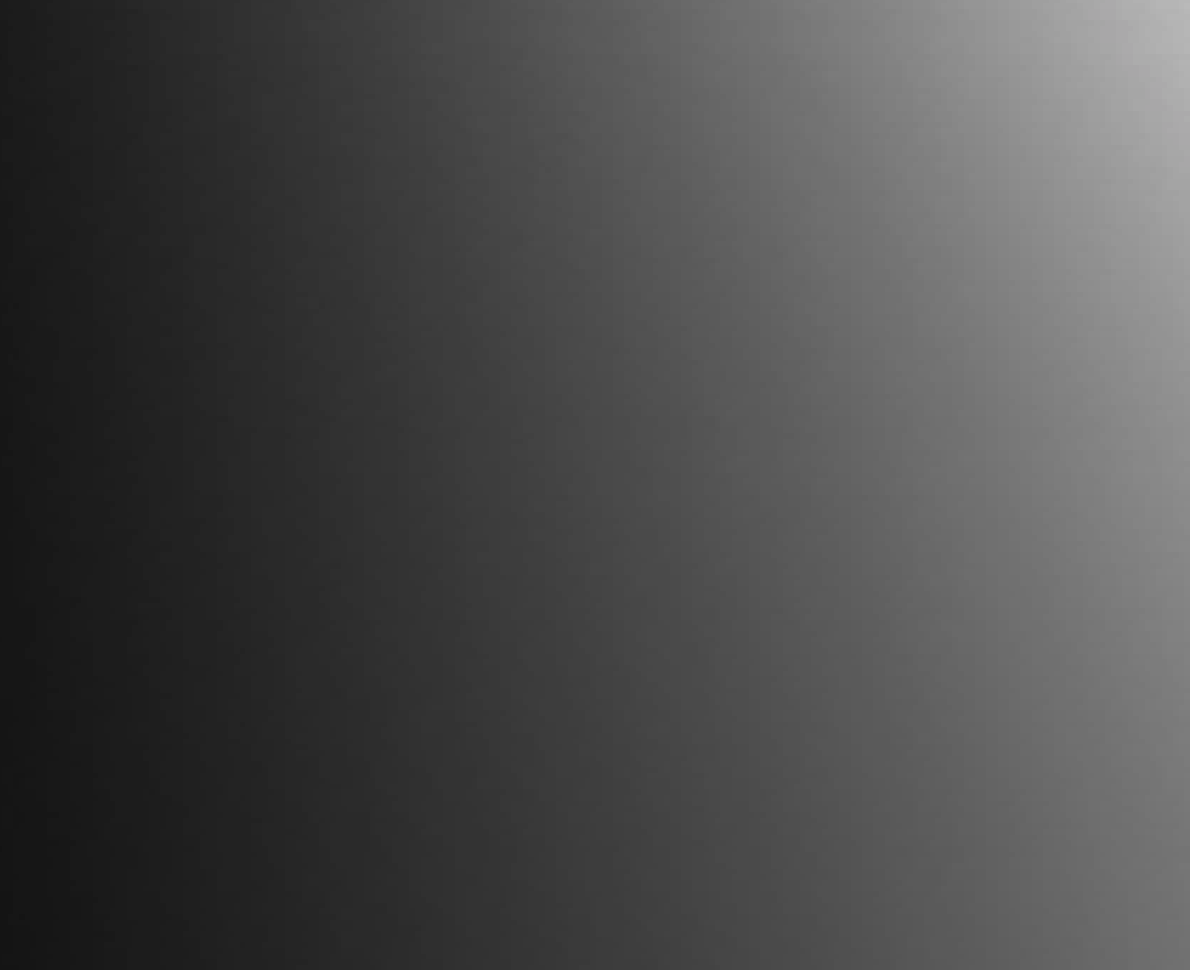
We have a pattern:
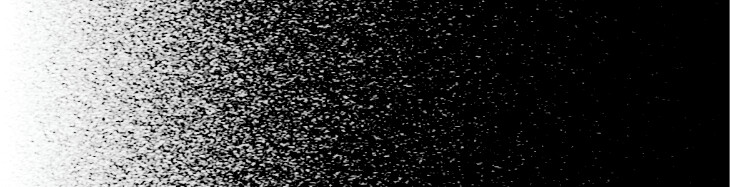
and we have pressure values:

so let’s do some simple math:
blackpoint = pressure
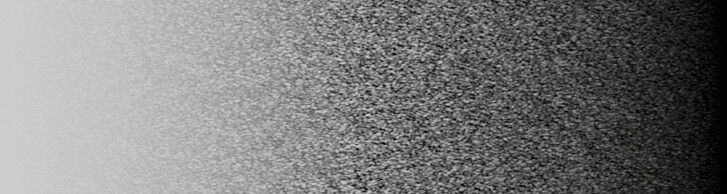
(pattern-blackpoint)/pressure
gives us this:
Thats’ a bit rough, we want some way to adjust the softness of the grain cutout.
softness = 0.5 [this is a value between 0 and 1, with 1 being maximum softness]
blackpoint = pressure * (1-softness)
then the above math gives us this:

This is where I run into problems. The softness value is an offset, so it lightens the overall result. I’ll have to think on it a little to figure out how that part should work.
2 Likes
I think you should begin with a noise texture (height map) that uses the full range of values to get better results. The same for the gradient (brush pressure) image. Otherwise you can be finetuning the algorithm for a specific case.
Both maps do use the full range between 0…1. The screenshots are just viewed through a LUT with a highlight rolloff that causes the value 1 to show as a lower value.
OK, on further reflection, I think we need to use a conditional here.
@Deevad drew this much nicer, but basically we want a slice of the heightmap that is our texture pattern. So we need to define the width of the slice - this is how hard or soft the texture appears. Then, by offsetting the value of the pattern with pressure, we can adjust where that slice falls in the heightmap.
So naively, we’d just add " pressure" to “pattern” and use our softness value to adjust the contrast on that. The problem is, since it’s an addition, we end up with the pattern appearing even when pressure is 0.
So that sounds like we need to use Overlay or Hard Light. The logic here is, roughly, that if “pressure” is greater than 0.5, we screen pressure over pattern - if pressure is less than 0.5, we mutliply pressure and pattern.
So: Pressure merged over pattern in “overlay” mode, then contrast set with whitepoint/blackpoint (excuse my pseudocode, please):
if pressure > 0.5: pattern = 1-2*(1-pattern)(1-pressure); else pattern =2pressure*pattern
softness = 0.5
whitepoint = 0.5 + softness / 2
blackpoint = 0.5 - softness / 2
output=(pattern - blackpoint) / (whitepoint - blackpoint)
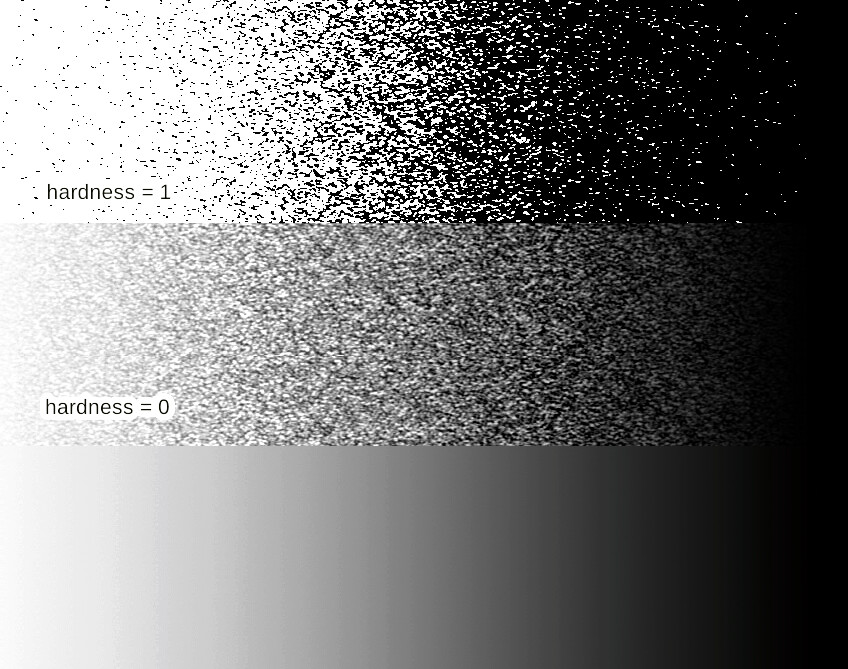
This gives us:

The problem here is that adjusting the softness value also adjusts the pressure response of the brush.
Softness = 1:
Softness = 0:
You could compensate for this by adjusting the pressure curves, but A: it’s ugly and B: it would require being able to set pressure values beyond the 0…1 range.
So I guess I need to think about this a little more tomorrow, and lament my lack of mathematical inclination.
1 Like
That is almost the same problem I was trying to solve in the halftone filter. I even considered the overlay blending mode to mix the images, but I was not happy with the result in the extreme cases (near 0 or 1), and also it was different from traditional halftone/dithering approaches which use the concept of adding noise to the original image. In traditional halftoning you just compare the image with the “noise” image and output 0 or 1 depending on if the image is greater or lesser than the noise (that is, the noise values are used as a threshold). The problem is that this produces a binary image, so I used another approach that mixes the images and then uses a contrast operation. In the case where the contrast is at the maximum, it is just like a threshold, so the results are almost identical to the traditional approach.
As I said earlier, I add the noise image to the original image in this way: img + (noise - 0.5). but this can make the texture appear in full white or full black areas, so I scale the noise depending on the source image using a somewhat arbitrary function with two ramps at the extremes.
You can look the code if you want (plugins/filters/halftone/KisHalftoneFilter.cpp, functions makeNoiseWeightLut and processIntensity).
Anyway, this is what I get using the halftone filter in a gradient image and using your noise texture (in which I applied the auto contrast filter first):
2 Likes
@Deif_Lou , that looks good, I’m afraid I can’t wrap my head around the code you used however… That’s my fault though. Possibly using your approach is a better idea, the result seems good.
On my end, I got something that I think works and only has one arbitrary magic variable! Let’s see if I can still explain what I did.
First, the results:
Here’s our pressure, with a good bit of both solid black and white so we can see what happens at full and 0 pressure:

And here are my results at different softness levels:
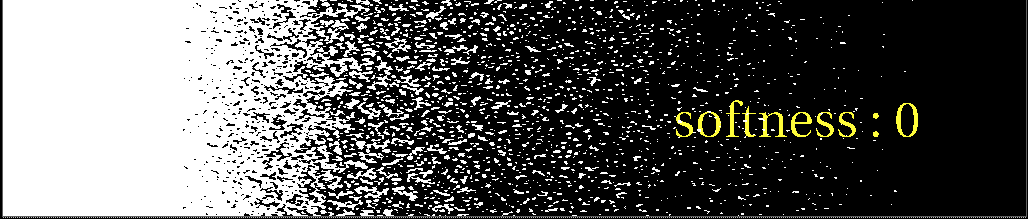


So we can see that changing the softness maintains the overall apparent value of the output pretty well. That’s good! And the whites and blacks remain clean without any major discontinuities at the transtion. At full softness there’s maybe a tiny edge where the pressure approaches 1?
This approach requires that we be able to do floating point math. The resulting output can and should be clamped between 0…1, but the calculations need values outside that range.
What I did:
we need to adjust the whitepoint and blackpoint of the pressure gradient as softness changes.
pressureWhitepoint = 1+(1-(softness^0.8))/2 using a hand-tuned exponent to avoid issues at softness=0.5
pressureBlackpoint=(softness-1)/2
pressure=(pressureIn-pressureBlackpoint) / (pressureWhitepoint - pressureBlackpoint) this is the range adjustment for our pressure
if pressure>0.5:
texture = 1-2 * (1-textureIn) * (1-pressure)
else:
texture = 2 * pressure * textureIn overlay blend of texture and pressure
Now we need to adjust the overall contrast using our softness value:
midpoint = 0.5 I believe we want all calculations centered on .5
whitepoint = midpoint+softness/2 final whitepoint adjustments
blackpoint = midpoint-softness/2 final blackpoint adjustments
output=(texture-blackpoint)/(whitepoint-blackpoint)
So, does that make sense to anyone? ![]() It seems pretty robust to me. It might be best to limit softness to values above 0, as when it goes to 0 the values of the result go to infinity. It gets clamped of course, but I’m not sure what kind of problems that could result in.
It seems pretty robust to me. It might be best to limit softness to values above 0, as when it goes to 0 the values of the result go to infinity. It gets clamped of course, but I’m not sure what kind of problems that could result in.
2 Likes
Thank you @hulmanen and @Deif_Lou for the investigation. I can’t pretend I understand all of it. But I kept experiencing on evenings here with ‘Multiply alpha’ and ‘Substract Alpha’ and the various contrast/brightness/neutral-point sliders and Pressure curves. So, as soon someone wants me to test a branch/MR/patch; I’ll be around knowing pretty well the boundaries of what was possible before the MR or patch.
2 Likes
Does my proposal seem sensible? @tiar , can you make heads or tails of what I’m describing?
Awesome thread, i am sure this will bring new good ideas and more creative possibilities. Is in my favs
Prolonging conversation from New Brush’s texture blending modes - Height
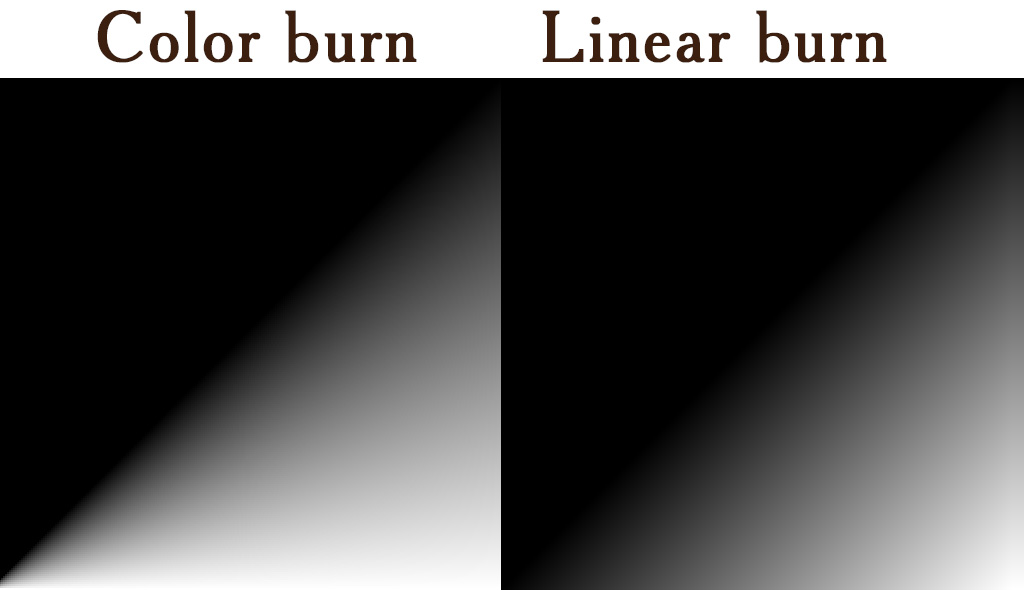
I’m not sure what “Color Burn” does… other mentioned modes are in Krita so it would be ok to add.
Moreover, since I noticed there is “Hard Mix” color in both Krita and your results, I tried to get the same result with layers and… I don’t think it works? I mean I get this result:
While yours (from the brush) is skewed and has noise on the bottom between the balck and white parts.
I checked in photoshop layer blending and got the same result as yours, so It seems ps’s devs use different formulas for texture brush tip and layer blending modes at least for “HardMix”. Or maybe I do something incorrect?.. ![]()
UPD: I checked all blend modes that photoshop has in brush texture-tip vs blending layer — all except “Overlay” are unmatching. Layer blending always tend to be more harsh in darker areas – darks and midtones became more darker. Tip-texture modes are more softer and gradual.
Btw “Hard Mix” of masked brush in Krita works in the way as layers do?
So I don’t know if is this helps but Krita has “linear burn” and it matches the photoshop’s one, so in comparison with color burn:
Regarding the Height stamps: I must admit it did take quite some time. However I think we might need to do this exercise again
I think the gradients were already dithered:
I’am not sure in which way I should use the gradient, so I putted it as brushtip with vertical first pattern and, actually, in “Height” and “Linear Height” got only solid color, “Color Burn” and “HardMix” have effect similar to the previous results. I have updated the .psd file
1 Like
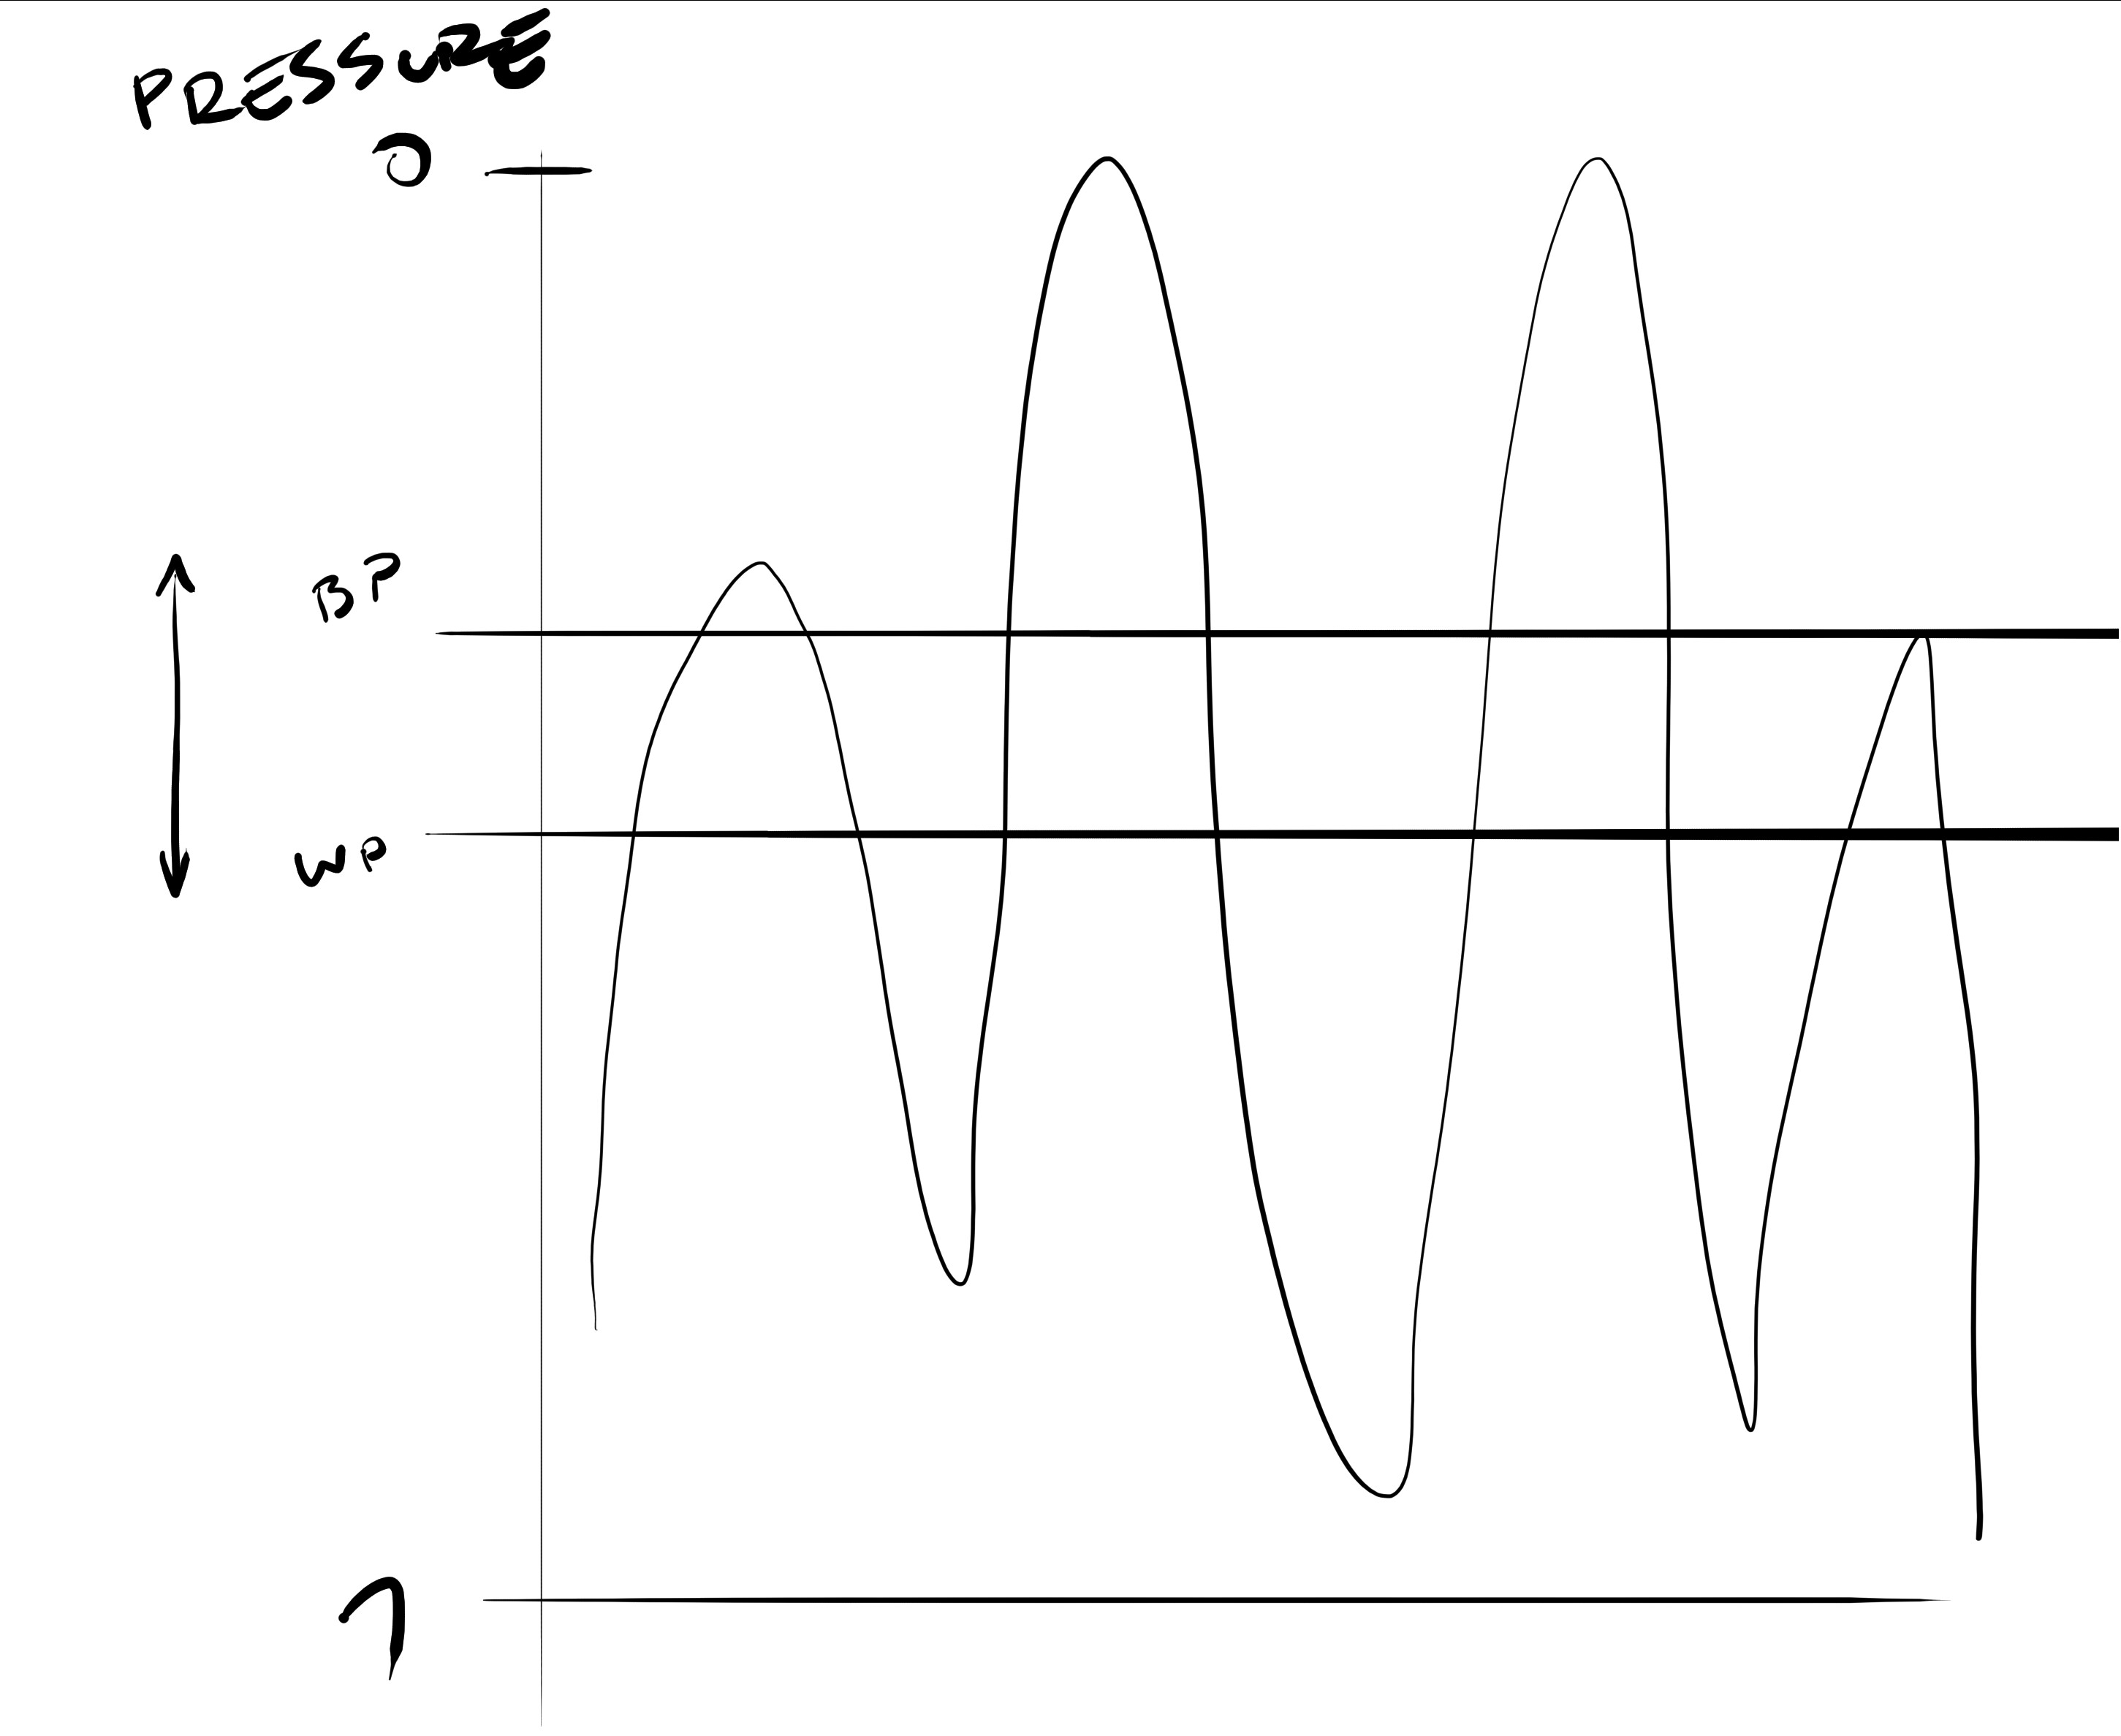
To take a higher-level view of the problem, the solution must involve some kind of sigmoid function. This is because we want the following:
- At the extreme pressures of 0 and 1, the result must be 0 and 1, respectively.
- The transition to these extremes should be smooth.
So we want something like the example on the right:
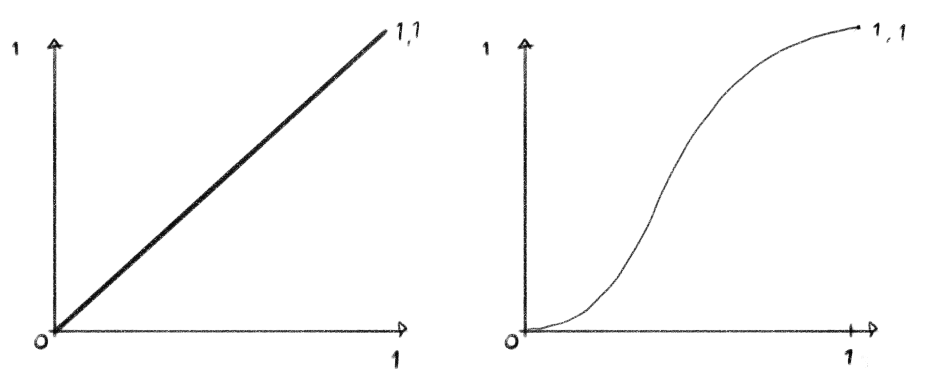
Now, I believe the overlay blend mode does exactly this. It just doesn’t produce the desired effect on its own, but the math behind it can be used to drive a whitepoint/blackpoint adjustment as I’ve outlined above.
OK, so I’ve gone and nerd-sniped myself here.
Thinking about the sigmoid curve - that’s really just the pressure response curve I think, and since we already have that, we don’t need to reimplement it here. So that lets us do away with the overlay blending mode, and all we need to do is have the pressure adjust whitepoint and blackpoint of the texture pattern. So this should work:
(pattern- (pressure - softness/2 ) ) / ( ( pressure+softness/2) - ( pressure - softness / 2))
This, with softness = 0.2, gives us:

And by manipulating the pressure curve we can adjust the result:

Unless I did something wrong, simplifying that function gives me (pattern - (pressure - softness/2)) / softness which in the case of softness = 1 gives pattern - (pressure - 1/2) which is very similar to what I did in the halftone filter.
Basically is like adding noise. Let’s say you have 2 functions, f(x) and n(x); f is the original image or the brush dab image and it is 10px wide; n is the noise texture. You want f to be perturbed by n, but since image values are positive we have to first offset the noise texture values by -1/2 so that adding them to f will make it increase in some cases and decrease in others. As an example, let’s say f(x) = x/10 and n(x) = (sin(x*50)/2 + 1) / 2 (the exact functions are just so they produce an understandable example):
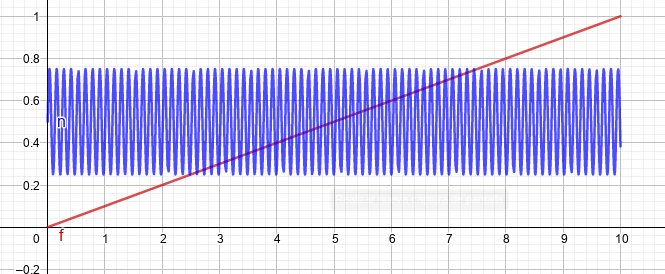
If we just add them we get
g = f + n: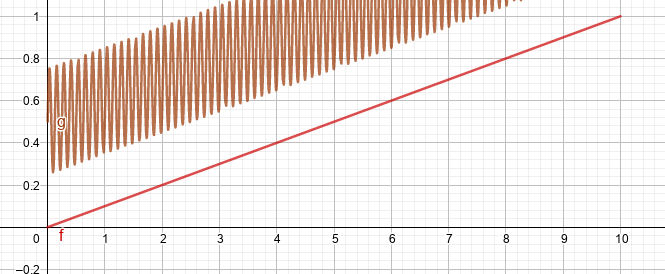
but we want the noise to perturb the image and not offset it so we need to offset the noise by -1/2, giving us
h = f + (n - 1/2):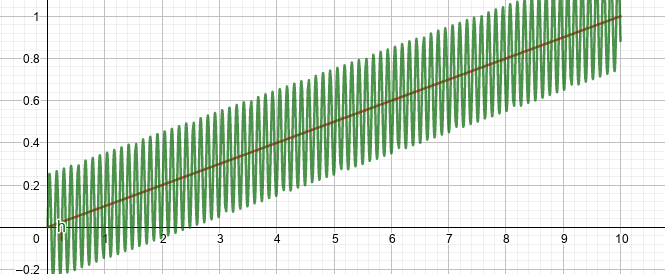
As can be seen this can be interpreted as adding noise but also as a kind of bump mapping, in which the height concept makes sense. You are perturbing the image, making it “higher” or “lower” acording to a “height” texture.
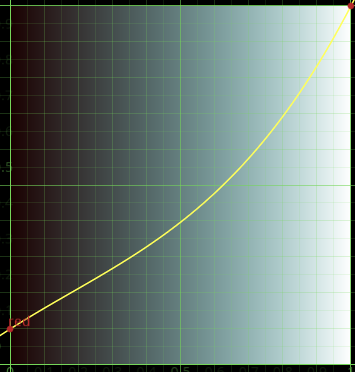
Then as can be seen, when the image is 0 or 1 it is also perturbed, so some sort of function must be applied to “soften” the effect in the extremes. I use basically something like
w(x) = clamp(2-abs(4 x-2)):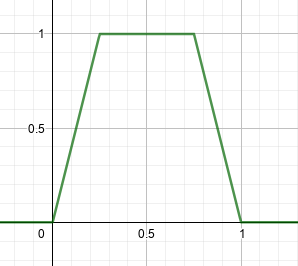
and the final function would be
f + (n - 1/2) * w(f):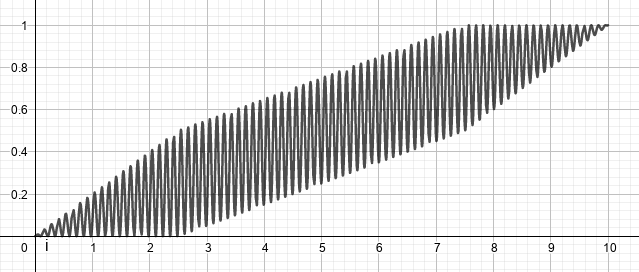
BUT I have to say that I 've never used that “height” mode neither in PS ot CSP, so I don’t really know how they behave.
1 Like
For curiosity I tried to make gradient tests with Paintstorm and CSP.
Here what I got:
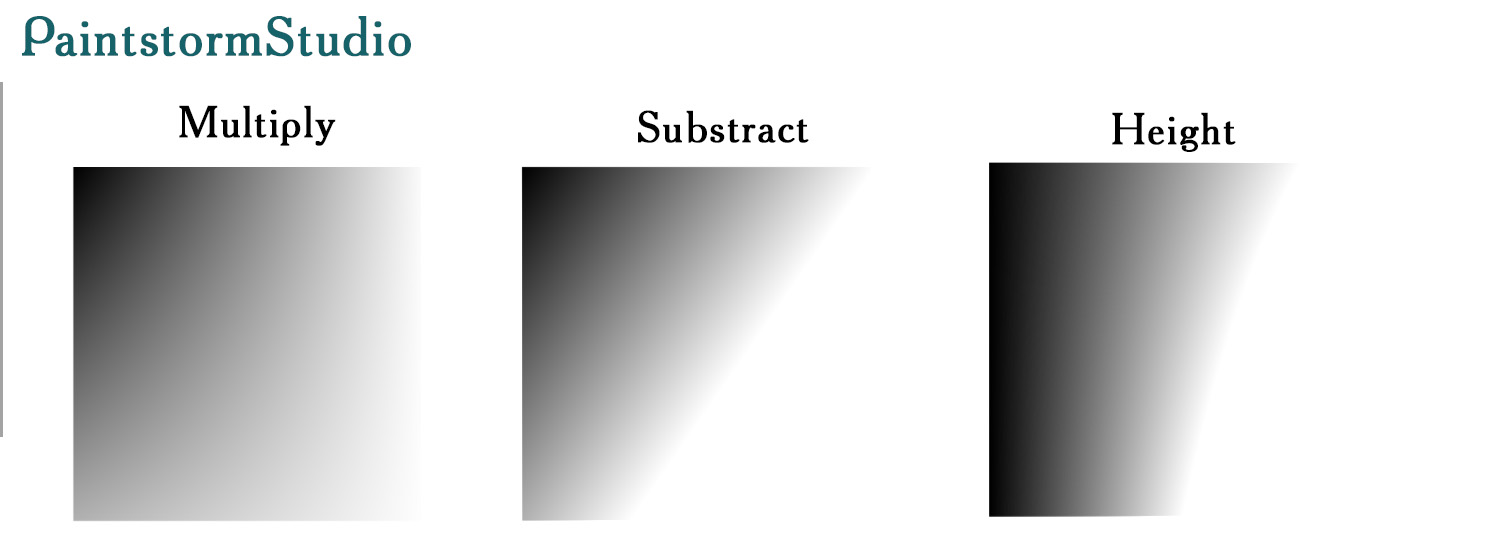
In CSP I wasn’t able to make any interaction between texture and tip with any modes through static mouse-clicking. It seems they interacts only through the stroke with pressure, or, again, I may do something wrong.
Making tests in Paintstorm is sort of confusing: 1) Size of a canvas while creating and size of a brush are differ, if canvas is 512x512 and I put 512px brush size, the last one is about 65% of canvas size. 2) Paintstorm has 2 option while import image as texture/tip – RGBA and Grayscale 3) And it have 3 options interaction of mode applying to: opacity, transparency, color.
So…Idk…
Yes, we’re pretty much on the same page, and your simplification is correct. I had neglected to test my simplified math with a high softness, and it does require tweaking to make sure we get solid 0 and 1 at the extremes.
Your way works, or we can do:
(pattern * 2 - (pressure * 2 - softness / 2)) / softness
multiplying both the pattern and pressure by 2 should ensure the extremes add up to 0 or less and 1 or more.
In case linux users want to test ps, there is option to run cs6 with no lags through wine or playonlinux. (Also Paintstorm has a native linux distro)
I will help to get photoshop cs6 distro if someone intend to.
Ah, please don’t offer to get people pirated software here.
Yes this is not officially supported and may be in the gray area. The policy of the forum has and will have a rule (in the new code of conduct) to not enable piracy. So please do not suggest anything that is problematic.
If someone really wants to try Photoshop, they can install trial version of windows and even photoshop and try Photoshop. You will have 7 days to test it.