Well, I was going to call this a “basic tutorial”… but that will depend on your computer knowledge! If, for example, I say “Go to File > Save as” and you don’t know what I’m talking about, it gets complicated…
But let’s try.  Okay, you want to change the color of a dragon’s eyes. Let’s practice something similar now, but before that: download this drawing of a little witch of mine to your computer.
Then, open the image in Krita. Your screen will look something like this:
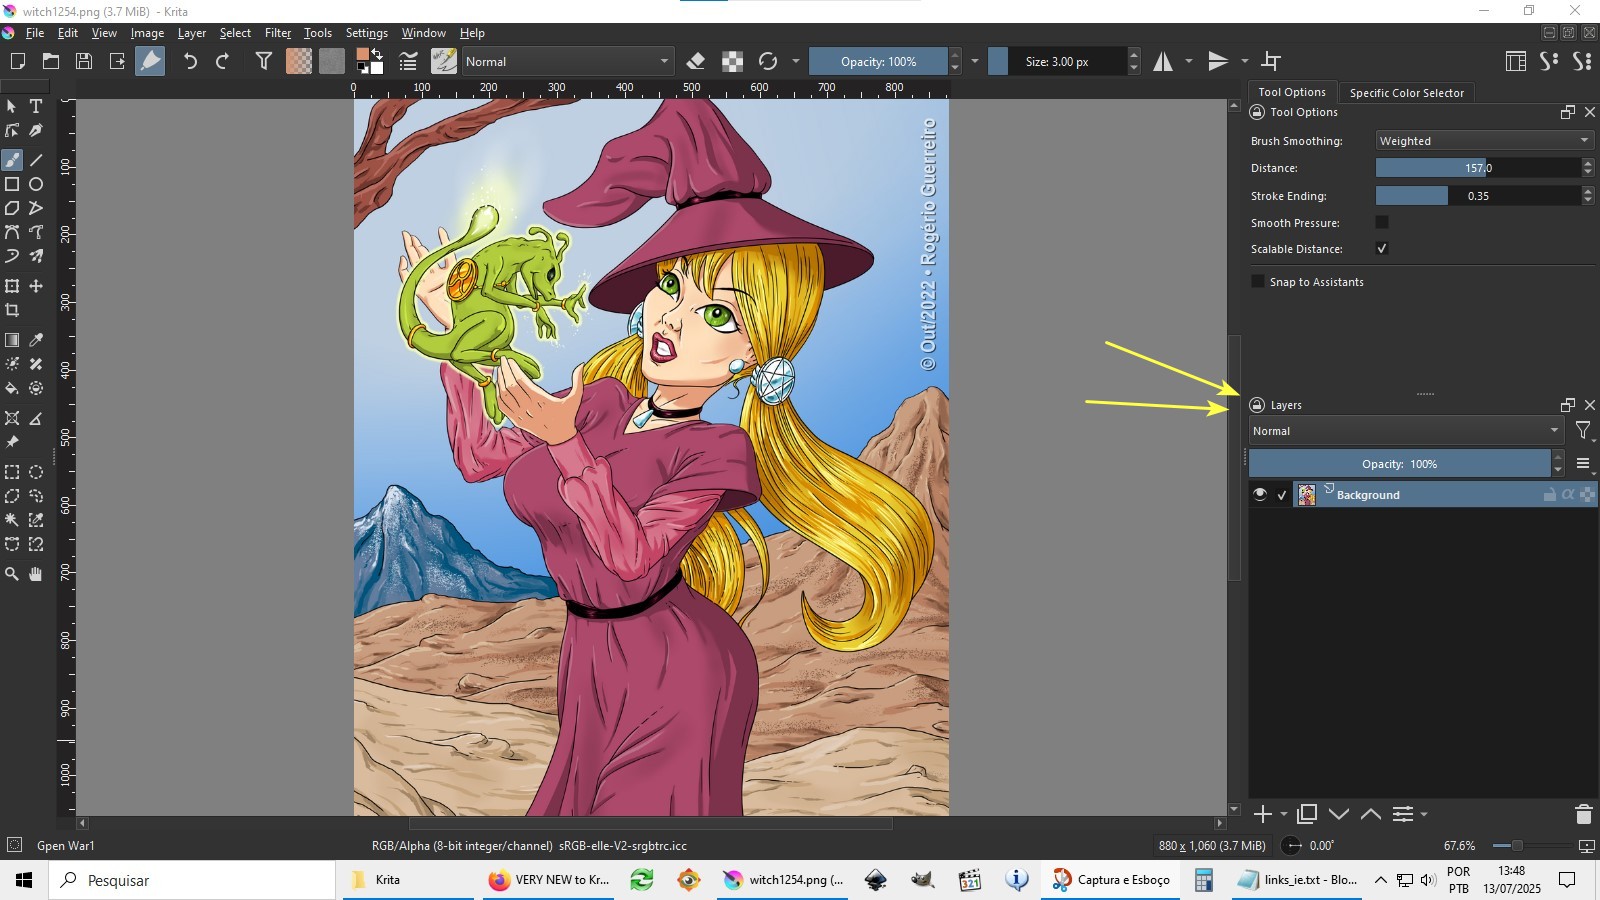
First, we need to know some useful shortcuts to make our work easier. For example, there will be times when you need to enlarge the view of the drawing to make adjustments. In this case, just press the plus (+) key on your NumPad (the number keys on the right side of your keyboard).
Want to reduce the view? Press the minus (-) key, which is nearby. You can also move the displayed area. On your keyboard, hold down the space bar. When you do this, the mouse arrow icon on your screen will change to a small hand.
Continue holding down the space bar, click with the mouse (or pen, if you’re using a graphics tablet), hold, and drag. When you reach the area you want to work, release the space bar. Practice these shortcuts a bit before continuing.
Note that in the following image, I’ve significantly enlarged my drawing, using the indicated shortcuts. Okay, at this point, it’s important to establish what we want to do, “why” and “how.” In this case, I want to change the color of the little witch’s eyes from green to blue, just to see if I like it… and I want to do this without ruining the original image: that way, if I’m not satisfied with the change, I can go back, no problem.
We already know “what” and “why” we want. As for "how" we’ll do it… this is one of several ways to do it.
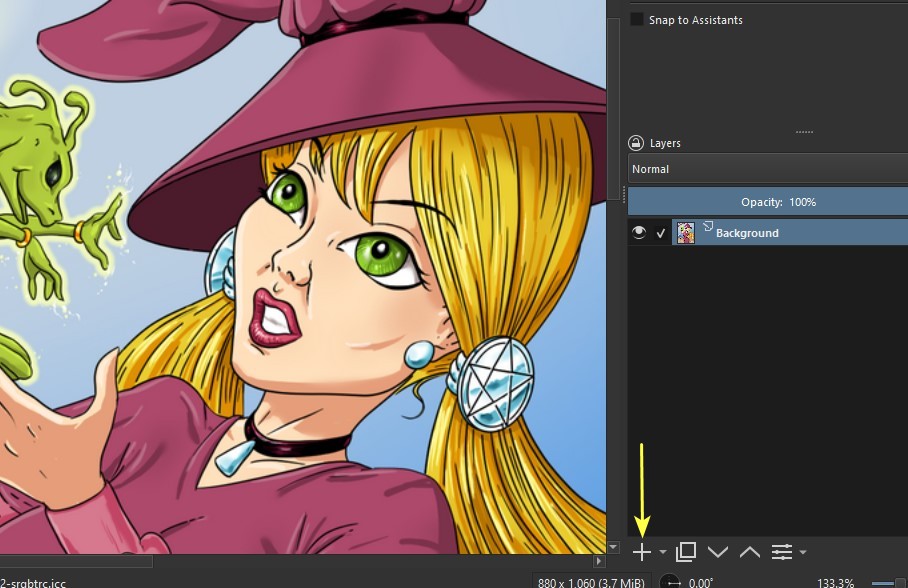
First, we need to create a new layer, going to the Layers docker. Notice that at the bottom of the Layers docker there’s a button with a “+” sign: click it.
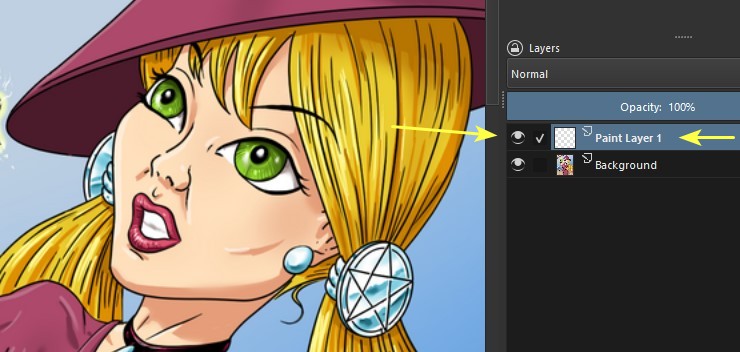
This will create our new layer, and Krita will automatically name it Paint Layer 1. At this point, it’s a good idea to save the file. Use this shortcut: hold down the Ctrl and Shift keys and press the S key. This will open a dialog box where you can choose the file name (for ease, use this name: witch1254.kra) and the folder where you want to save it.
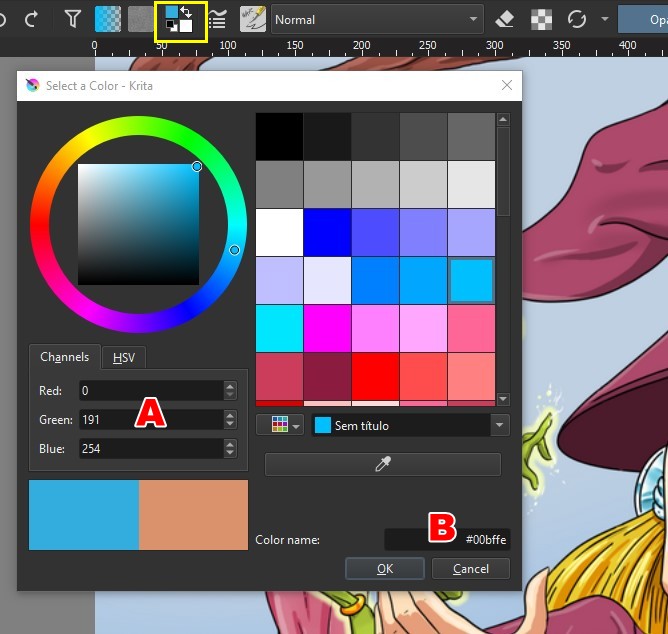
Now it’s time to choose the color we’ll paint. At the top of your screen, in the area indicated by the yellow square, there will be two small squares. Click the square closest to the top. This will open a dialog box for setting the colors.
Don’t worry if this box doesn’t look exactly like mine in your Krita. To get a shade of blue like the one I’m using, you can type the numbers I used for Red, Green, and Blue in “A”… or, much easier: copy this text (without the quotation marks): “#00bffe” and paste it in the area indicated in “B,” replacing the previous text. Pressing Enter will close the box and change the color to our blue.
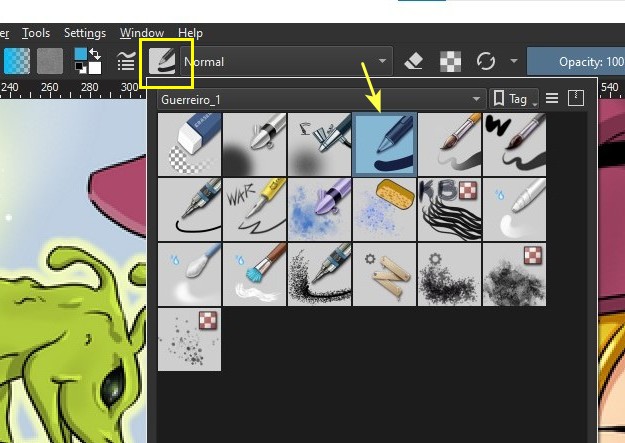
Time to choose a brush. Clicking the brush icon (indicated in the yellow box) will open a box with several brushes to choose from. It’s okay if your box doesn’t look exactly like the one in my image.
I’m using a standard brush, called Basic-1. After choosing the brush, click on an empty area of your canvas to close the box.
Here are two useful shortcuts: to decrease or increase the size of the brush tip, use the [ and ] keys, respectively. I don’t know what your keyboard is like; on mine, these keys are next to the Backspace key. Experiment with the shortcuts before proceeding.
I start by painting the eye area, and since I’m on a new layer, this doesn’t affect the image area yet…
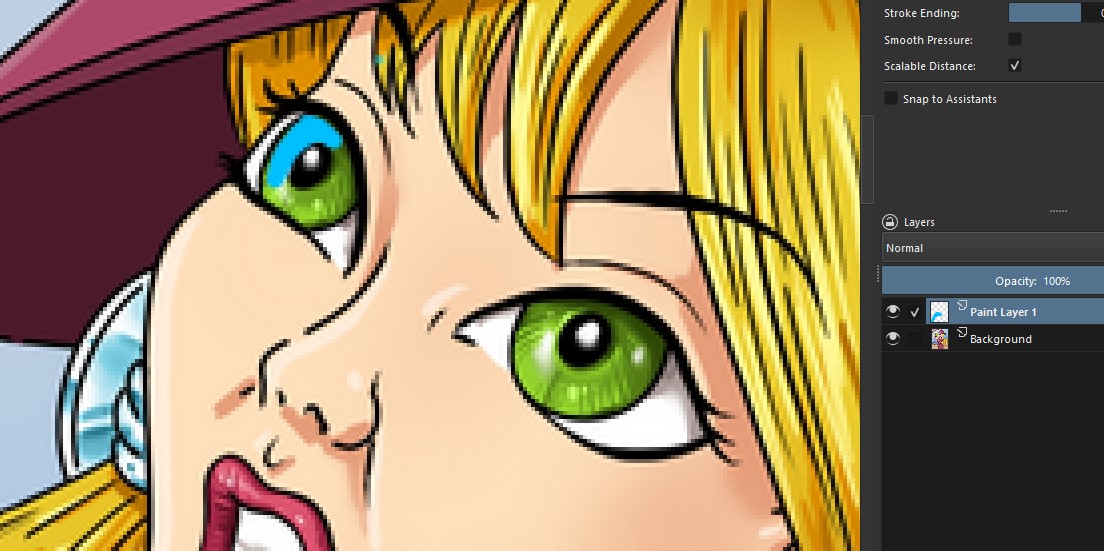
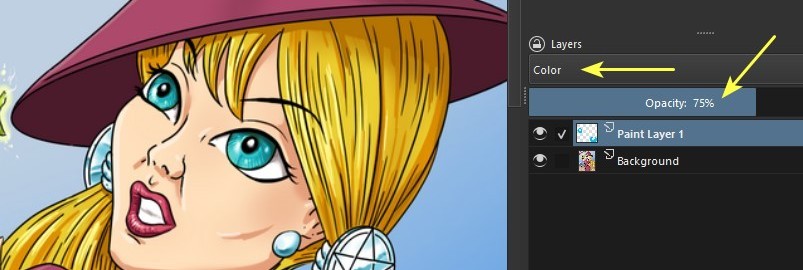
After you’ve painted the eyes, it’s time to actually change the color of the little witch’s eyes. In the layers docker, click the button labeled “Normal.”
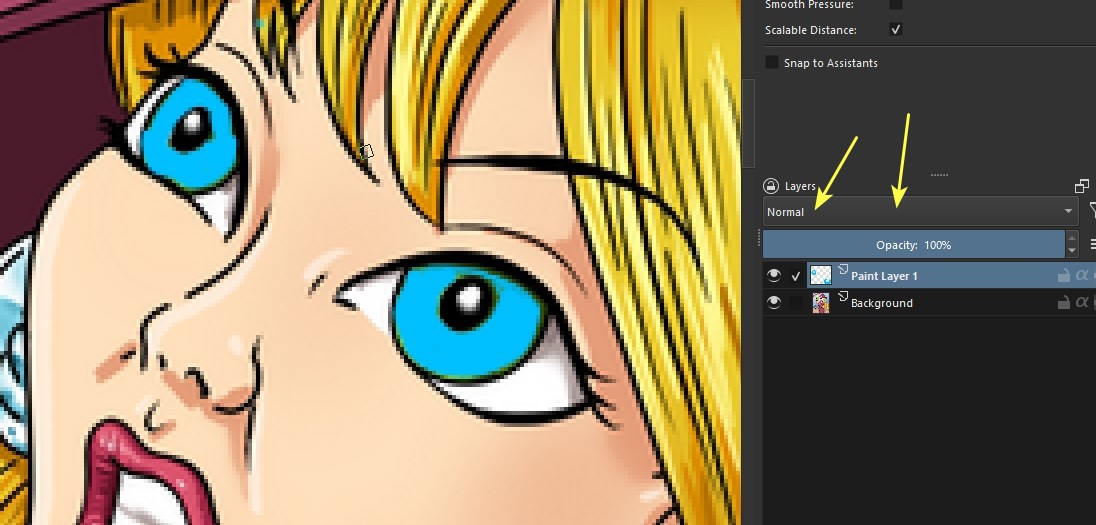
Choose the mode called “Color,” and you’ll get the result shown in the image:
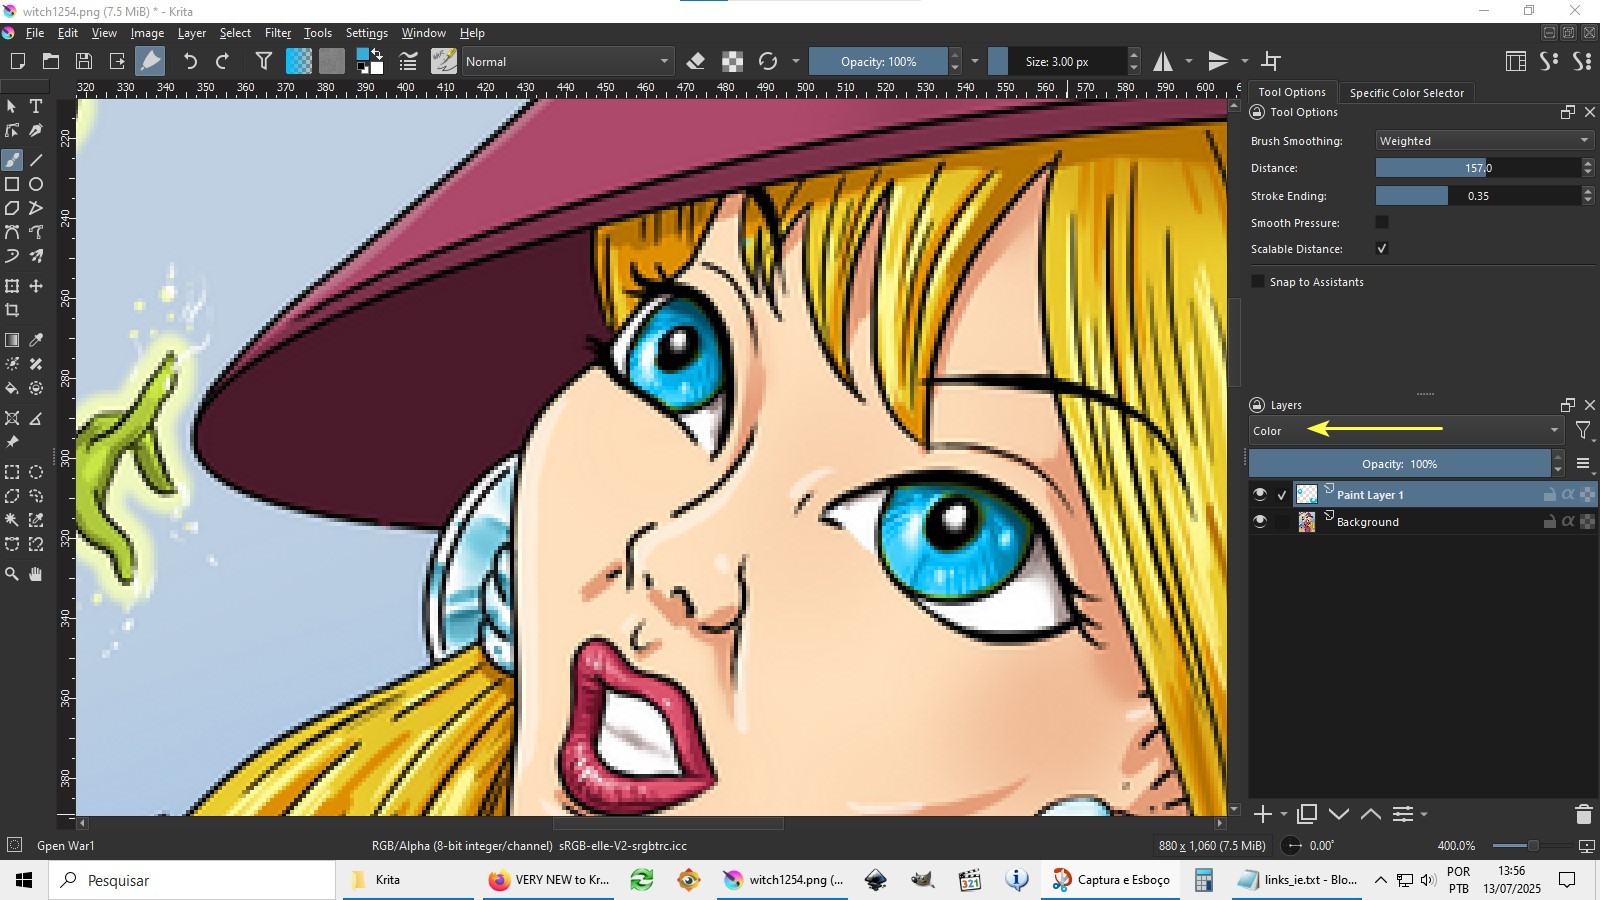
You may have left some areas unpainted blue, as happened to me. To fix this, simply zoom in on the image and reduce the brush tip, using the shortcuts shown… and retouch until finished.
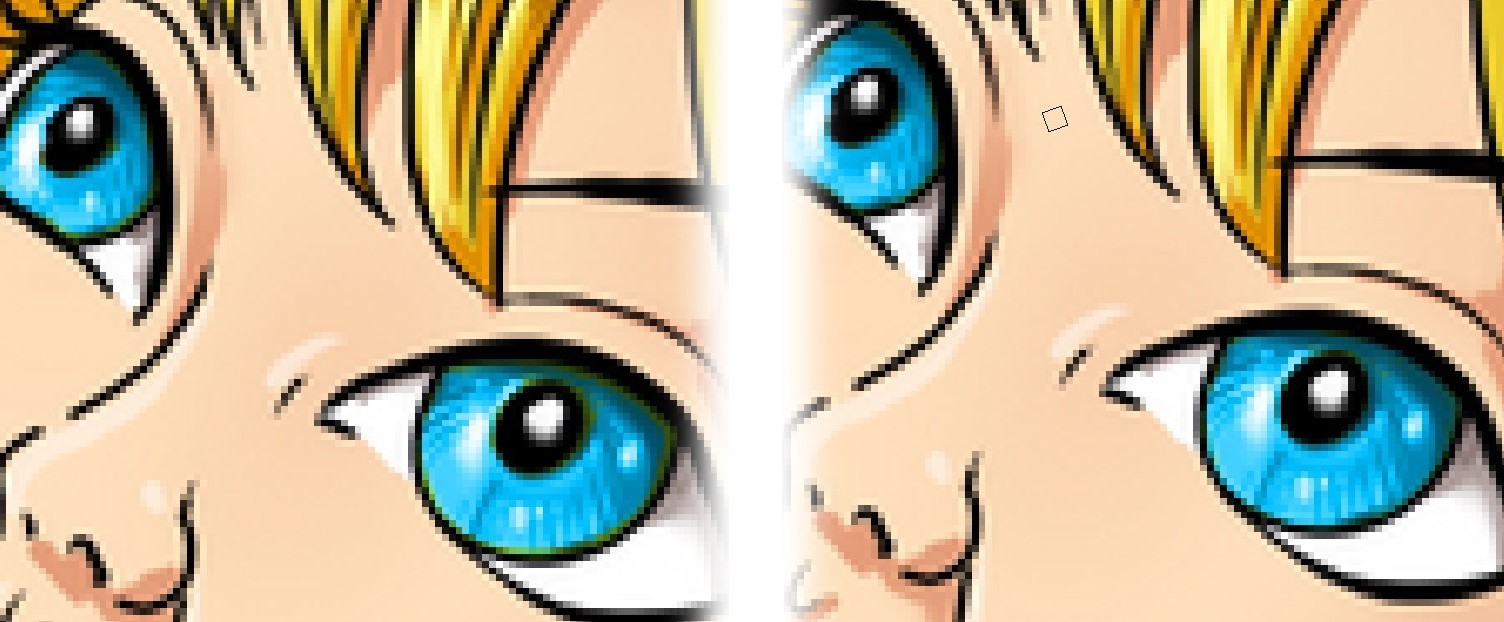
And if I want to soften the blue tone, I can reduce the layer’s opacity by clicking on the “Opacity” area, typing the desired value (for example, 75, for 75% opacity), and pressing Enter.
If I like the result, I export the image as a png or jpg file with a different name than the original if I want to continue preserving it. That’s it…