Hello. I am a novice user. I have a Samsung S8+. I can’t set up a descending brush. And also the size of the brush does not depend on the pressure of the stylus. Help solve the problem.
Hi @Marina1 - Welcome to the forum.
There are several ways to change the size of the pen. My favourite way is to open the popup palette (3-finger tap) and adjust the brush size there.
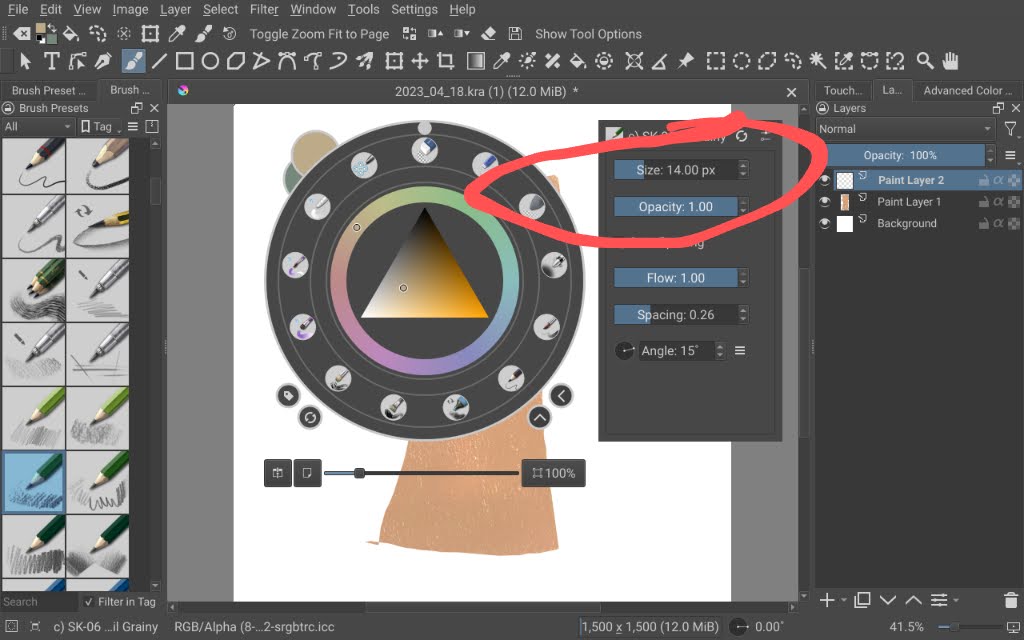
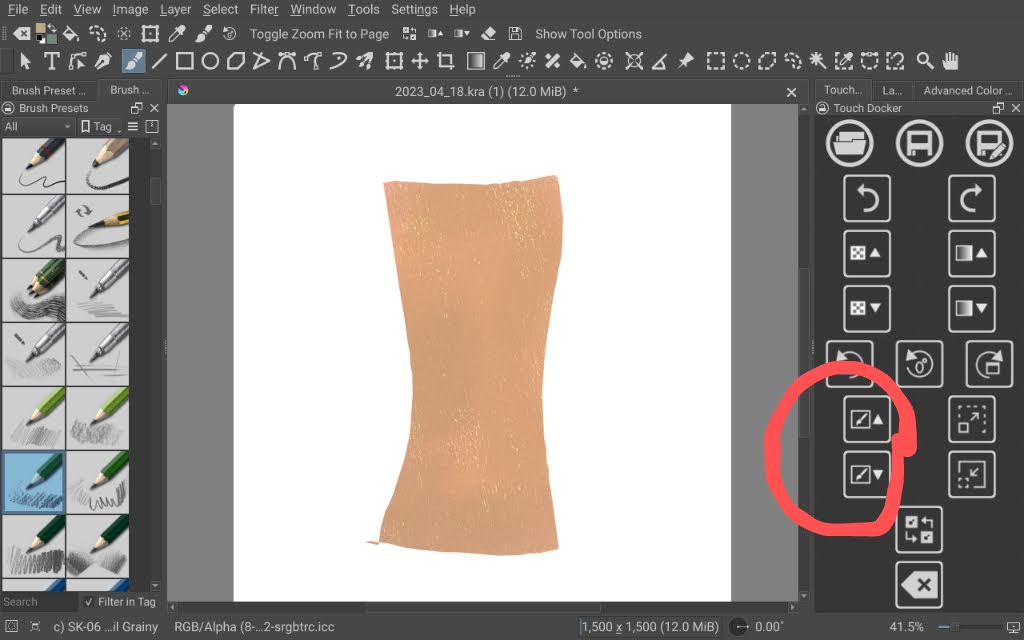
Or, you can put the touch docker on the screen. I circled the brush size icons for you.
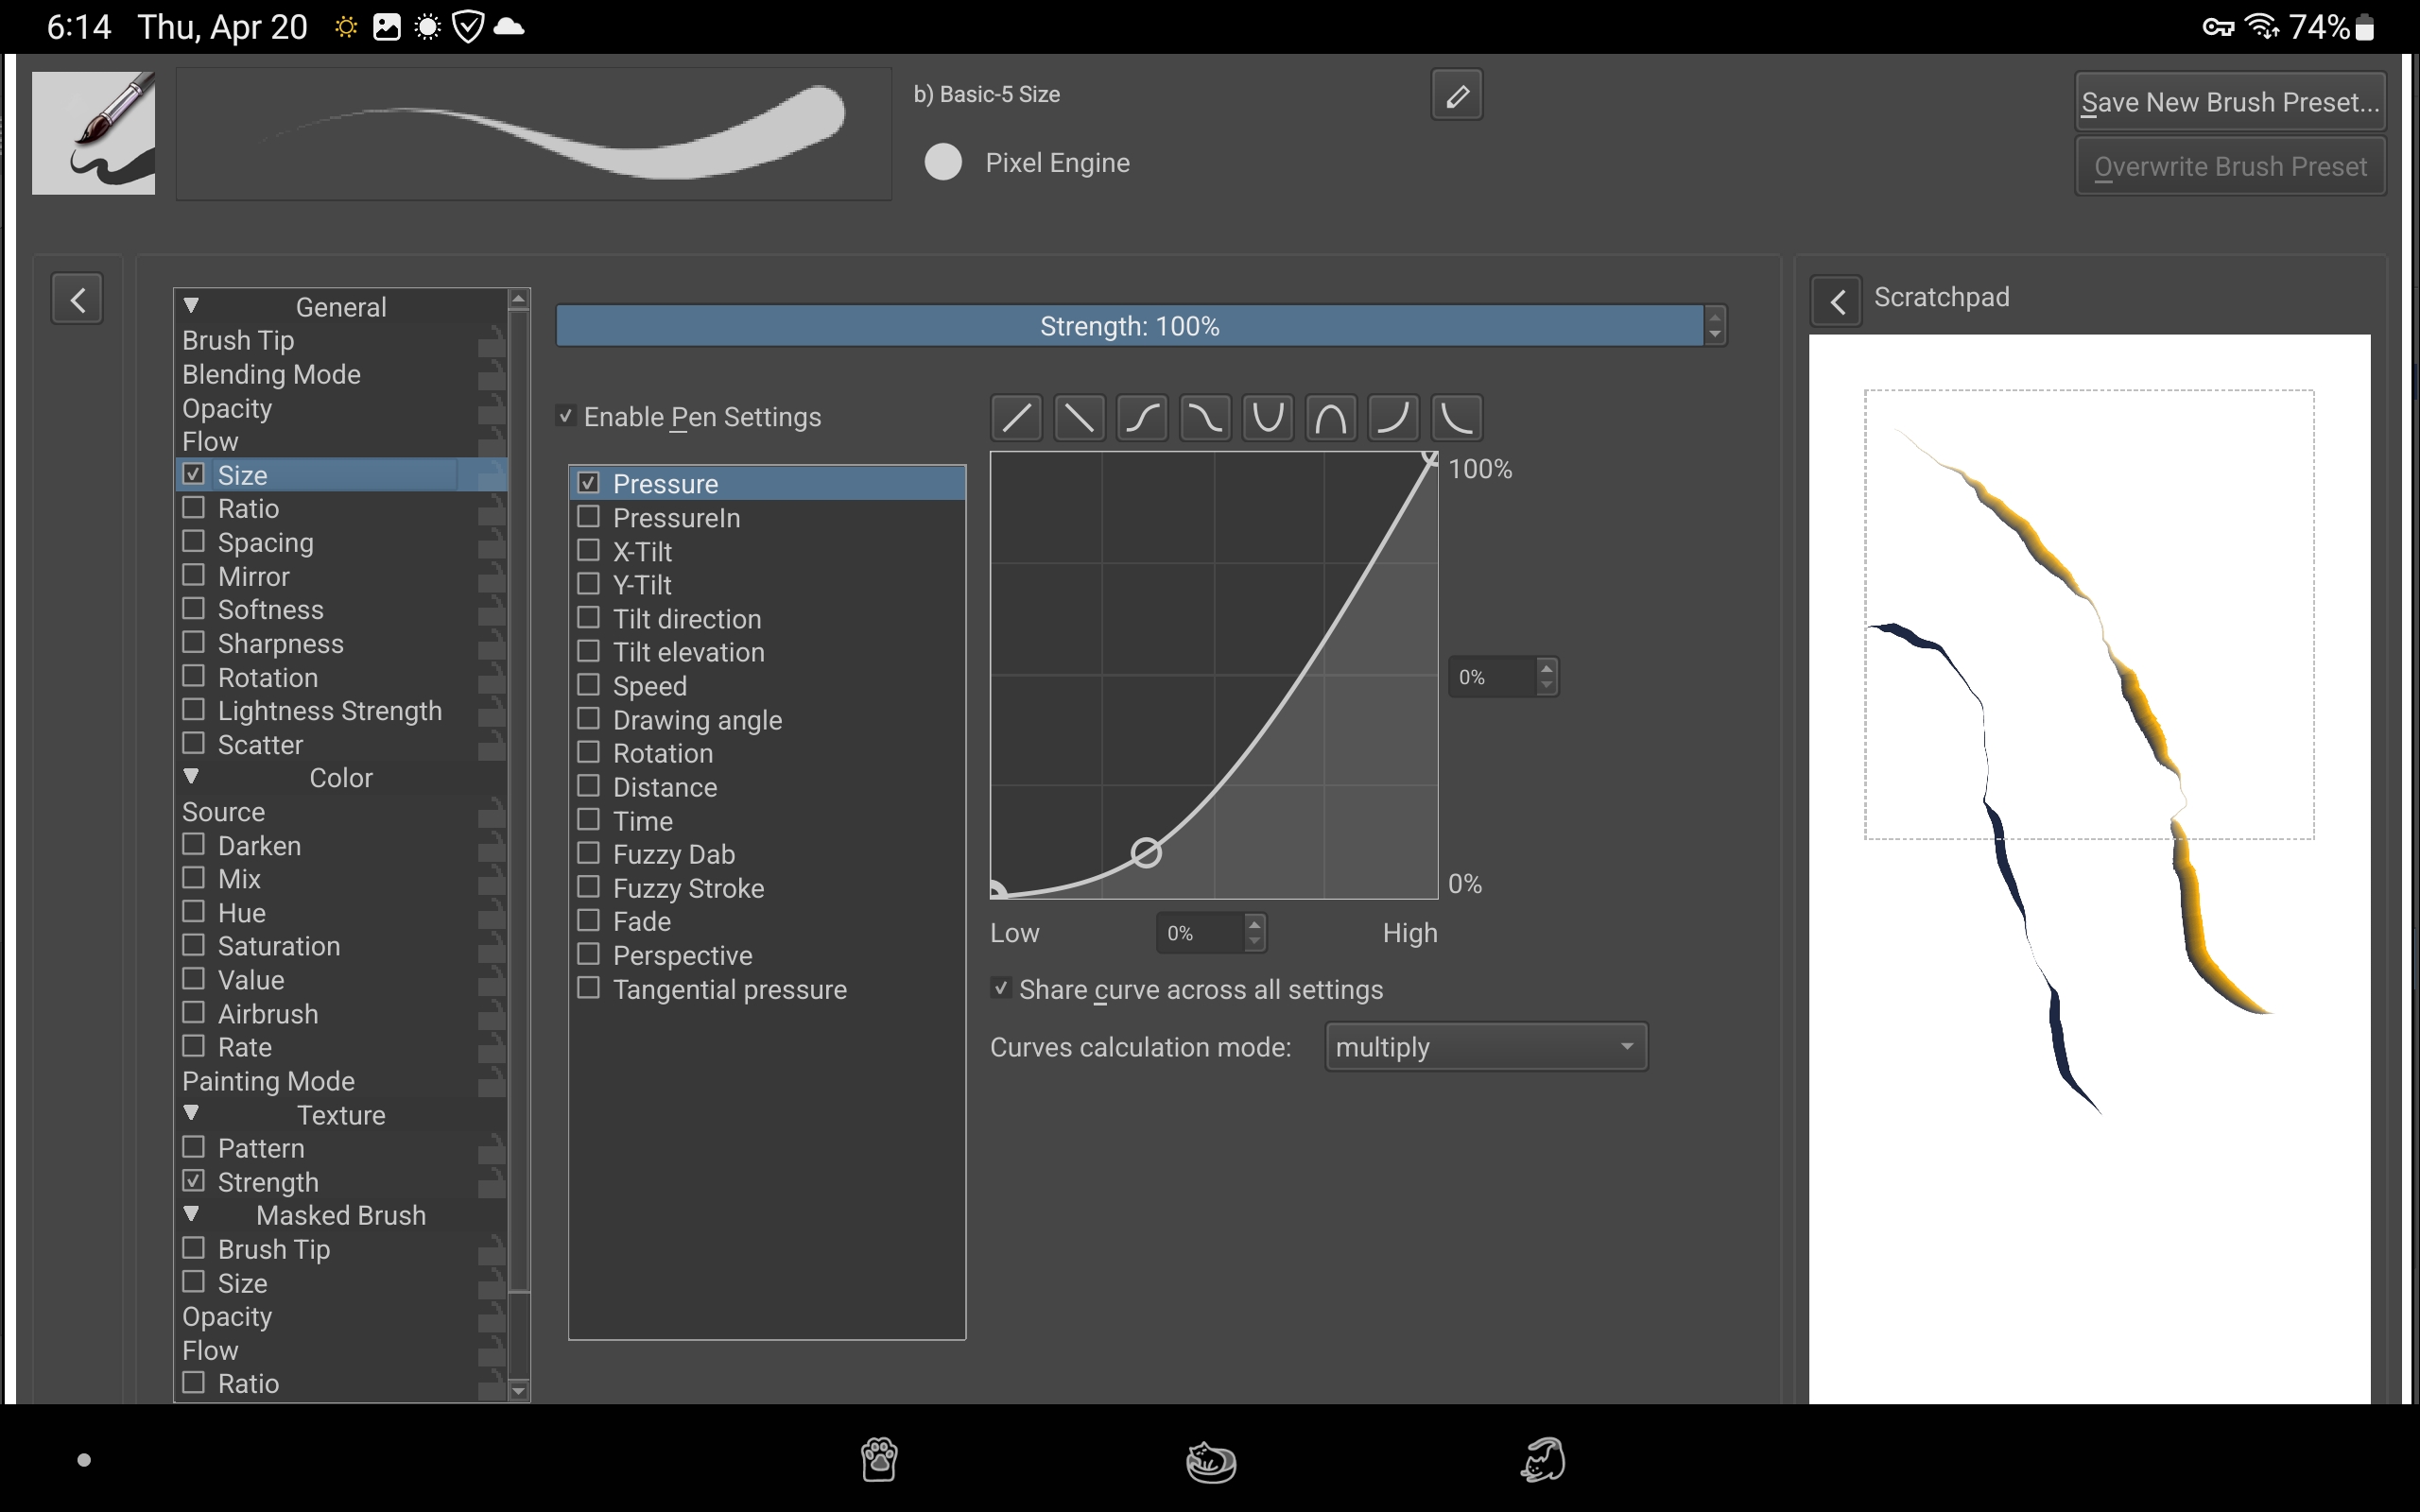
When it comes to size varying by pressure, please make sure you’re using a brush with that feature. Try Basic-5 Size. You can open the tablet tester to make sure everything is working properly. (Settings > Configure Krita > Tablet Settings. The tester is at the bottom.)
Make a couple of strokes and then read the text output. Look for % numbers to show that pressure sensitivity is working properly. If you want to, you can post 5-10 lines of the text in a reply here if you want one of us to “read” the output for you.
1 Like
Thanks for the response.
Stylus move X=131.50 Y=76.47 B=1 P=7.7% S=0.8(DRAW)
Stylus move X=133.77 Y=75.04 B=1 P=7.6% S=0.9 (DRAW)
Stylus move X=135.94 Y=73.61 B=1 P=7.6% S=0.9 (DRAW)
Stylus move X=138.11 Y=72.23 B=1 P=7.5% S=0.9 (DRAW)
Stylus move X=138.11 Y=72.23 B=1 P=7.5% S=0.9(DRAW)
Stylus move X=140.23 Y=70.95 B=1 P=7.4% S=0.9(DRAW)
I hope I understood correctly what needs to be done.
1 Like
Also, I don’t have all the options you showed.
@Marina1 The small sample of tablet tester output lines that you showed have a pressure signal of about 7.5%. (P=7.5%).
As you draw on the tablet tester grid, can you vary the stylus pressure to give the full range of pressure from close to 0% all the way up to 100% in the P= signal?
2 Likes
Thank you. To get P=100%, I need to press really hard on the stylus. But the lowest rate P =7%. I can’t make the pressure of the stylus so that the indicator is less than 7% .
1 Like
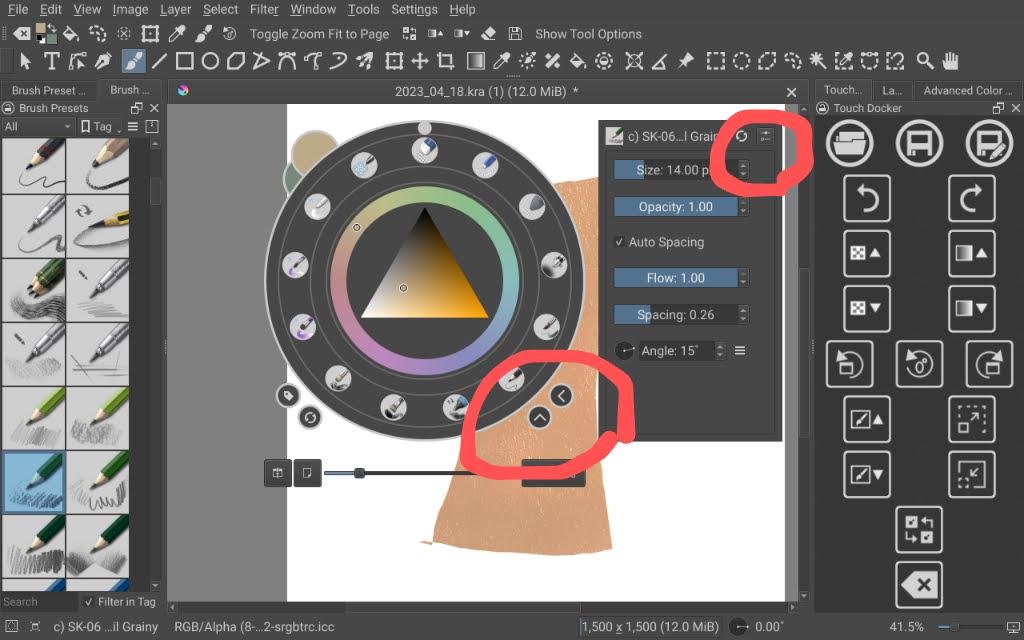
Hi @Marina1 - When you say you don’t have all the options, possibly you haven’t expanded the popup palette fully. There are two tiny arrows in the lower right corner of the popup palette (circled below). Expand those and you will see that you have additional options in panels that open to the right and below the popup. Once you expand them they will always open when you access the popup palette (so no need to keep tapping those tiny arrows).
Additionally, once expanded, there is a settings icon in the upper right of the expanded panel (again, circled). Click that to see if there are extra options you can add the right-hand panel. I keep mine with all the available options because it’s so convenient.
1 Like
Thank you. These buttons are. I’m changing the scores. The brush size changes, the color saturation changes, but I need the stroke to narrow at the end
To make the stroke get thinner at the ends, you need to start and end the stroke with very little pressure. That will take some time to learn. You might want to create a document just to practice making strokes.
2 Likes
Here is my problem in this and is that the thickness of the stroke does not depend on pressing the stylus.
I think @CrazyCatBird has a Samsung. Maybe she would have further advice about adjusting stylus pressure.
1 Like
Yup! That’s it.
Some brushes are set up for that while others aren’t.
2 Likes
Can I find out which brushes can be set up and how? Thank you.
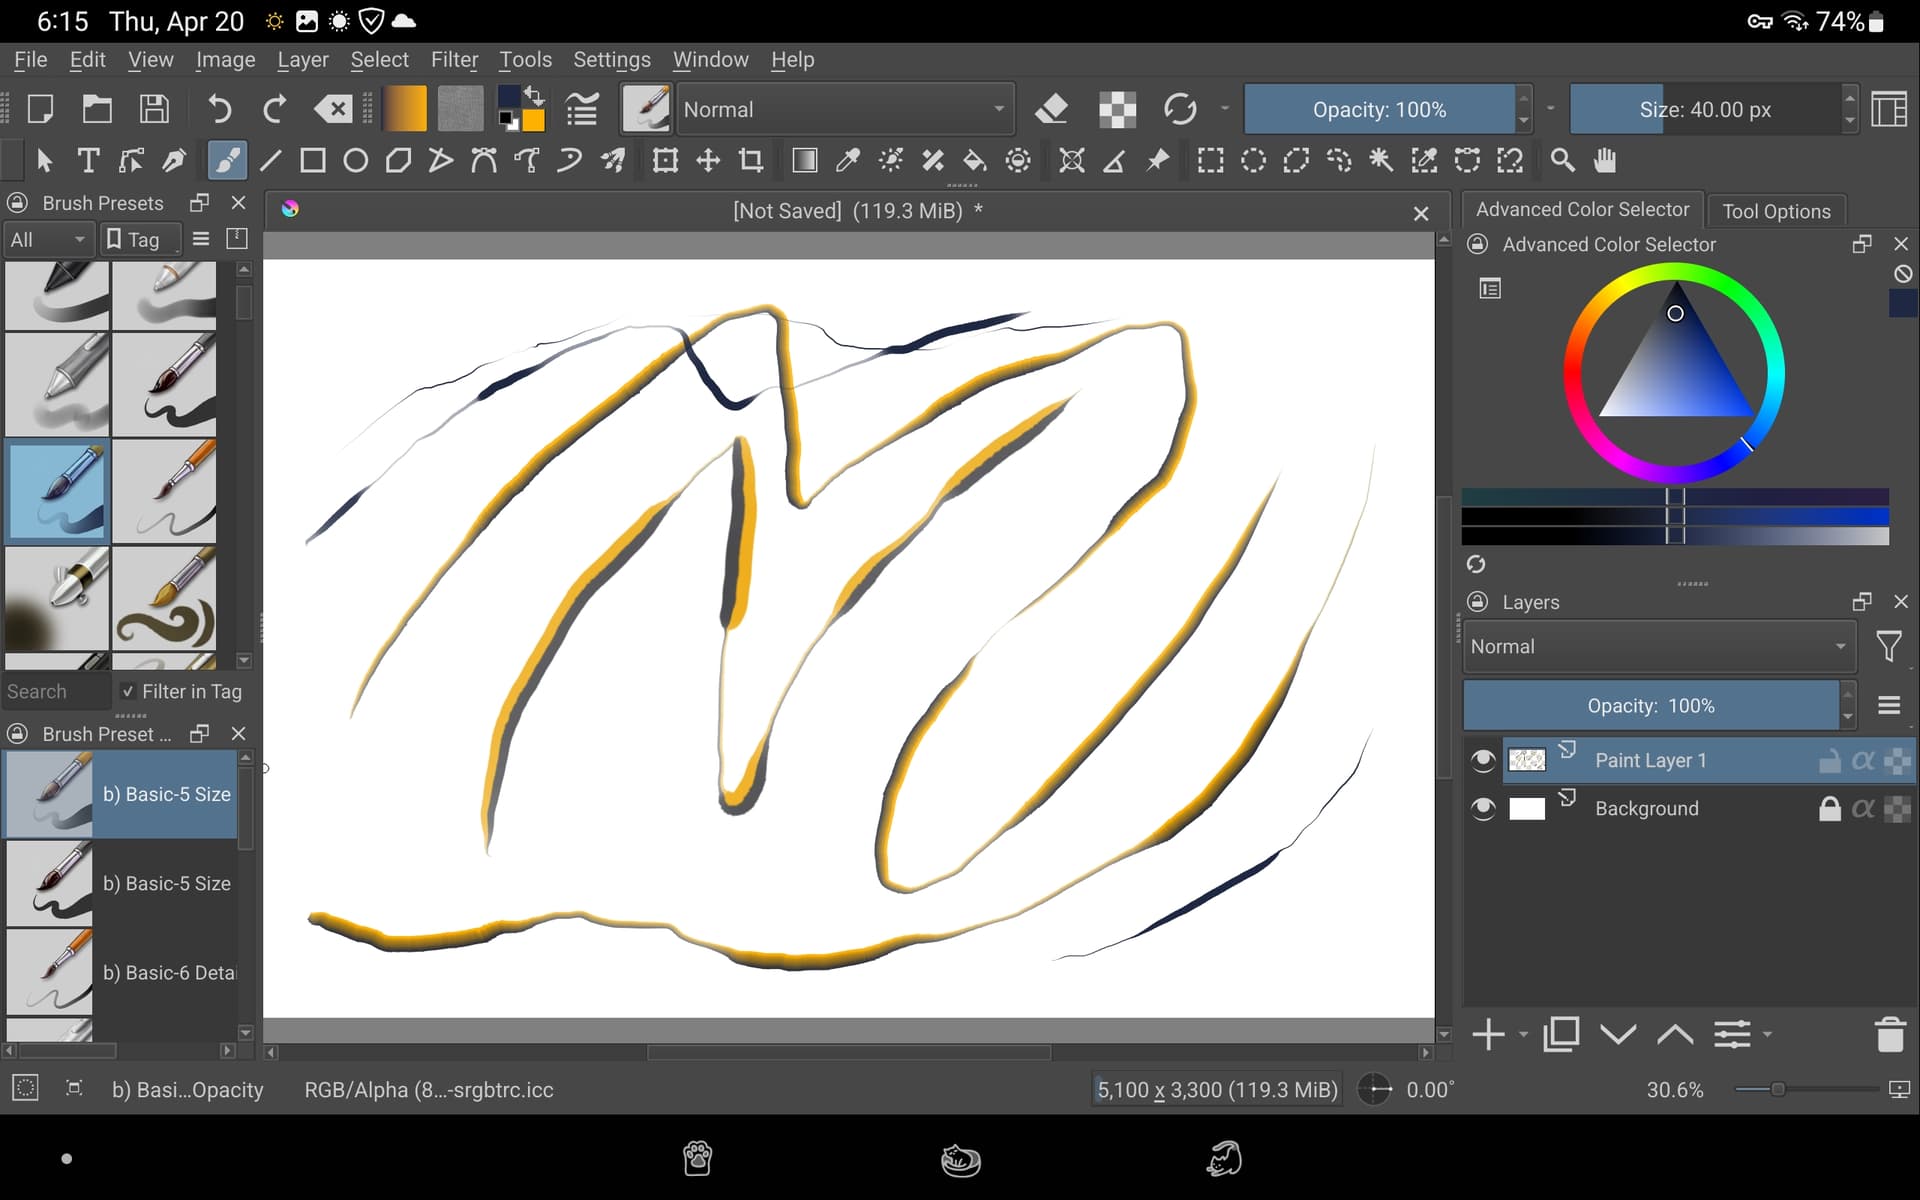
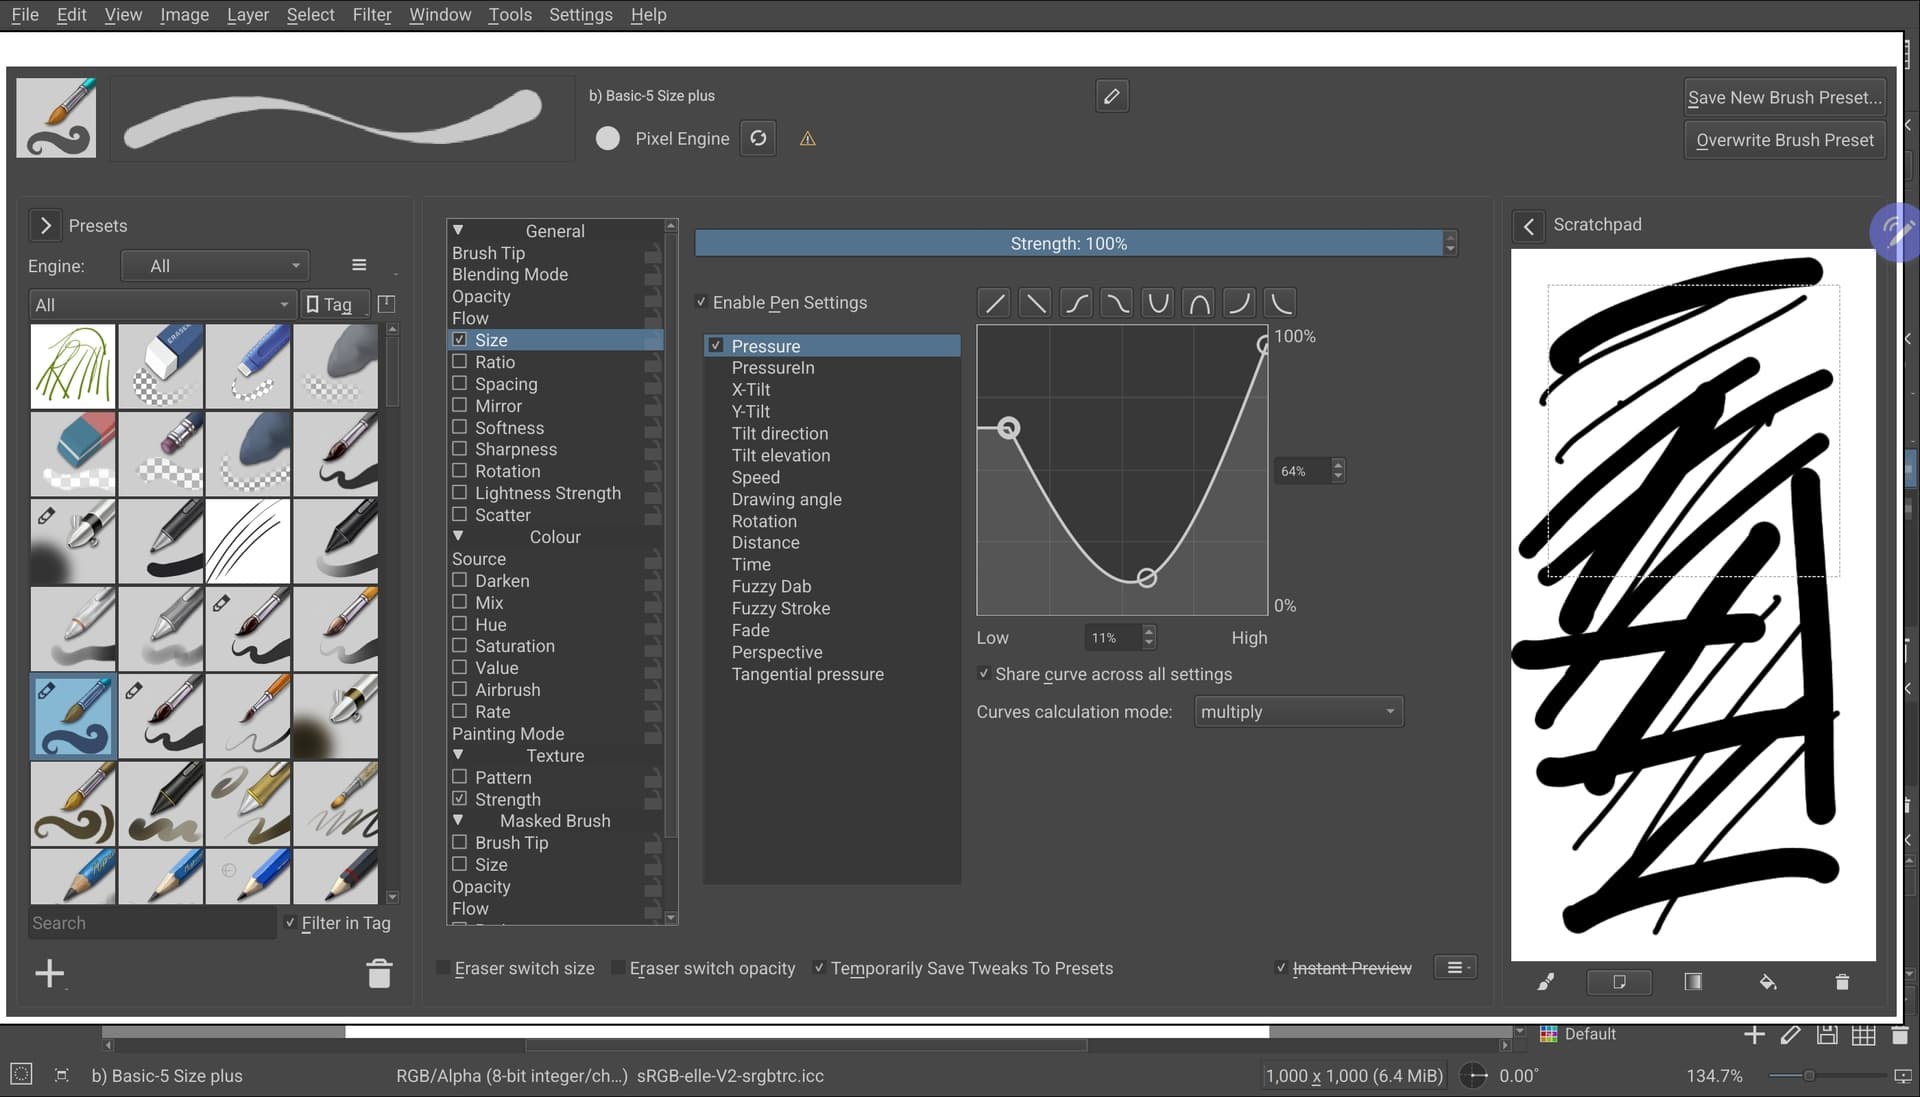
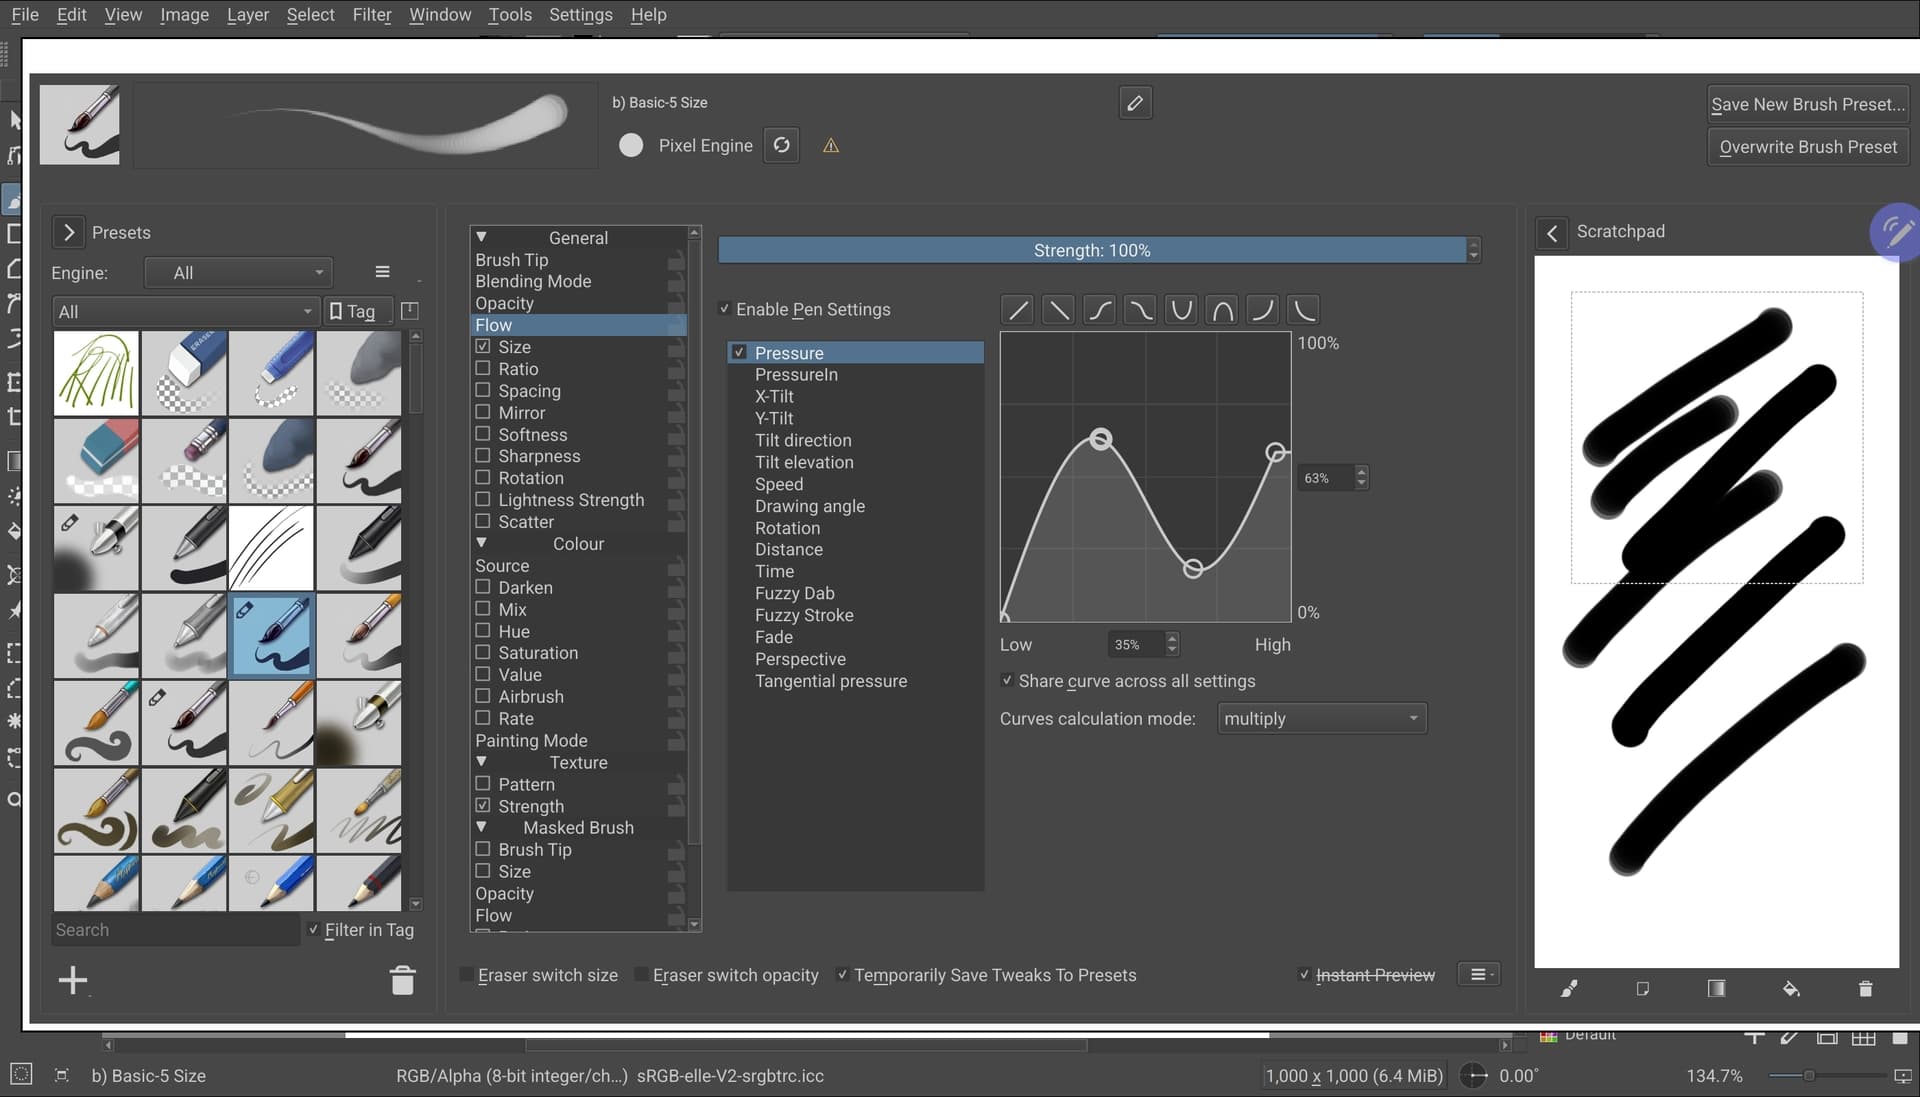
Here are the brushes that do the size changes with pressure… Notice their previews…
Here’s the setting that causes it:
3 Likes
The lowest attainable pressure depends on the characteristics of your stylus and your personal ability to control your hand/fingers.
I can’t get a controlled pressure of less than 5% so don’t worry about that.
‘Really hard’ is a matter of personal opinion and what you feel comfortable with.
To get P=100% with my drawing tablet, I have to press ‘very hard’ in a way I don’t like so I modified the tablet pressure curve as follows:
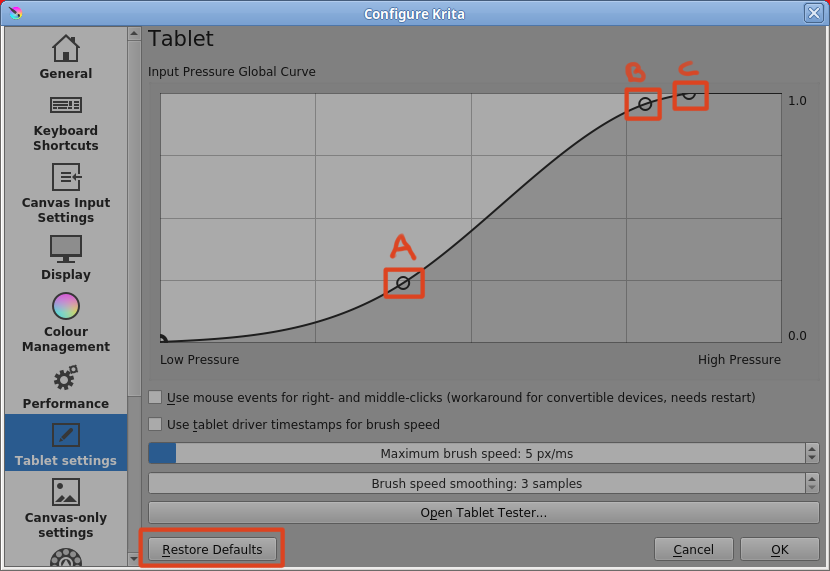
I dragged point-C back to reduce the physical pressure required to get maximum output.
Then added point-A and moved it down to get a flatter curve at the start to give more fine control at the low end.
Then added point-B to give a smooth transition to maximum output.
You add control points by touching the curve then you can drag them around.
If you make a mistake, you can drag the control point off the curve and it goes away.
Or, you can press the Restore Defaults button and start again.
It does take time and experiment and practice to get a tablet pressure curve that ‘works for you’ and more time to train your hand/fingers to produce the effects you want.
Smooth stylus pressure changes are difficult, at least they are for me.
Yes! Lines and spirals are good for that.
3 Likes
Thanks everyone for the advice. I did all this, changed the settings, brushes, brush settings, etc. But all this doesn’t change anything.
Which brush preset are you using?
Can you post a screenshot (or a good quality photograph) of the entire krita window while you are having this problem?
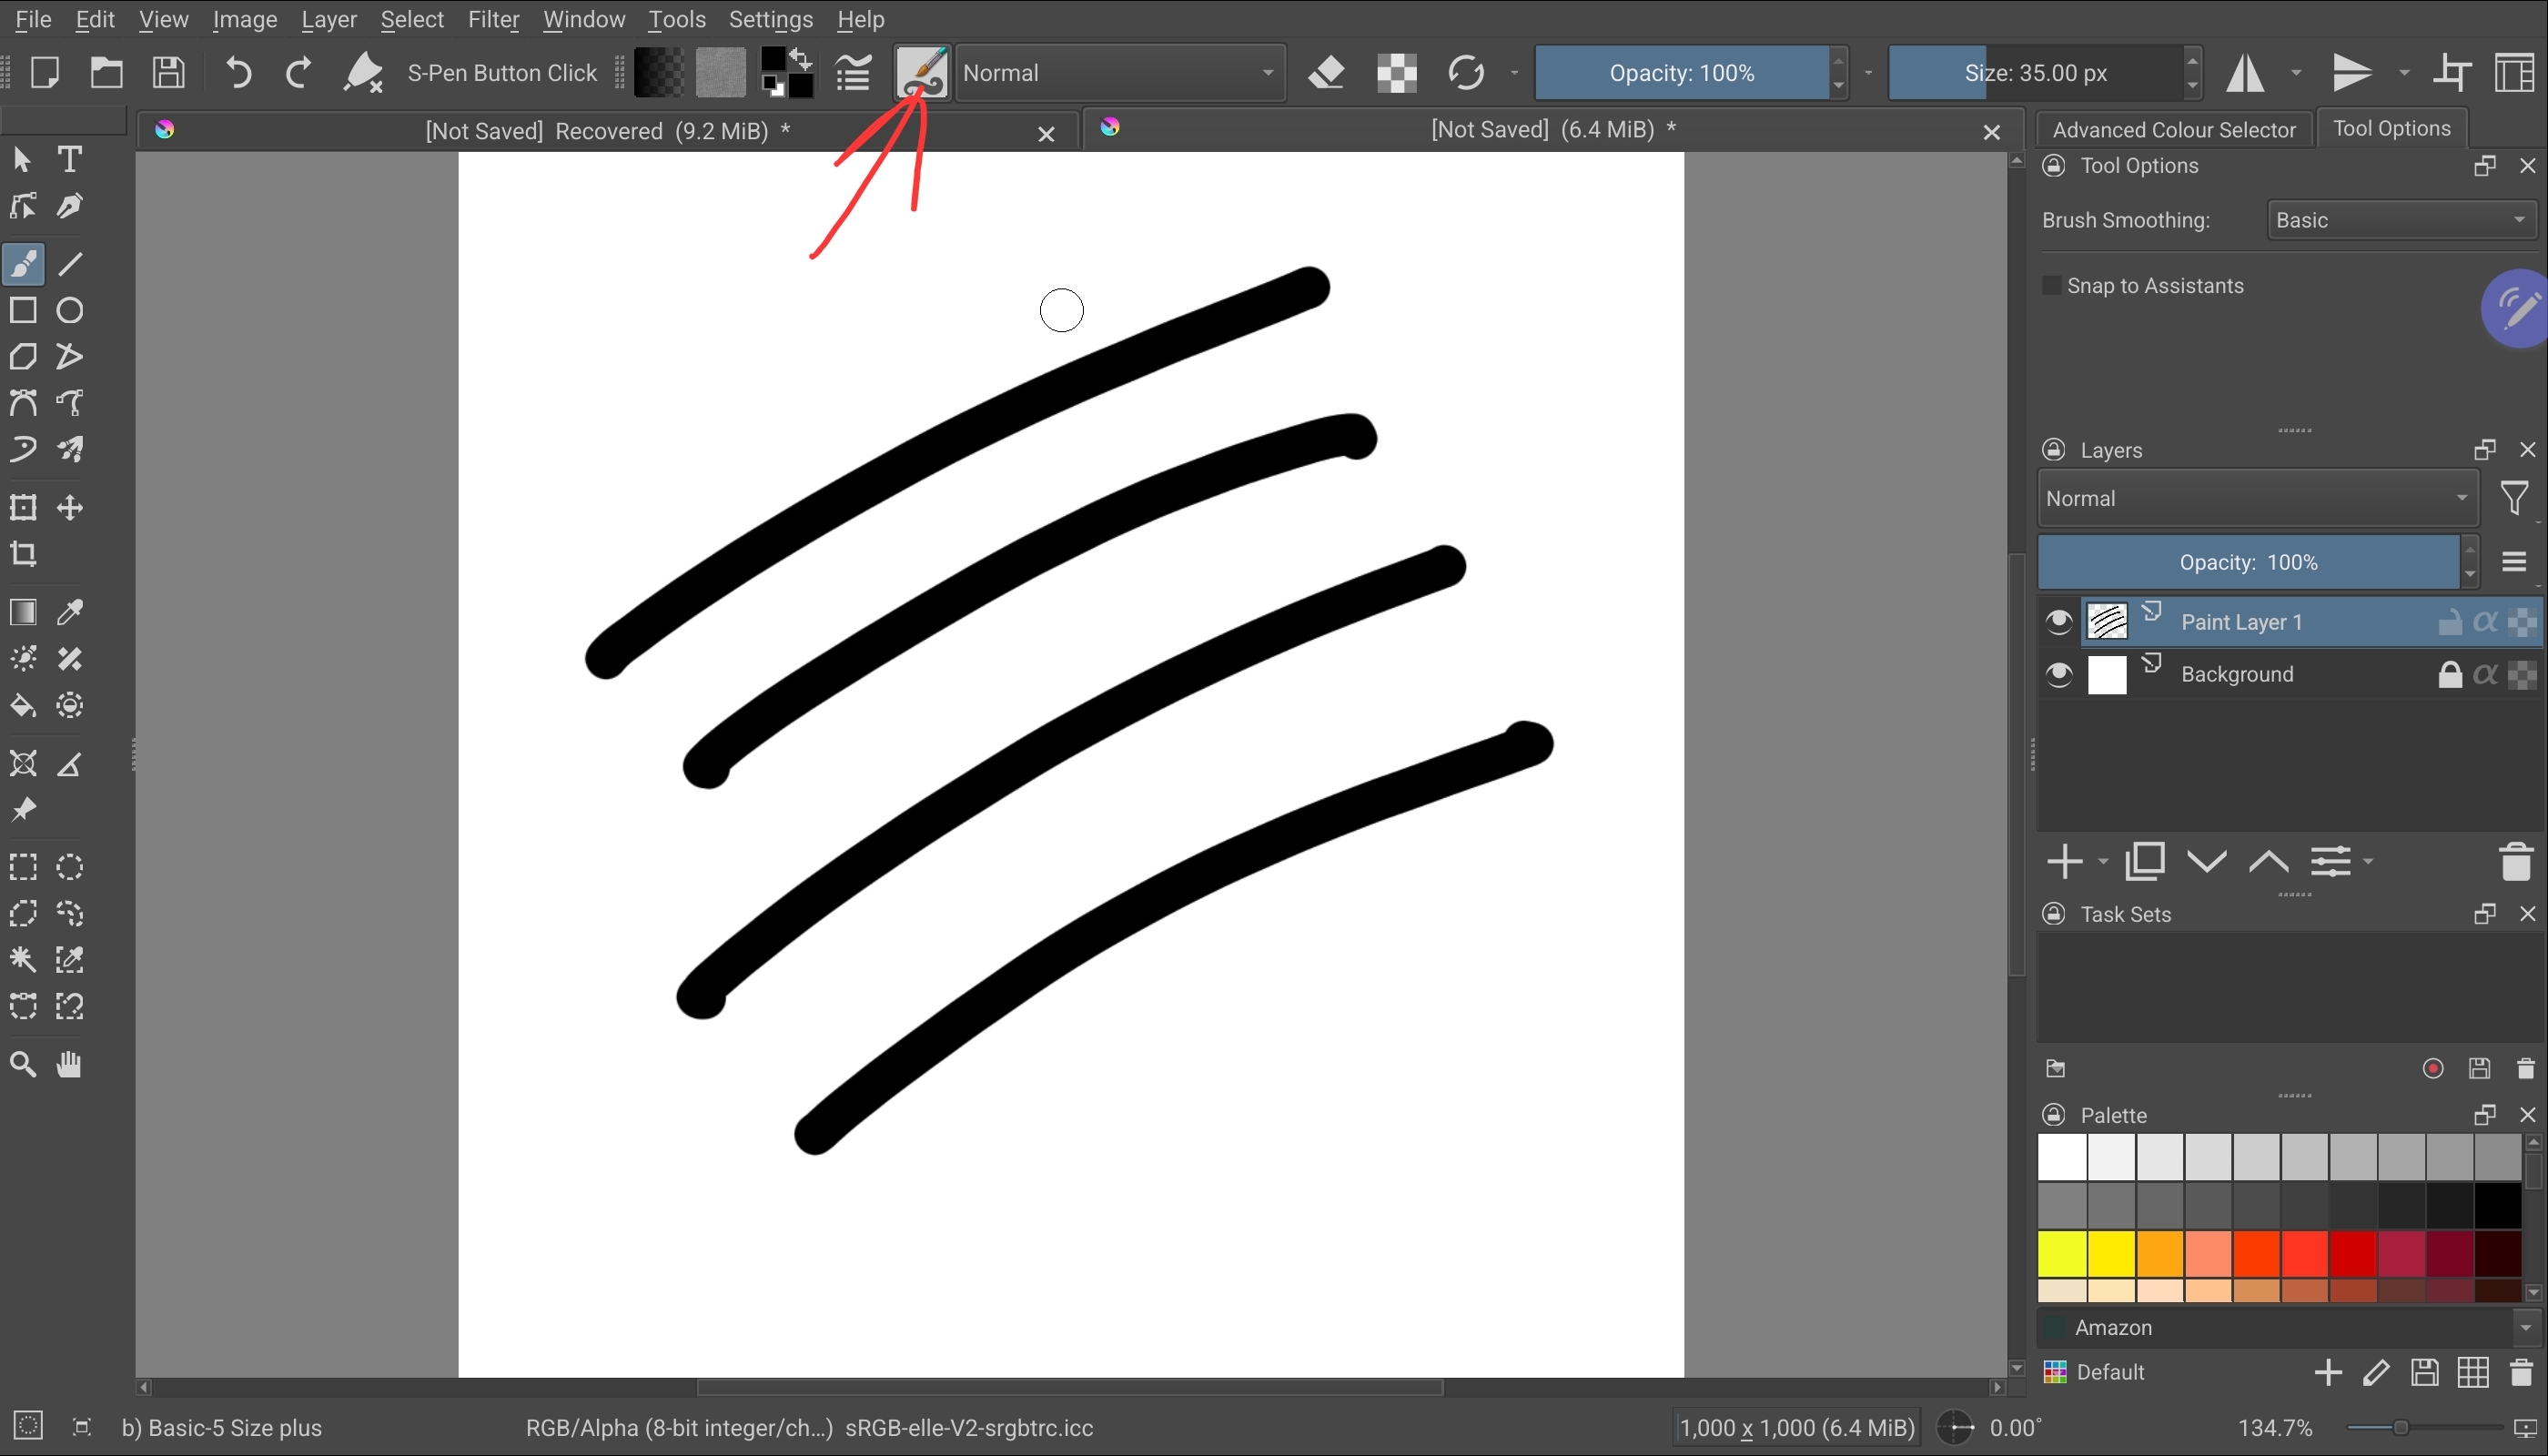
The pressure sensitivity of the stylus does not change in any way. I was only able to change one brush to be thinner, but that’s not the same effect. This effect can only be done with one long line, but I need stylus pressure sensitivity so that I can make any lines with an outgoing end (short, curved, etc.). Here is the problem.
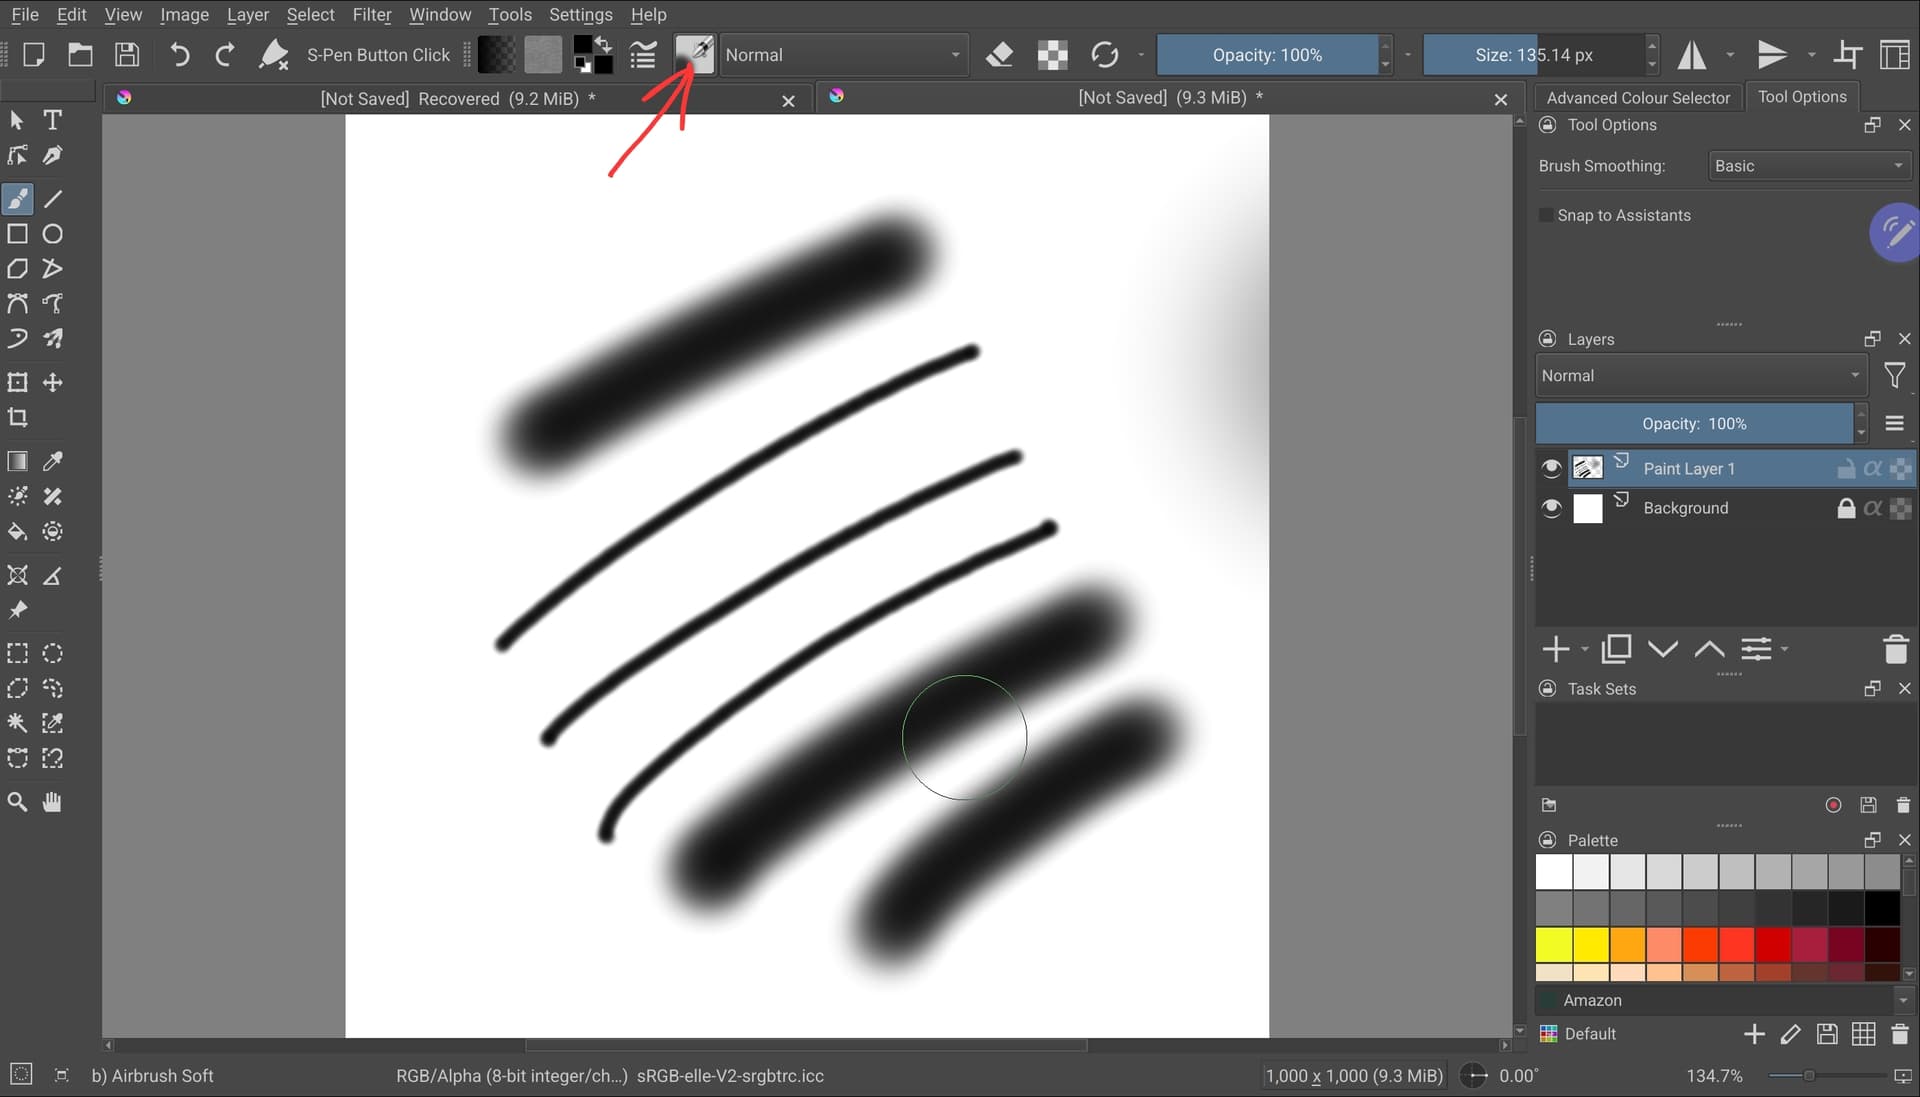
Unless I’m blind, I see more than five thin beginning and ending strokes here. So it seems to be working. Apparently you are not yet able to do this willingly, but rather by accident.
My feeling tells me that you have to train yourself for the necessary sensitivity for such strokes, the stylus can only put on the canvas what you put in it. But this is a process that needs time, will and patience, masters don’t fall from heaven, they do practice, practice, practice. It may be boring, but is a “needed evil” to practice before one can master a tool.
But I’m sure you can do it, because your pen did it in your last screenshot.
Michelist
2 Likes