Recently, I found that the selection mask is a very useful feature, which can temporarily serve as a new layer. People only need to draw on the selection mask, display the selection area as an ant line, and then fill in the corresponding layer. This is very useful when it is not convenient to create a new layer for drawing, such as when drawing on a transparency mask, but I also found an issue, There are many times when I cannot confirm the drawing content of the selection mask because the selected area is completely transparent and will be affected by the image below. However, if the color of the selected area can be customized, it will solve this problem.
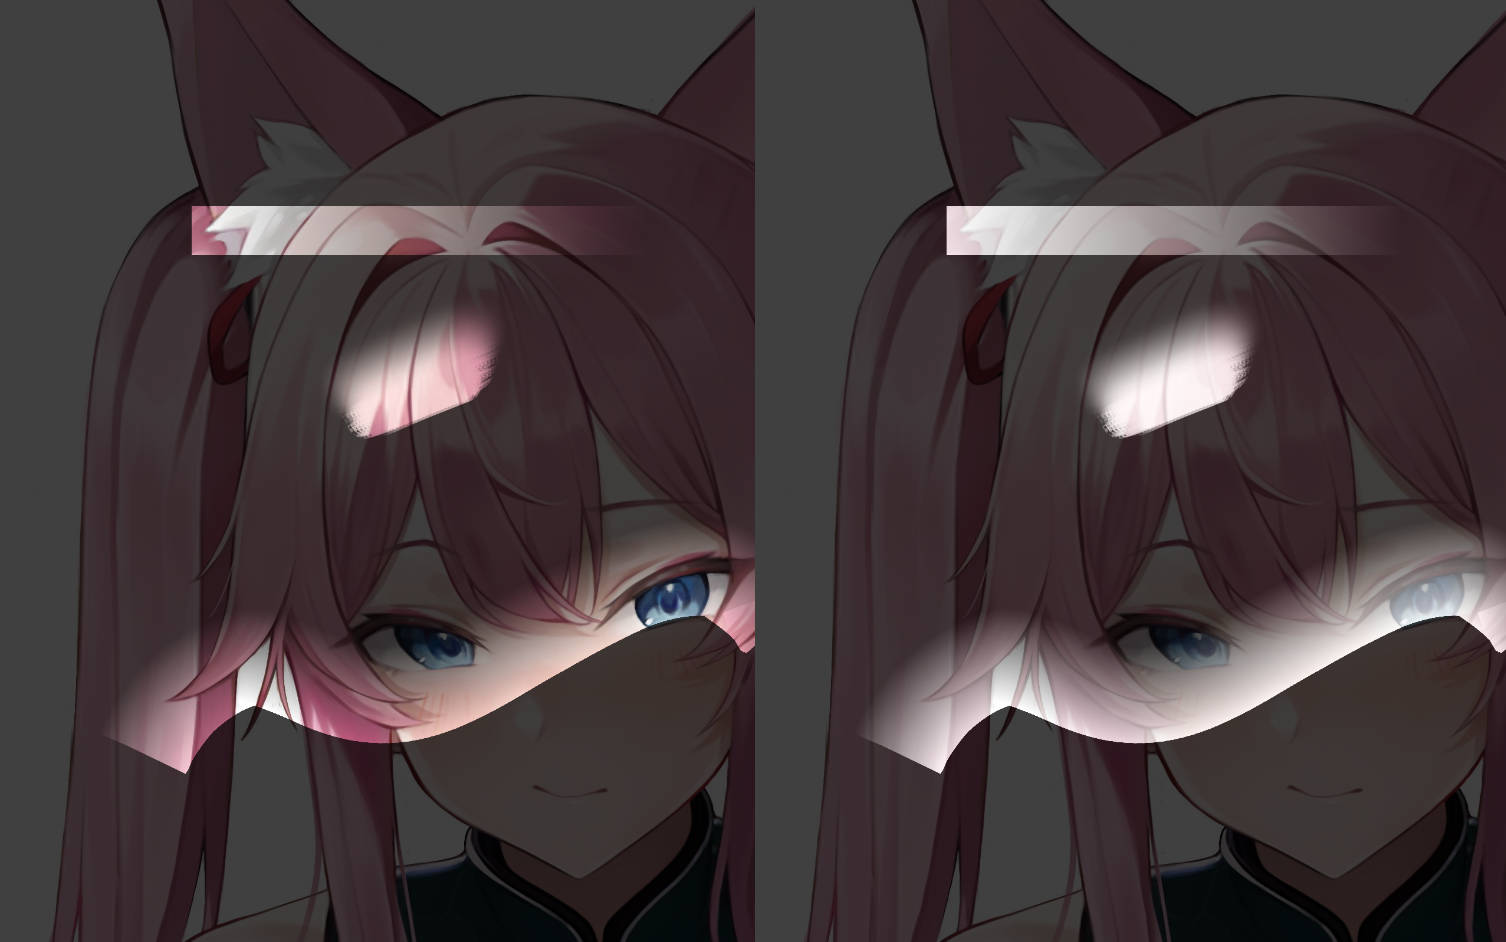
The right image below shows the effect of setting 75% opaque black as the coverage color of the unselected area, and 75% opaque white as the coverage color of the selected area. The left image on the shows the effect of krita setting 75% opaque black as the overlay color. You can feel that the image on the right makes it easier to distinguish the content drawn by the selection mask:
I think to achieve this function, the opacity of the selection can be used as an interpolation parameter for the two colors. When the color of the selected area is set to fully transparent, its effect will be consistent with the current effect in krita.
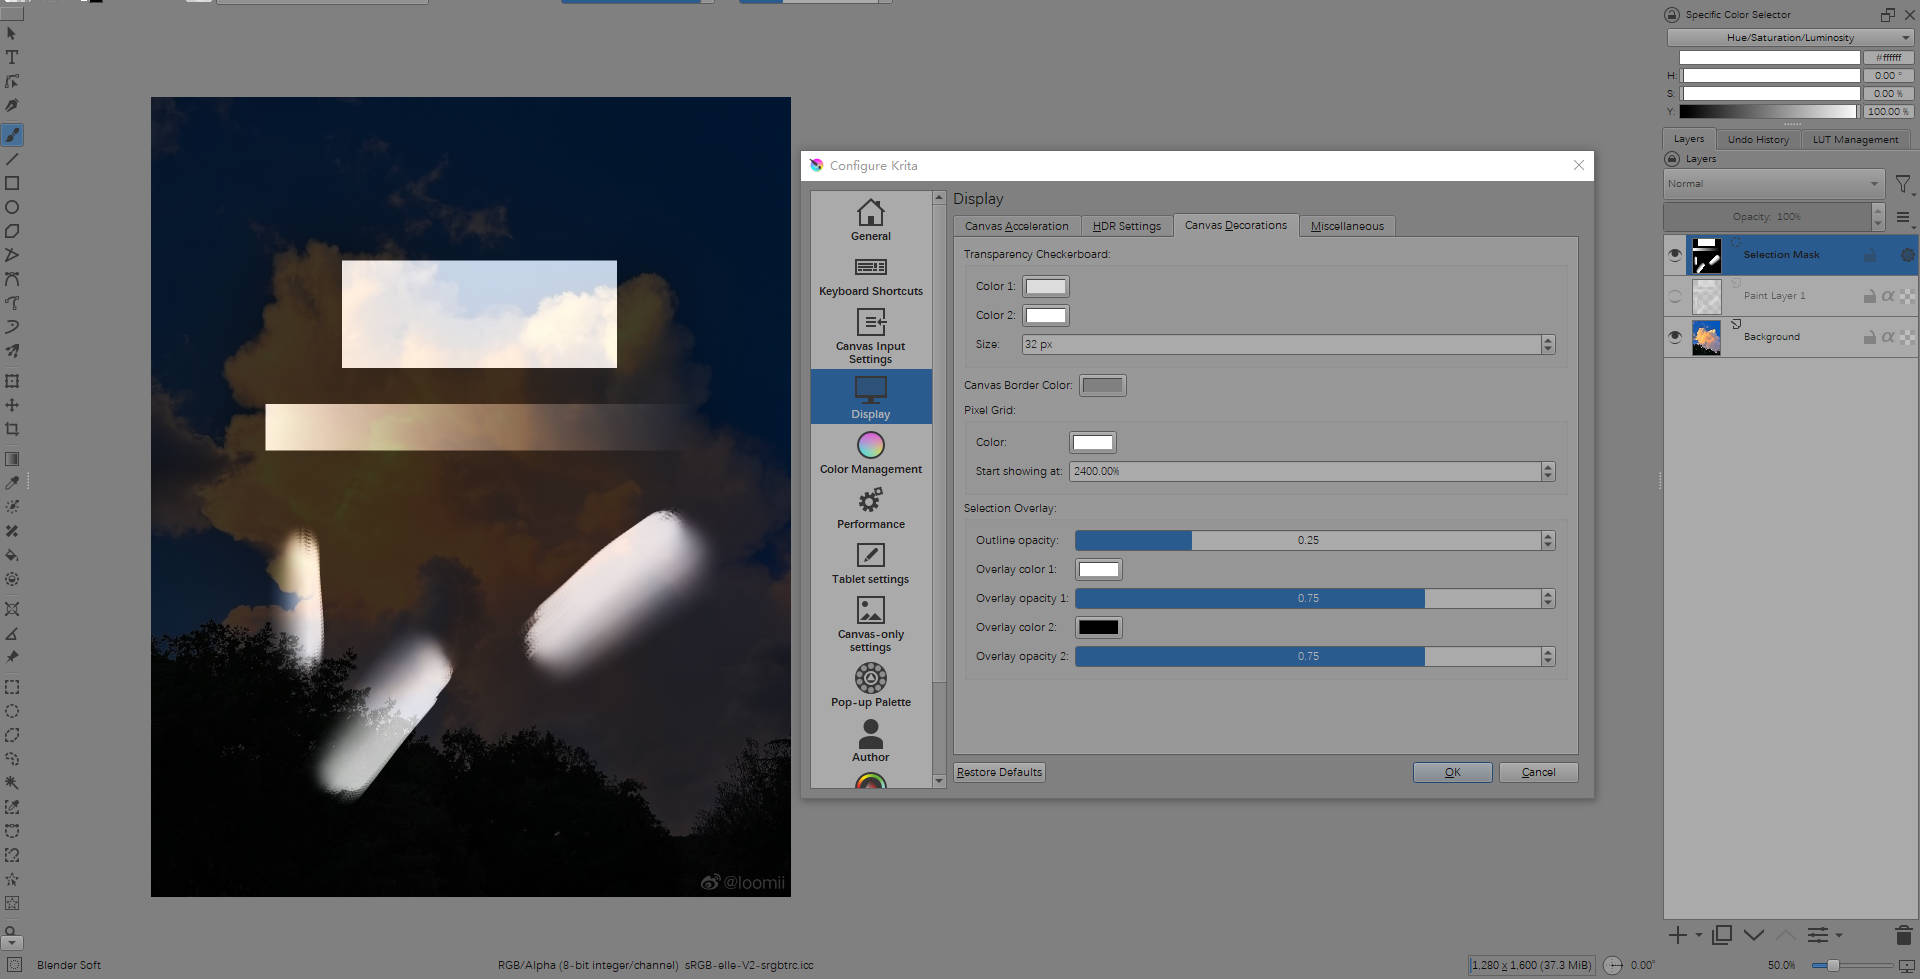
I have made some attempts, but it is a bit different from the ideal effect. The opacity of the mask in the middle part will increase, and the ideal effect should be that when the two colors have the same opacity, the opacity of the entire mask will be the same, only the color will change:
I’m assuming you are painting twice, the selected and the unselected areas, hence the issue with the intermediate areas. You have to choose the final color by interpolating the 2 overlay colors and opacities, using the value of the selection as parameter: final_overlay_color = (1 - selection_value) * overlay_color_1 + selection_value * overlay_color_2 assuming that selection_value goes from 0 to 1 and that the opacity is already baked on the overlay colors for simplicity.
Thank you, yes. Currently, I have verified the feasibility of this idea. However, I encountered some issues while searching for converting the selection to interpolation parameters, as well as some rendering issues. However, I feel that this feature should be possible.
You have to do something like this (the actual changes begin in the first comment):
void KisSelectionMask::mergeInMaskInternal(KisPaintDeviceSP projection,
                                           KisSelectionSP effectiveSelection,
                                           const QRect &applyRect,
                                           const QRect &preparedNeedRect,
                                           KisNode::PositionToFilthy maskPos) const
{
    Q_UNUSED(maskPos);
    Q_UNUSED(preparedNeedRect);
    if (!effectiveSelection) return;

    {
        KisSelectionSP mainMaskSelection = this->selection();
        if (mainMaskSelection &&
            (!mainMaskSelection->isVisible() ||
             mainMaskSelection->pixelSelection()->defaultBounds()->externalFrameActive())) {

            return;
        }
    }

    KisCachedPaintDevice::Guard d1(projection, m_d->paintDeviceCache);
    KisPaintDeviceSP fillDevice = d1.device();
    fillDevice->setDefaultPixel(m_d->maskColor);

    const QRect selectionExtent = effectiveSelection->selectedRect();

    // Hard-coded "selected areas" overlay color and opacity
    KoColor selectedOverlay(Qt::green, fillDevice->colorSpace());
    selectedOverlay.setOpacity(0.5);

    if (selectionExtent.contains(applyRect) || selectionExtent.intersects(applyRect)) {
        // Get a reference to the selection device
        KisPixelSelectionSP pixelSelection = effectiveSelection->pixelSelection();

        // Get the color spaces of the selection and fillDevice
        const KoColorSpace *selectionColorSpace = pixelSelection->colorSpace();
        const KoColorSpace *fillDeviceColorSpace = fillDevice->colorSpace();

        // Get some iterators for the devices
        KisSequentialConstIterator selectionIt(pixelSelection, selectionExtent);
        KisSequentialIterator fillDeviceIt(fillDevice, selectionExtent);

        // Prepare the vectors that contain the normalized channel values
        QVector<float> nonSelectedAreaColor(fillDeviceColorSpace->channelCount());
        QVector<float> selectedAreaColor(fillDeviceColorSpace->channelCount());
        QVector<float> resultColor(fillDeviceColorSpace->channelCount());
        fillDeviceColorSpace->normalisedChannelsValue(m_d->maskColor.data(), nonSelectedAreaColor);
        fillDeviceColorSpace->normalisedChannelsValue(selectedOverlay.data(), selectedAreaColor);

        // Interpolate the two overlay colors based on the selection value and put
        // the result on the fill device
        while (selectionIt.nextPixel() && fillDeviceIt.nextPixel()) {
            const float t = selectionColorSpace->opacityF(selectionIt.rawDataConst());
            const float oneMinusT = 1.0 - t;
            for (quint32 i = 0; i < fillDeviceColorSpace->channelCount(); ++i) {
                resultColor[i] = oneMinusT * nonSelectedAreaColor[i] + t * selectedAreaColor[i];
            }
            fillDeviceColorSpace->fromNormalisedChannelsValue(fillDeviceIt.rawData(), resultColor);
        }
    }

    KisPainter gc(projection);
    gc.bitBlt(applyRect.topLeft(), fillDevice, applyRect);
}
Here I just use a hard-coded color for the selected areas (selectedOverlay), but you have to implement it the same way as maskColor.
Also, this should be implemented for when the selection display mode is set to mask (toggle selection display mode" action, the button on the bottom left of the window) because it seems that it is painted on another part of the code.
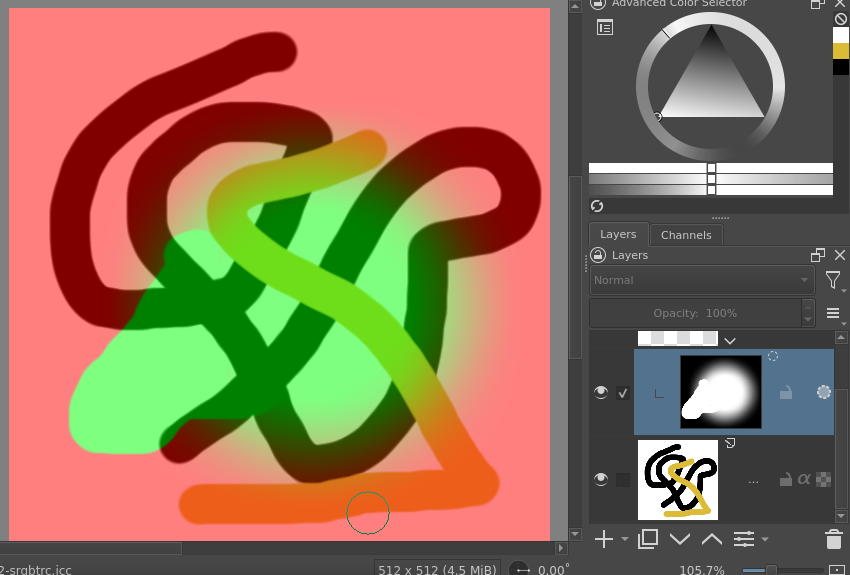
In the next screenshot you can see how the colors go from semi-transparent red to semi-transparent green: