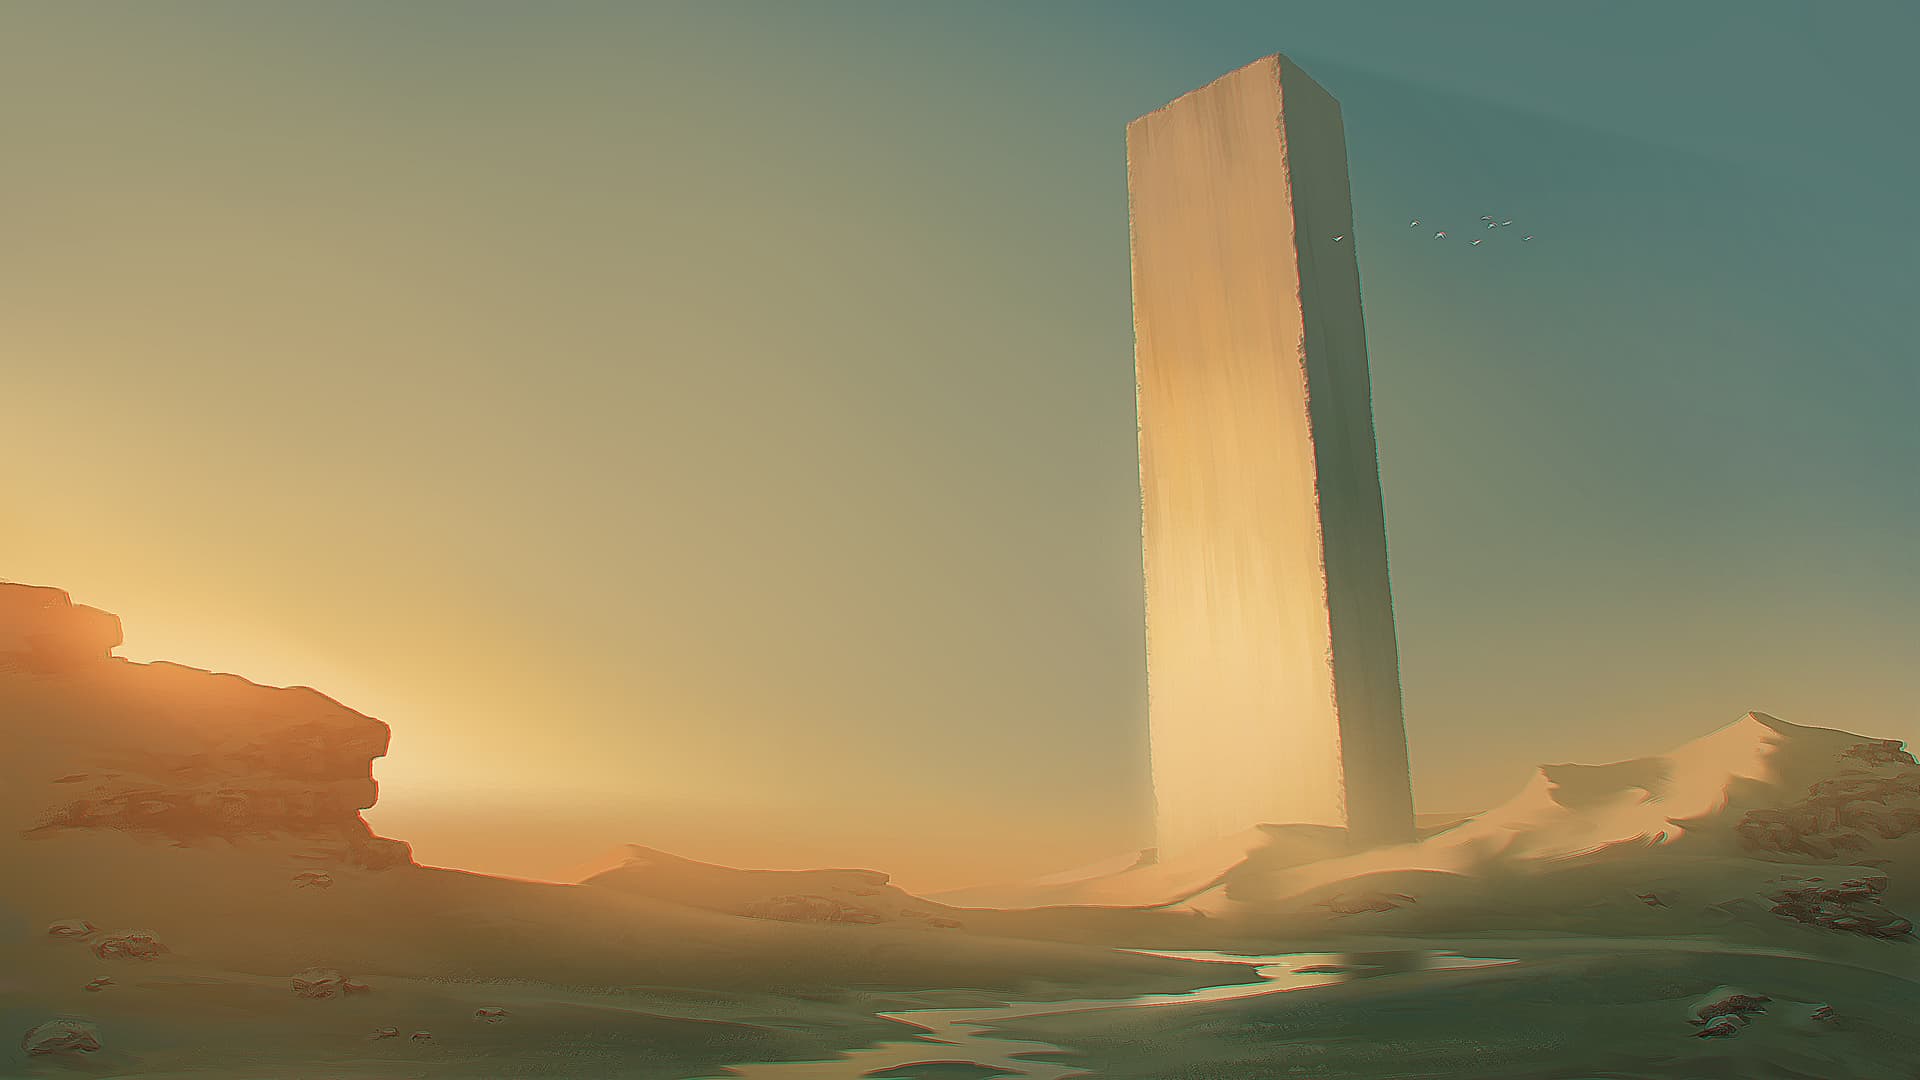
“Monolith” Desert Concept Art
35 Likes
Hi, welcome! Looks really crisp and the colors are very nice. However, the chromatic aberration is a bit too strong for me ![]()
1 Like
Hi thanks for your feedback, i’m happy that you like my work ![]()
I tried to make it less strong but it was the minimum i could do, maybe i did not use the right tool to do the chromatic aberation ![]()
I think i’ll just do a version without it
1 Like

Hey, thanks for entertaining the thought!
Post-processing definitely adds that quality feel / oomph to the artwork, so probably it’s good to keep some chromatic aberration.
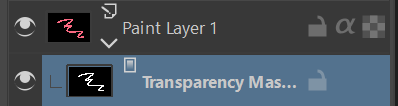
I’m not sure how well are you familiar with Krita (forgive me if I’m stating obvious things), but one flexible way of managing the strength of your effect is adding a transparency mask to a layer. Say, you have your aberration on one layer, add a mask to it, then paint the mask black (=invisible) with a big airbrush where you want to lessen the effect.
He’s a simple demo. The color stroke layer is modified with a mask:

This way you can keep the effect strong near the edges and reduce it in the middle (gray mask would be half-transparent, etc.). So it’d be something like a vignette.
Love your style. I’d like to see more of your work. ![]()
1 Like
@YRH I’m not familiar with the transparency mask. Correct me if I’m wrong, but can the same thing can be accomplished by locking the layer and simply using the airbrush in eraser mode? Or is it something different?
Hmm. I don’t think so. If the layer is locked, you can’t modify it with the brush.
Normally when you paint with a half-opaque brush, such as the airbrush, the pixel’s alpha channel (transparency) will be somewhere between 0 and 1. 0 is invisible and 1 is fully opaque.
By adding a transparency mask to a layer, you can override its natural transparency, in a non-destructive way. You can disable the mask and your layer will be intact.
You can quickly see your layer’s “natural” alpha by using the option Split Alpha, too. But if you modify this mask, it will be destructive, because you have transferred the alpha information from the layer to the mask.

Before:

After:
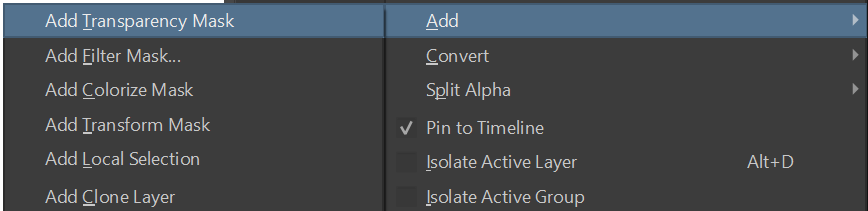
The transparency mask is added by right-clicking on a layer and selecting:
I meant the Alpha Lock, not Locked Layer. But I see what you mean about the transparency mask having the advantage of not being destructive to the original. I use clipping groups a lot, which appears to accomplish the same thing. So what is the difference between using a transparency mask and just making the layer a clipping group? All the alpha inherents and masks are confusing and I’m trying to learn the uses of each one Thanks for your help ![]()
Ok thanks for your answer I know what you mean ![]()
But I wanted my CA to have edges less separated from the original paint, i don’t know if it’s clear.
I used the Transform tool, then Scale to get the effect less stronger in the middle of the canvas but stronger on the edges.
But I put it in 101% (the minimum) and it’s still too strong…
1 Like
Thanks for your feedback, i’m happy that you like it ![]()
Maybe I’ll post futur paints but I’m not happy with what I did up to now ![]()
I meant the Alpha Lock, not Locked Layer.
Yeah, sorry, that should have been obvious from the context.
I think you can achieve a similar effect in a variety of ways. In my case, I use the transparency mask when I don’t want to permanently erase my layer. For example:
- My sketch has multiple layers, e.g. the head, hair, and hair accessories. I don’t want the lower layers to peek through the upper ones, but if I later decide to adjust or move the layers, I may need to restore the erased parts. With a transparency mask, that’s easy. Just paint it white again and it’s restored.
- Another use case are the effects, just like that chromatic aberration case. I can tweak the mask to try various strengths and effects, and if I change my mind the next day, I don’t need to redo the effect, just clear the mask and try again.