A thought popped into my head earlier - I was thinking about wet-in-wet painting and how the pigment spreads from the point of contact. I wondered if I could create a similar effect in Krita by setting Size to ‘Time’ - so that the size of the dab would grow gradually outwards.
I found this didn’t work as I’d hoped because the stroke doesn’t seem to progress without movement. So holding the point of contact didn’t cause the dab to grow or change in any way (I think some instances were made due to micro movements). It kind of worked if I moved the brush around, but not quite what I had in mind.
I couldn’t see any way to change the brush behaviour to allow for the stroke to be static - so it would progress with time without having to move it.
So I’m just wondering if anyone knows of a way to do it? I think it could be useful feature to implement if it’s not already possible (perhaps as a ‘spread’ setting or something?).
The dabs of the brush tip are based on the distance moved by the brush, i.e. the Spacing value of the brush tip. If you don’t move then you don’t get dabs.
When a dab is put on the canvas, it’s there and can’t change.
It’s a nice thought but I don’t think it can be done, at the moment.
If I understand correctly what you want - there is ‘airbrush’ tick in brush editor. Both for pixel and smudge engine.
Ticking it basically means that your dabs are not only created on spacing condition, but also over time, so you have new ones constantly. Then you can use tilt to change rotation while not making any other movement, or as you want - make them grow over time.
You can press override spacing, to make time the only condition on which dabs are made, but I think the it works better without override
Oh yes … You can get some really nice point spread effects by using the Airbrush setting, without needing to do continuous ‘micro movements’. Nice swept strokes too.
Again, the dabs don’t (and can’t) change once they’re made.
Yeah - I understand that, but dabs can be affected by subsequent dabs - so the accumulative effect can appear to evolve - like the watercolour style brush I was using as a base for my experiments.
I’ll have a play around with the airbrush and see what I can do.
That reminds me - I created some experimental tips earlier to get more of a grain effect. I haven’t figured out the edge effect yet, but using layer effects like I do with the impasto template is one possibility. It can get a bit taxing on my ageing system though…
I’ve also done a couple of running-drip brush experiments which actually work - but look a bit naff in the current implementation.
I think a lot of these experiments are more about the challenge; Just thinking ‘I wonder if I could do that using existing tools’ and might not be of much use in the end.
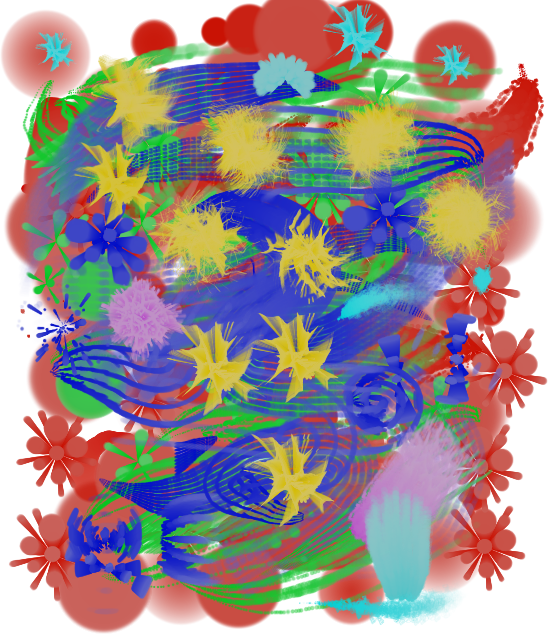
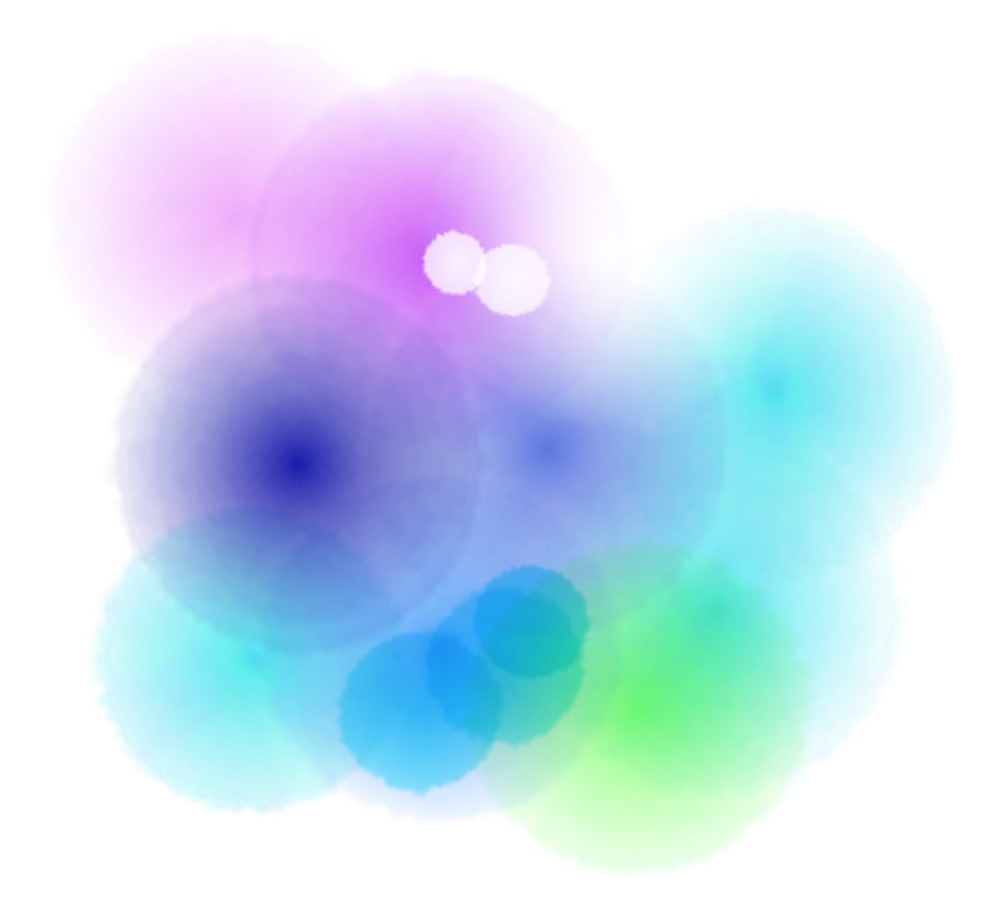
I can see uses for this one though - like making watercolour texture effects, bokeh style effects, or natural textures - such as lichen spots on rocks etc.
The brush in the video has hue variation, but I switched it off for the demo. It works better with grainier brushes - imitating the effect you get with some watercolours.
Here’s a little demo of the dripping paint effect I mentioned. I managed to improve it, but it’s still a bit of a gimmick!
It makes use of the new RGBA brush feature combined with the ratio setting and airbrush. Honestly - it was a pain just to get it looking this good - and I don’t suppose I’ll ever use it!


 Amazing that Krita can do stuff like that!