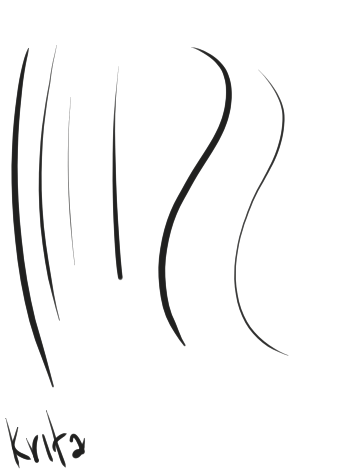
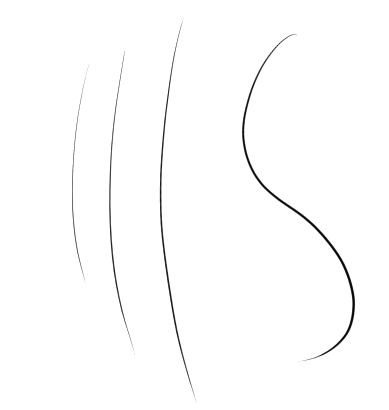
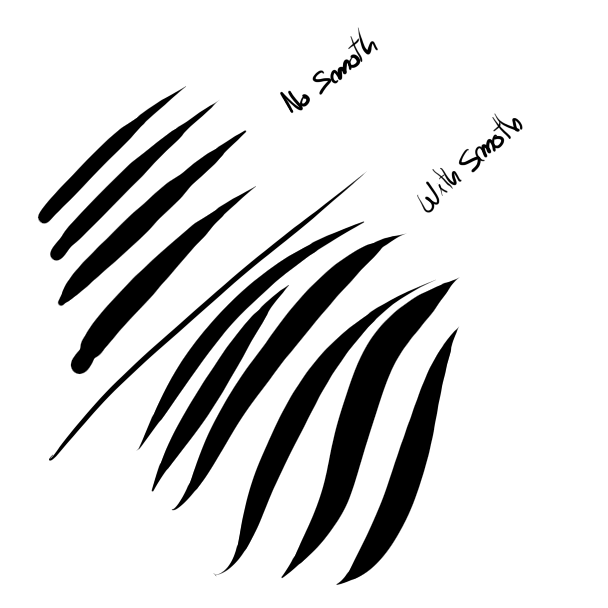
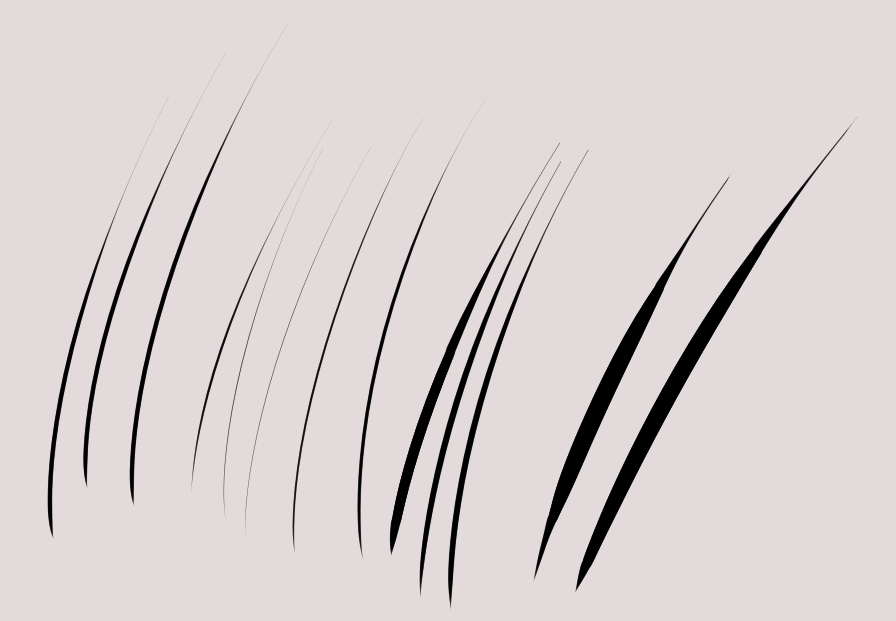
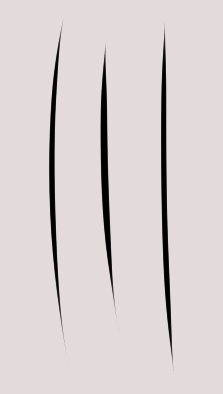
I played around with settings and figured out how to get brush strokes that taper off to a point (instead of them terminating with a blunted end), similar to how brush strokes perform in Clip Studio Paint.
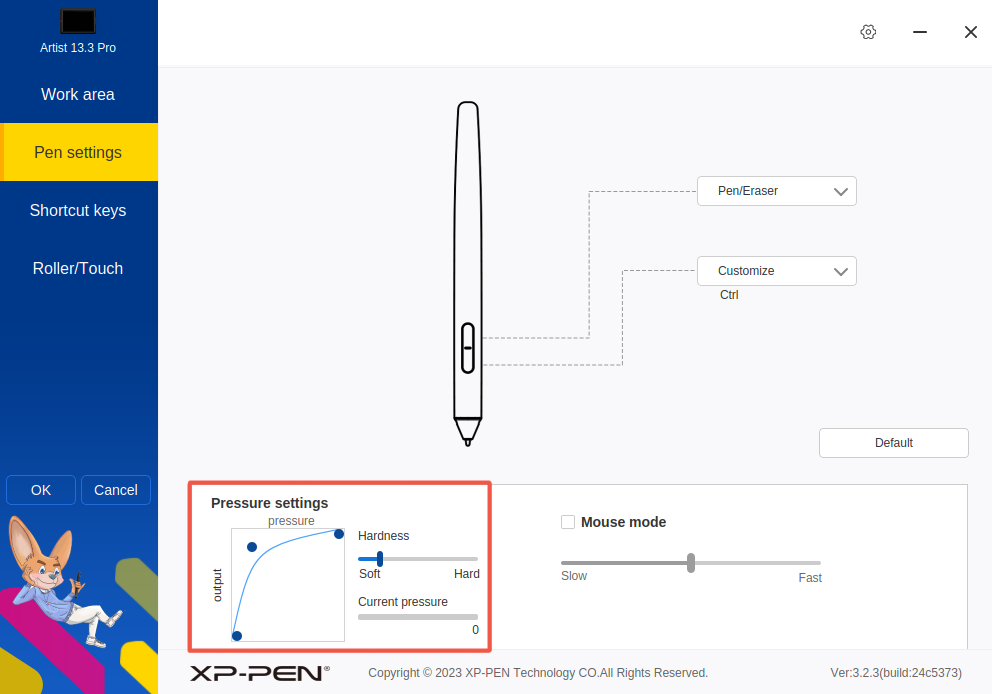
I am using Manjaro with an XP-Pen tablet/driver, so your mileage may vary. I’ll test this out on Windows to see if it works similarly, but I can’t imagine that it would be much different.
Hope this helps someone!!
Is it better to leave the krita interpretation of pressure linear and instead calibrate the brushes you want because your forcing a modifier to your whole brush set like that.
I’ve tried to do that, but simply modifying the curve within the brush itself, and I haven’t been able to get that to result in a brush stroke that cleanly tapers off. I just wind up with blunted ended strokes, as seen in the OP.
If you have found a curve within the brush settings that works for you, please let me know!
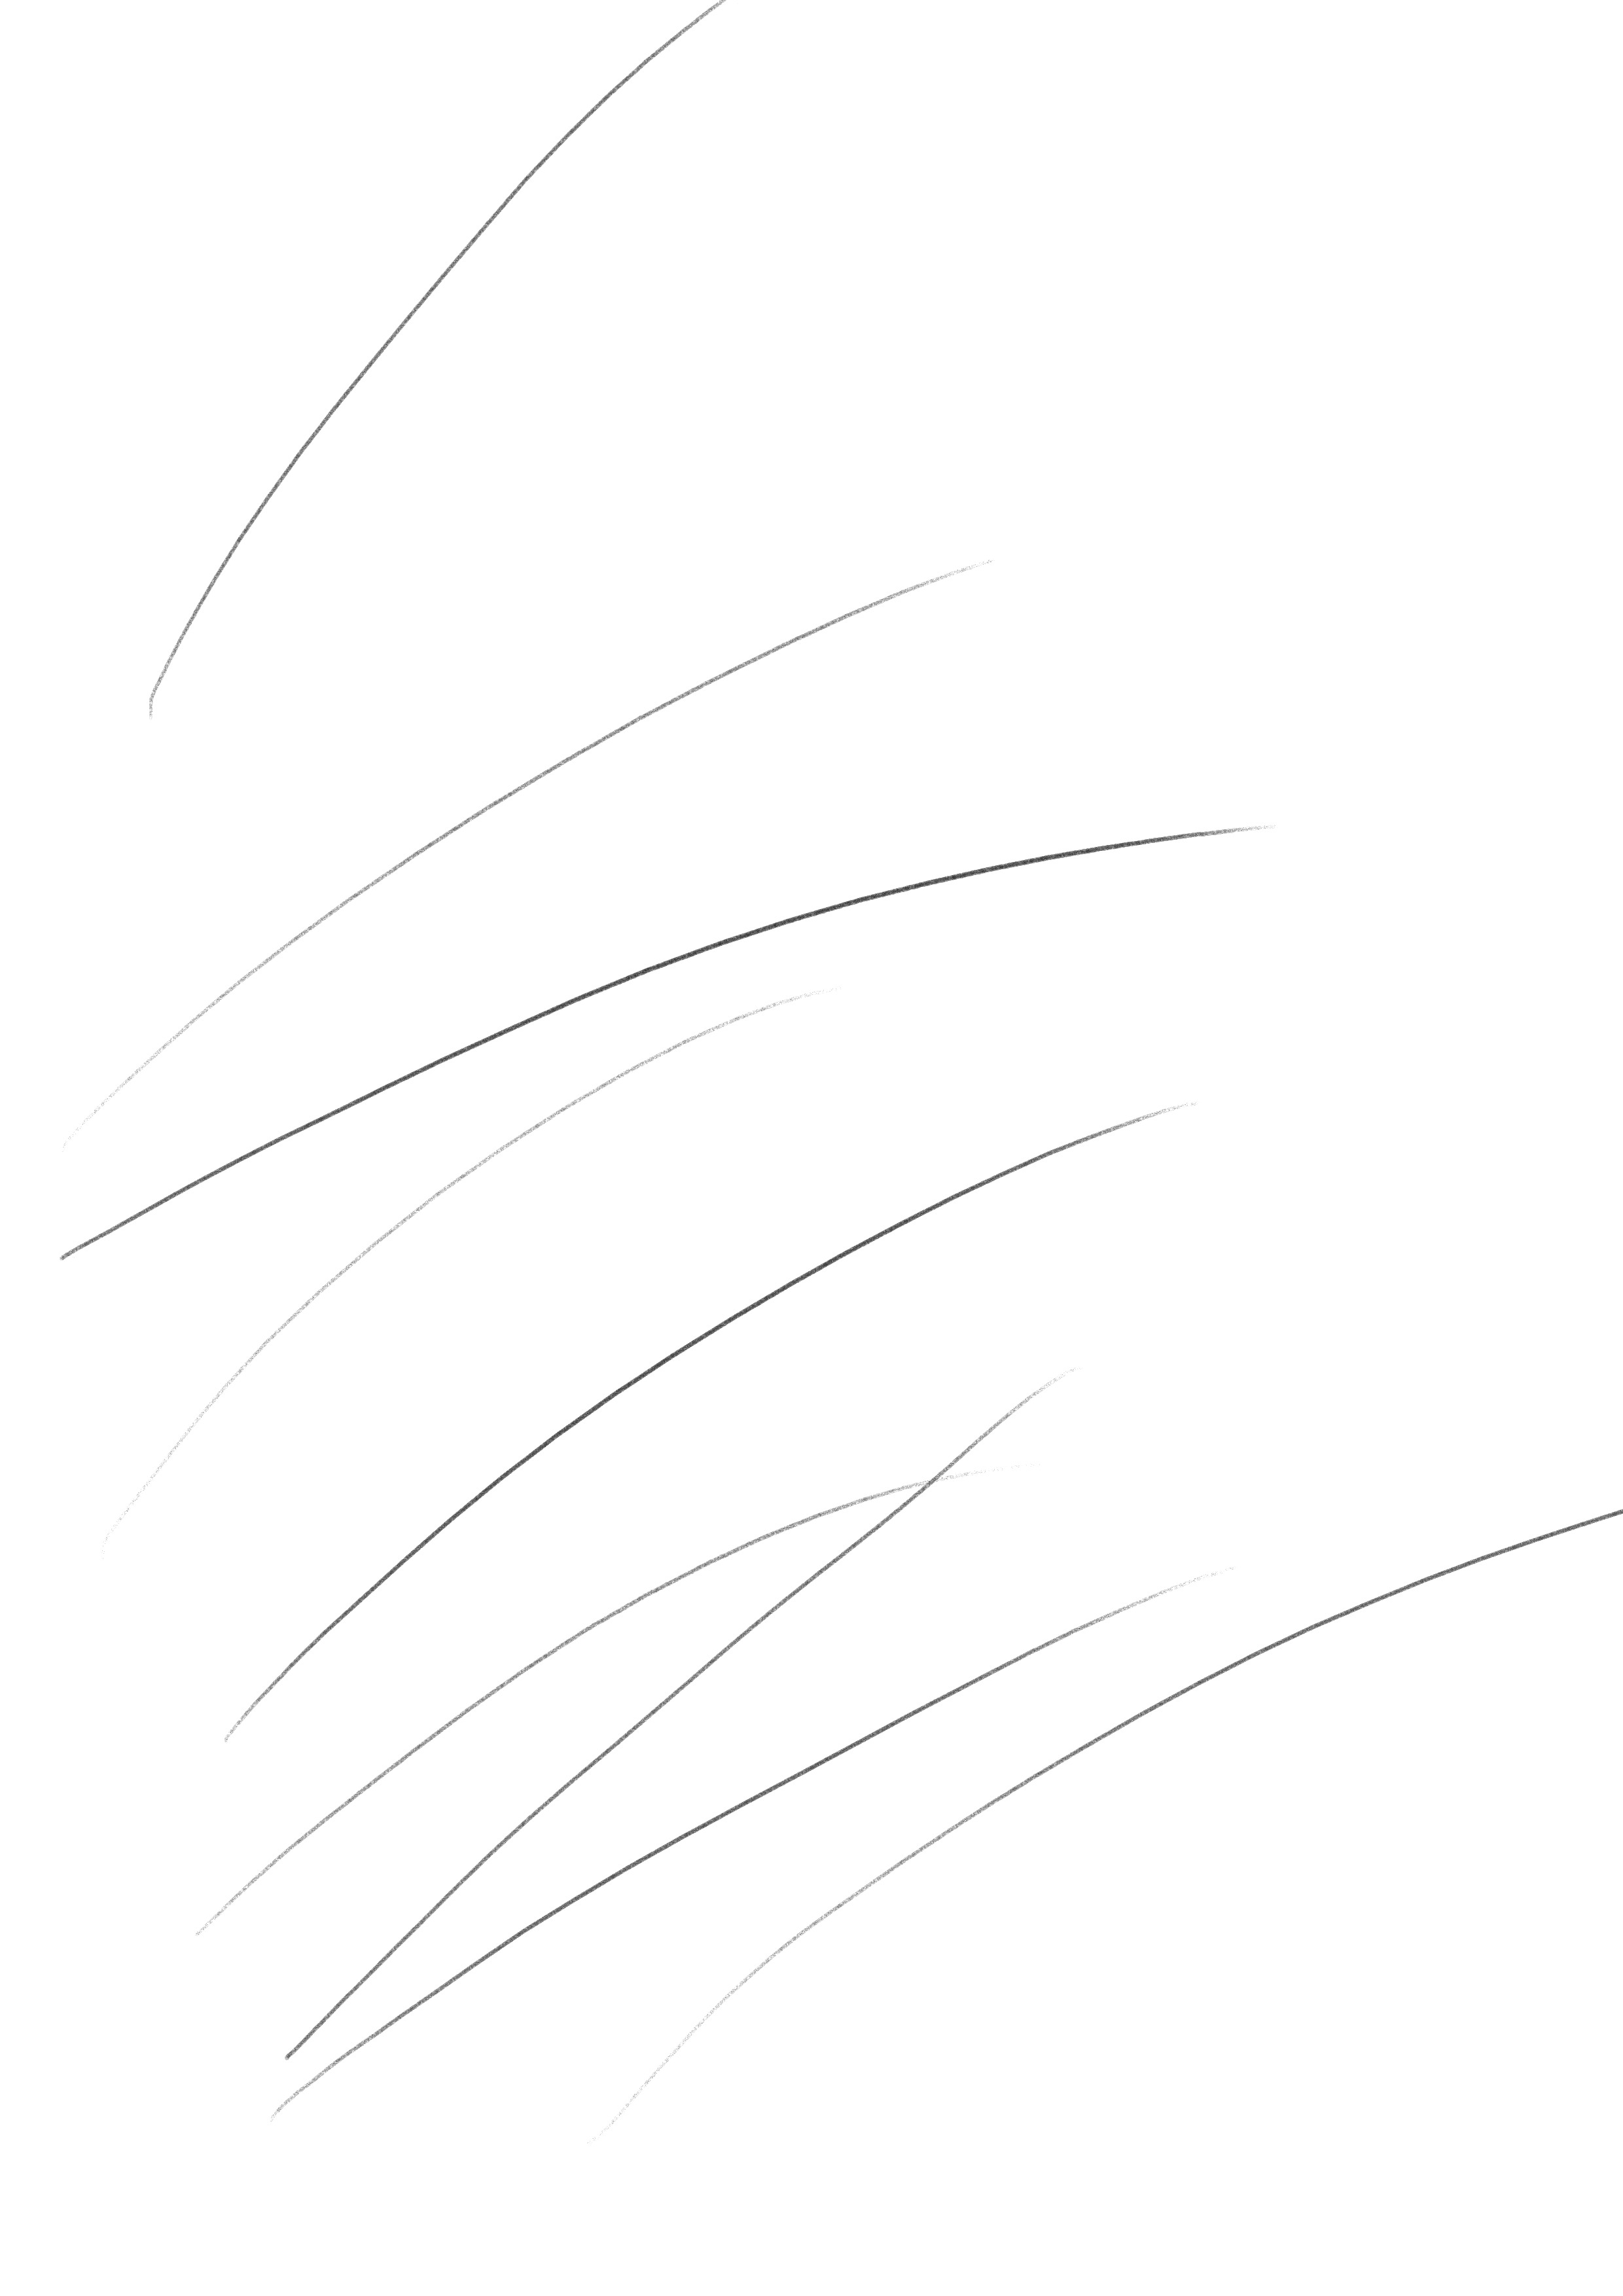
with and without pressure smoothing but with big lines.
Adding some pressure smoothing I can make it consistently sharper edges.
Also I suspect CSP demo is with vector tool line or with filtering which is kinda non comparable with what Krita has at the moment.
what your doing is making the whole tablet very numb to pressure just to ensure the value variation stays smoother and it will affect everyones brushes. that is why your lines are so consistent but if your brush is 100px wide your will never reach the 100px wide at full pressure and if you do manage it will be a sudden spike.
@magneticfloorboard , @SchrodingerCat Thank you very much!!
I couldn’t expect that regular brushes may feels so comfy and smooth. Really grateful for your kind recomendations
Hi, i use galaxy A8 TABLET & honestly NO brushes works with this ends. They either don’t change at all or disappear completely when i play with the brush setting (AKA become invisible) please help!
With a mouse, I consider it as (nearly) impossible and only achievable via “cheating”. You can set brushes so that they become thicker over time or distance. Once you have achieved this, paint the start and end of the desired line as 2 separate strokes, the end backwards, so to speak, and then connect the 2 lines. As I said, it’s cheating and not very elegant, simple or even easy.
Maybe there are other possibilities that I don’t know about or can’t think of.
This method was PERFECT. It NEEDS to be in the docs that you can do tapered strokes with a tweak of the tablet settings. Who can I talk to to get this added to the docs? I can very closely emulate tapered strokes with this way. Is it perfect? No. Is it good enough? Absolutely. Just need to tweak it more here and there to my liking.
And if anyone is wonder what tablet I use, I use a basic wacom intuous tablet. Screenless. Pretty entry level, so if it works with me, it can work with you for sure.
It actually does work for the starting stroke/starting end of the taper! That’s what motivated me to share this post with everyone, since it was so frustrating for me not to be able to have that slivery, tapered starting stroke like in CSP.
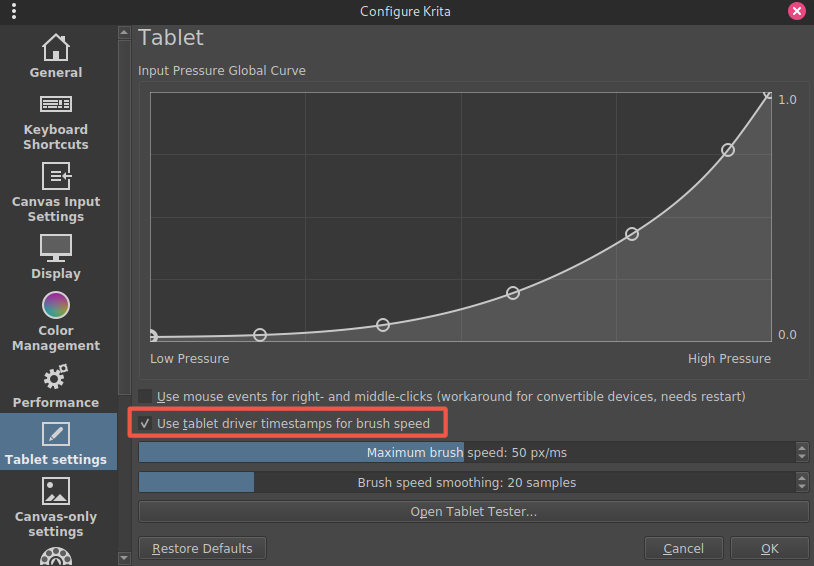
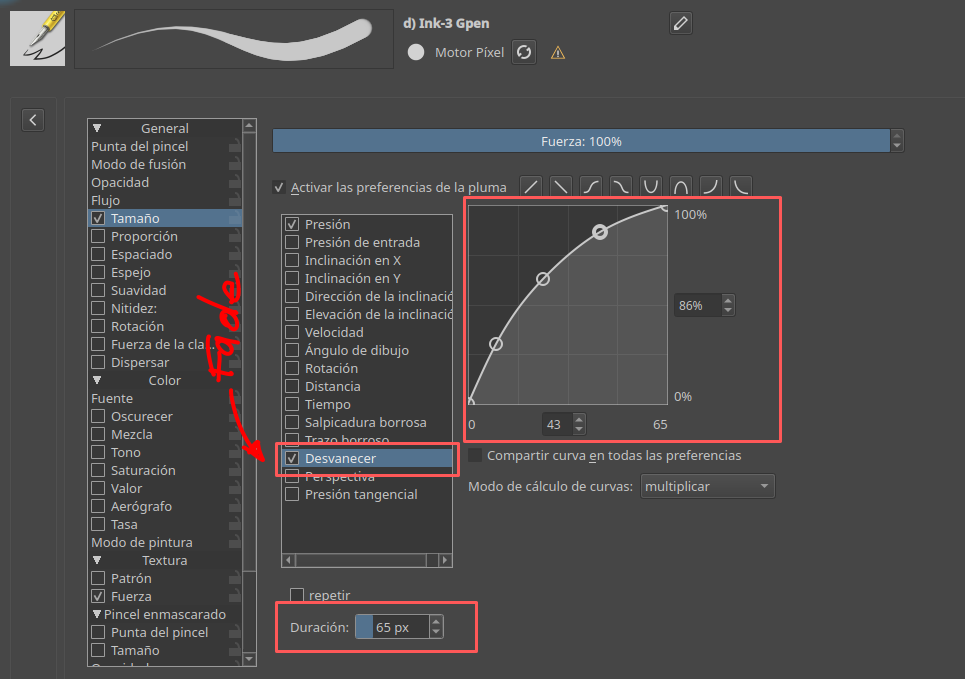
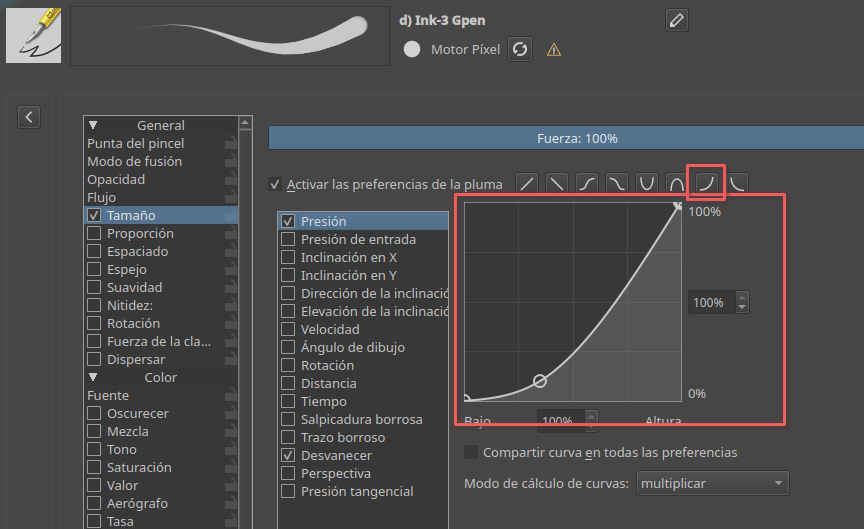
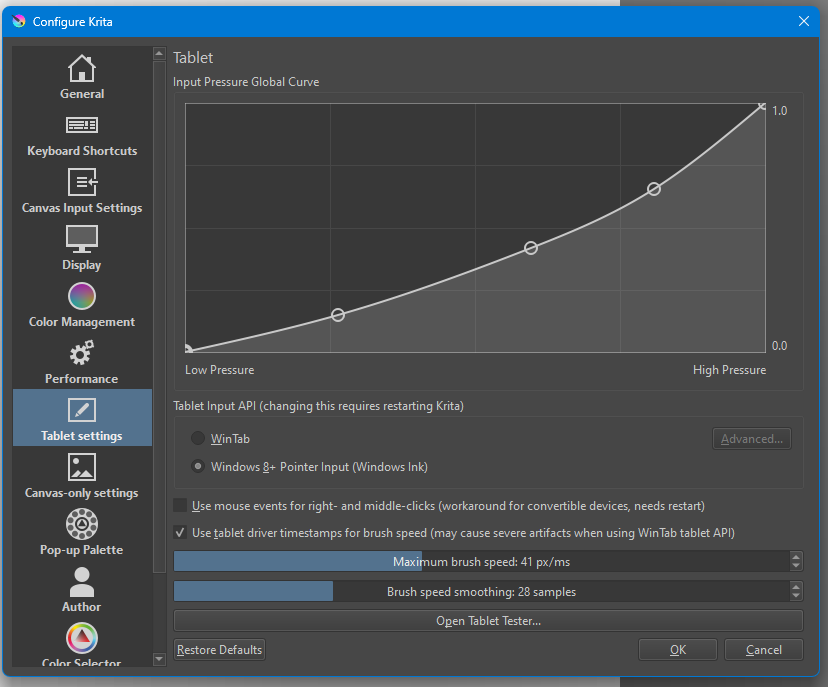
When making the curve in Krita’s tablet settings, it’s very important to focus putting more points on the low pressure end(the left side) of the curve. Having that end be smooth and a little elongated is the most important aspect of this trick.
I also found that raising the starting vertex on the left can be crucial in getting a specific look for the fade in taper.
Good luck!!
I’m so glad that this trick has helped so many people, it gives me life! I love Krita and its community so much like you can’t believe.
And EyeOdin, you do have a point. I wonder if there is a feature where you could toggle activation of the input pressure global curve, that would be incredibly useful for this trick and in general. But I’ve found that I wind up pleased with how it affects most if not all of my loadout.
@ShrodingerCat Also, there is an option in Krita’s keyboard shortcuts where you can Increase Fade/Decrease Fade dynamically, so anyone using this option might want to set that hotkey to use on the fly instead!
Es la opción de duración que se ve aquí cuando activas el desvanecimiento.
De igual forma este truco lo aprendí porque otro artista del foro tenia el mismo problema de que Krita no empieza con puntas cónicas, este ajuste ayuda bastante, te dejo el enlace a su post porque hizo un pincel que tiene dichas configuraciones por si lo quieres probar =)