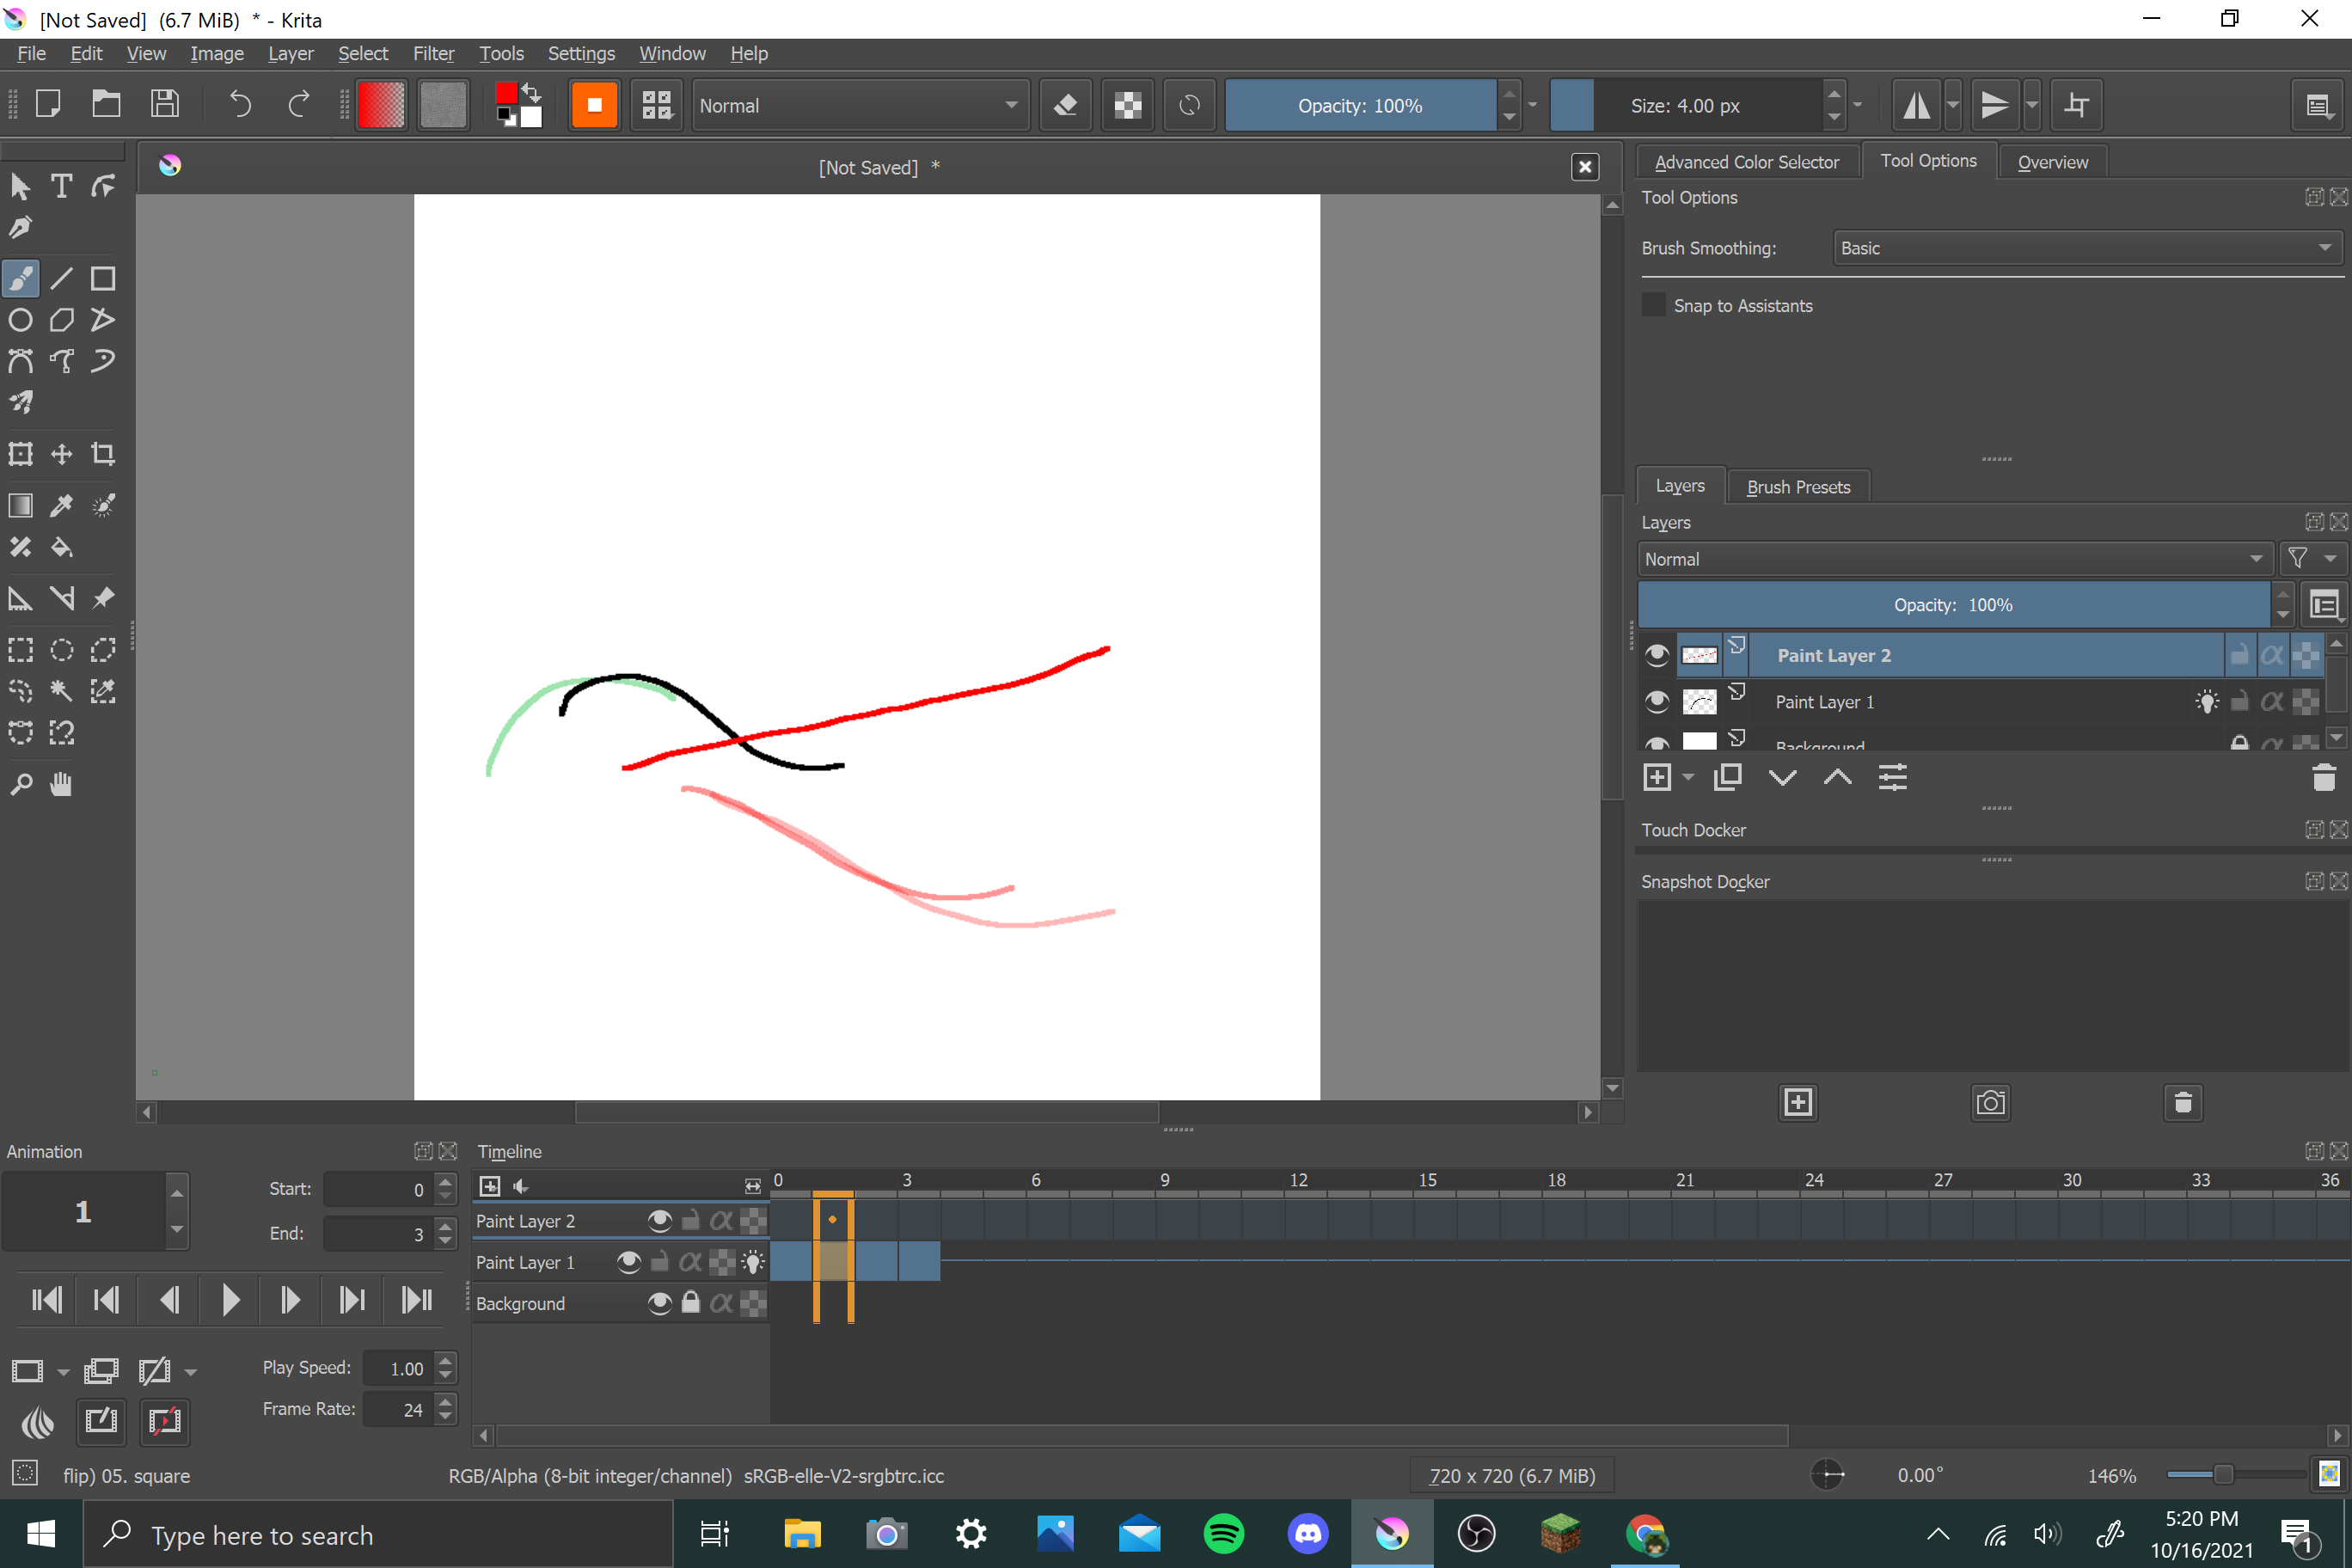
I’m animating in Krita, and very much a beginner at the program. I’m trying to create a layer where I can draw lineart on, following the sketches. However, when I try using a new Paint layer, anything I draw stays without moving over the entirety of the animation, almost like a watermark, even if I’ve been working frame by frame.
Make a blank keyframe on that layer, and it would stop repeating.
Also, are you trying to animate yourself sketching something? In that case, Krita 5 recorder would be easier as it makes an animation of yourself sketching.
Hi.
I have also felt lost initially when I started experimenting animation on krita.
but once,you start to get the basic feel,things will be easier.
I am not exactly sure if my suggestions/sharing will make your journey easier or not.
but we can always hope !
It will help you a lot ,if you can create your own custom shortcut for basic function /requirements.(you can do that via Settings > configure krita > shortcuts),it can save you some valuable time and energy.
Example -I have made button A ,S and D as create blank keyframe,go to next frame and duplicate frame. this set up helps me to work faster.
you can try out your own custom set up as per your requirement.
Always check out if that small bulb icon (onion skin mode) is on or off,sometime this function is extremely helpful,but sometime it can create confusion.
In that case you can go to the right side of the animation timeline docker bar and click the small onion like icon.Through that you can control the opacity and other factors of onion skin function.
You can try out another method,which can be a little easier for you in the beginning phase.
Just take a small animation template and don’t activate the animation workspace.
Create a new layer ,draw something on it,then lower it’s opacity as you wish,then take another new layer,draw your next frame.keep repeating the process until you are satisfied with your experiment.
After that create a new group folder( click the + icon in lower bar in layer docker to access it ) and move all your images inside it .Just be sure to restore all the layers inside that folder to 100 % opacity .
In the end select the folder, go to MENU > layer > convert > convert group to animated layers and finally change the workspace to animation.
Then the group will be converted into a single layer and all the layers inside will be converted into a sequence of keyframes.
After that you can create more option by RMB click on a keyframe or series of keyframes .
Hope something will be helpful here !
When you make a new paint layer; it’s a static image layer, it’s not an animated layer and so the contents of that layer will be shown on every frame of any animation you have.
This is useful for making static content such as a fixed background image.
Your screenshot shows Paint Layer 2 as a static image layer with a red line on it. Paint Layer 1 is an animated layer with frame-0 to frame-3 having drawn lines on them, each frame is a ‘keyframe’.
So, the red line of Paint Layer 2 will be visible on all frames of the entire animation.
[You have the onion skins lightbulb turned on so you’ll see red and green onion skins for previous and next frame content. In this situation, it’s not a good idea to draw red artwork because it’s easy to become confused between drawn red artwork and a red onion skin image.]
You’ve made one animated layer (Paint Layer 1) so maybe you forgot how you did that?
To make Paint Layer 2 animated, right-click on frame-0 on its timeline and then click Create Blank Frame to make a new empty frame, or click Create Duplicate Frame to convert any existing content of that layer into frame-0 of an animated layer.
I also wanted to add something that I found out recently: if for example if I make a finished sketch, and then decide I want to animate it/certian layers of it, you can open the animation + timeline dockers, and then “duplicate” the layer so that it exists as a key frame. Otherwise, when you “create new keyframe” it will erase the whole layer. But if you duplicate the layer, you won’t have to redraw the layer! IDK if this helps!
 !
!