How do I create a multi-brush stamp?

If I select “z) Stamp Mountains Distant” from the Brush Presets and click on “Edit brush settings” on the toolbar, I get the Brush Editor window opened with the Predefined tab active.

To the right of the chooser, it reads:

Mountains Distant
Animated Mask (256 x 256) incremental

If I select the P Graphite Pencil, it says:

P_Graphite Pencil
Animated Mask (128 x 128) random

Back to the mountains.

If I singularly click on the scratchpad with the Mountains Distant selected, I get always the same picture (upper six examples.

However, if I drag the mouse over the scratchpad, four different pictures are displayed (lower twelve examples).

How do I create such kind of brushes?

I read especially this document, but it lead me nowhere.

I have successfully created a single brush and I tried a multi-layer brush, but to no avail, all layers are displayed simultaneously, not per click or drag.

If you look closely at this dialog


You can see Animated is selected in Style. :arrow_down_small:

This is how you preserve your layers instead of flattening everything.

Edit in your case you certainly didn’t chose Random in selection mode, so you always begin with the same stamp :person_shrugging:

I did choose Animated yesterday (always), but it did not work.

This is what I tried (again) this morning:

(1) I opened Krita (5.1.1) from the appimage on Debian 11 Bullseye

(2) I opened my two-layer test_1.kra image, which contains a slightly bent fir tree in one layer and a mirrored duplicate in the other.

(3) I selected the Mountain stamp from the Brush Presets (to get the Predefined tab in the Brush Editor)

(4) I clicked on Brush Editor in the toolbar (the Mountain stamp is selected in the list of the Predefined tab)

This does not look right: The “Brush mode” is grayed-out. Not now, but previously, I clicked on other thumbnails, but “Brush mode” remained blocked.

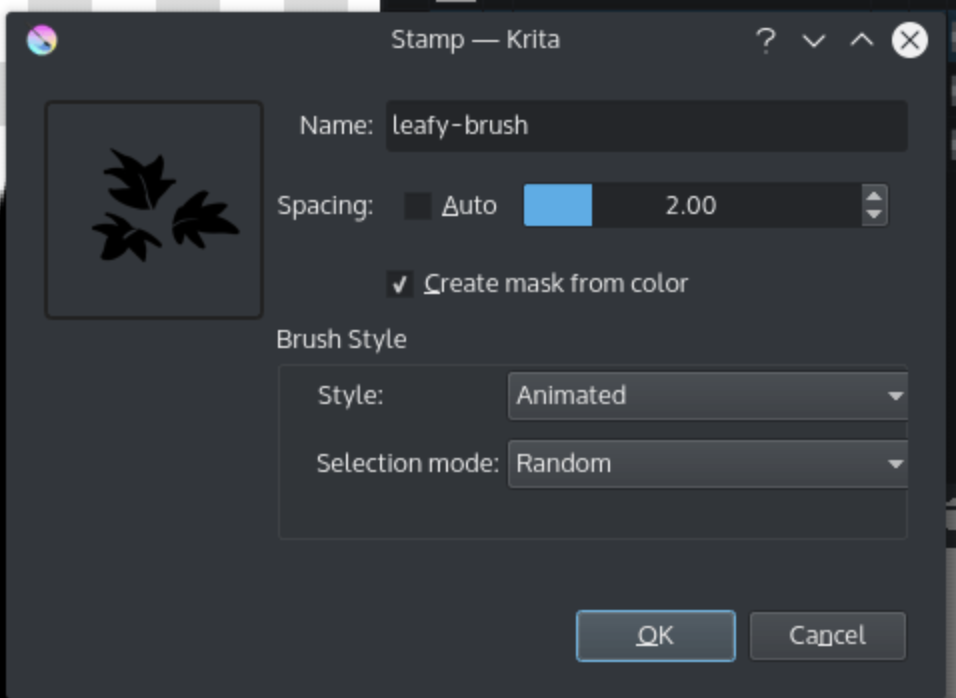
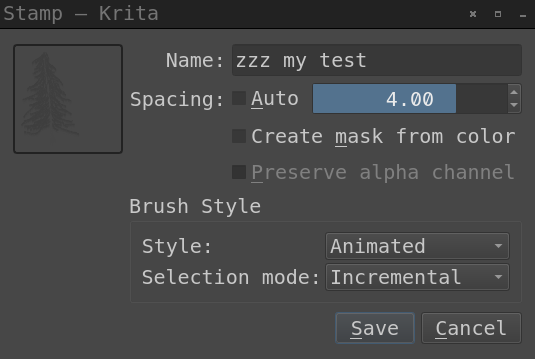
(5) I clicked on “+Stamp”

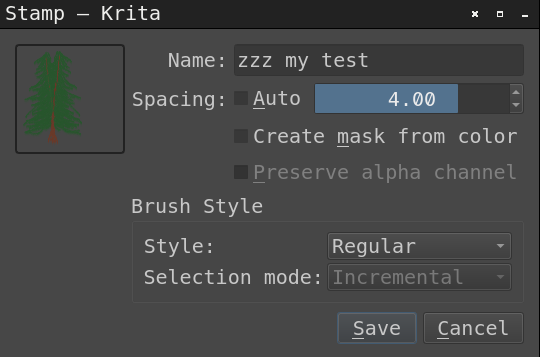
(Note, that the preview shows both layers, because Style is still Regular)

  • I named it “zzz my test”
  • I unchecked Auto and set Spacing to 4.00
  • I unchecked “Create mask from color” (to get a colored image in preview):

(Note, that the preview shows now green and brown)

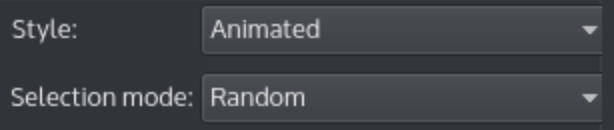
  • I selected Animated as the Style

Wow, this does not look right either, the preview now lost its color, but shows a single layer at least.

  • I selected Random as the “Selection mode” (preview expectedly did not change)

  • I clicked Save

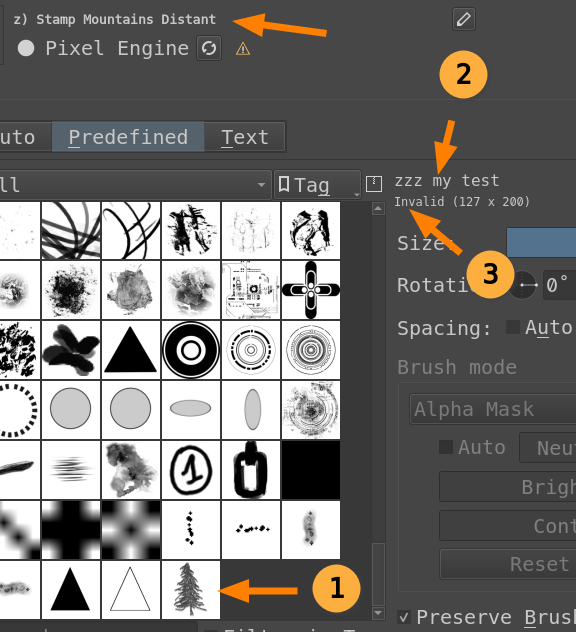
Now the preview image appears in the list on the Predefined tab (at the end of the list due to its name starting with zzz (1)), it is not selected, but on the right of the list the name “zzz my test” (2) appears, but also “Invalid (127 x 200) (3)”

• I select my image in the list (1)

The text under “zzz my test” now says “Animated Mask (127 x 200) random”

This looks very good.

Now comes the problem:

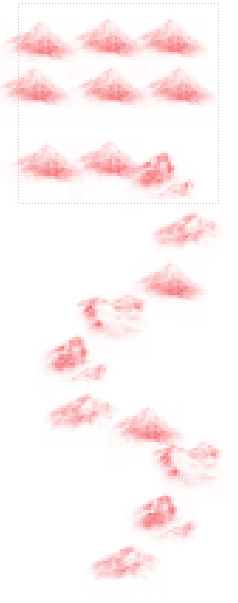
(a) I reduce the Size from 360 to 30 and click on the scratchpad

5

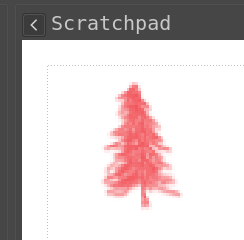
No colors, probably because the Alpha Mask is preset as the “Brush mode”, but it cannot be changed

What now?

(Repeatedly clicking on the Scratchpad now cycles randomly thru the two layers. I have no explanation, why this did not work yesterday, but yesterday, I had a colored picture :thinking:)

If the image you made is RGB then you should be able to select Brush Mode: ColourImage in the Brush Editor.
If you saved the image (as a brush tip) with ‘Create mask from colour enabled’ then I think it makes a greyscale image which can’t have the Brush Mode: Colour Image option.
Your Brush Editor screenshot shows a greyscale image, not a green image.

For making .gih brushes, I use Export and choose the .gih output format option so I’ve never explored the ‘Stamp’ pathway. I think the Stamp is a simplified form of the full set of .gih capabilities.
Then I import the .gih file in the Predefined tab of the Brush Editor.

2 Likes

(1) It is and was an RGB image. Again, it worked yesterday with respect to color. Anyway, it does not matter, because of the following (3).

(2) I never said, a grayscale image is green. The first screenshot shows green and brown in the thumbnail, which I commented on below the image (no offense meant).

(3) Thanks for your tip to export/import a Gimp Image Hose Brush. That did the trick :smile:.

1 Like

This topic was automatically closed 3 days after the last reply. New replies are no longer allowed.