Hey everyone, I’m Sandal, and I’ve come to this forum with 1 pretty specific issue I’ve been battling in all of my works that I haven’t been able to really resolve.
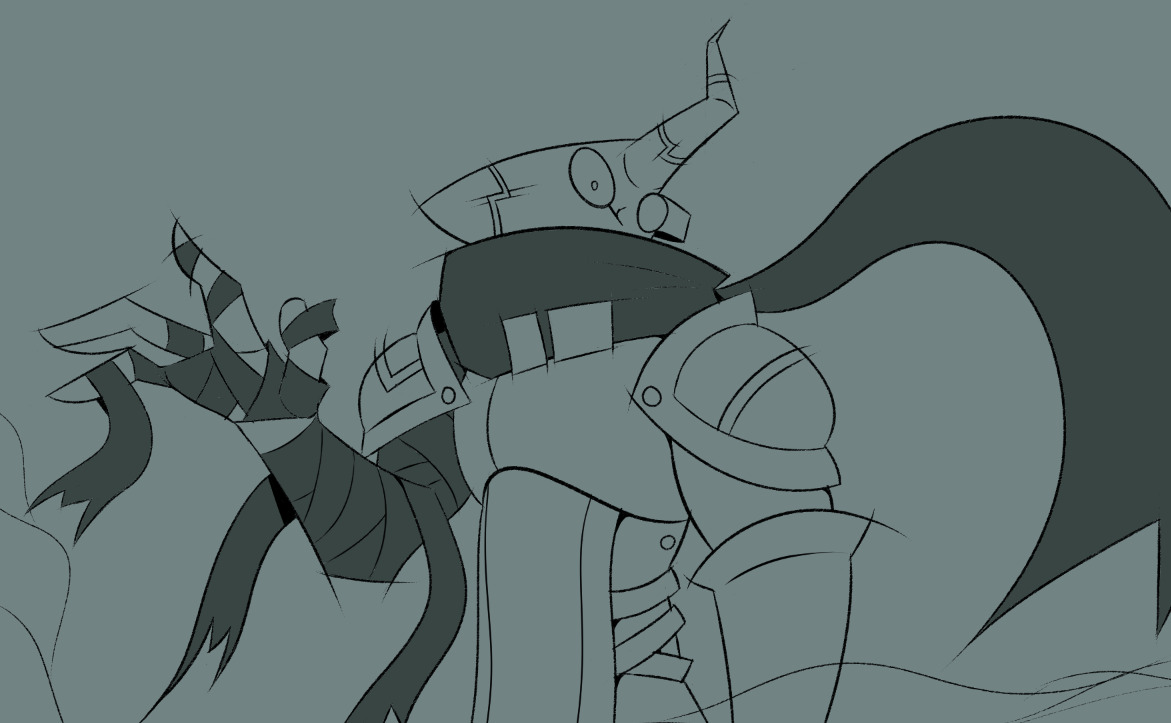
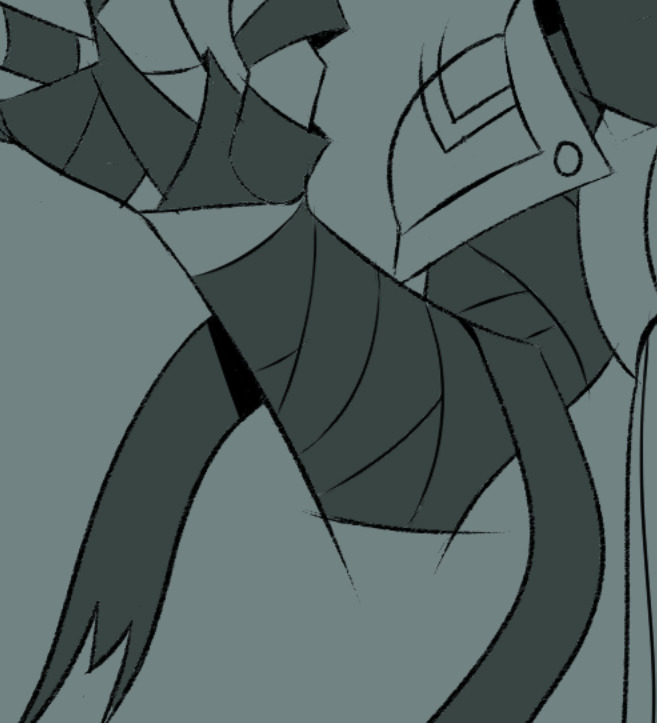
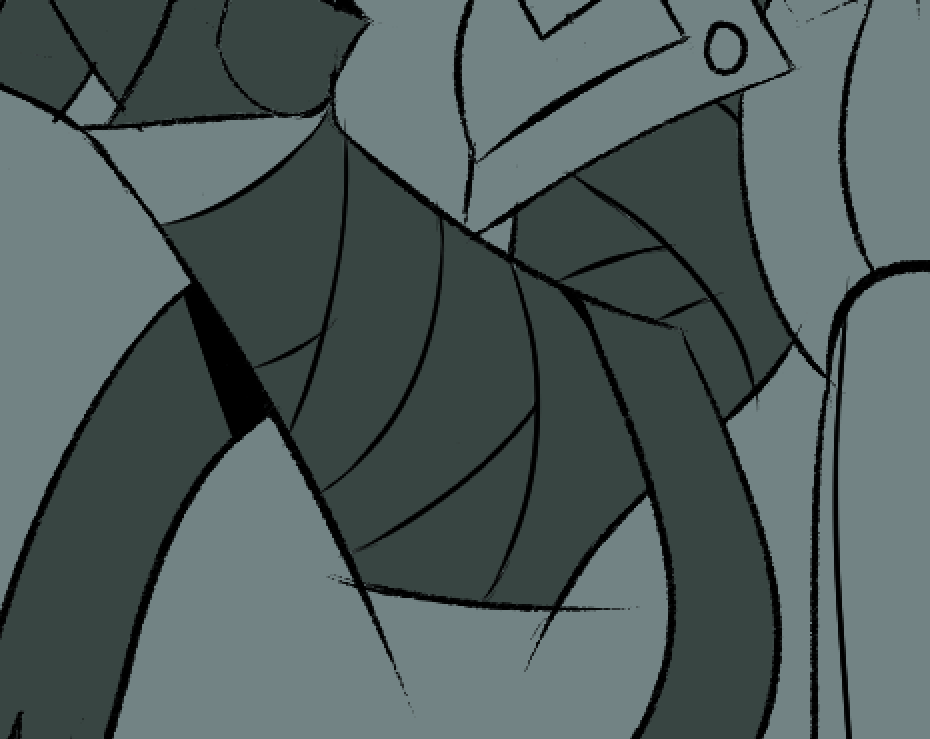
Here’s the problem: if we look at this unfinished WIP image I’m creating of a character, it looks fine as is, right?
What’s the deal with all this little white fuzz between my lines? I’ve experimented with the settings to the moon and over and I haven’t been able to get rid of em’ when I use the wand tool, it only disappears when I go back and manually draw underneath that section of the piece, which for obvious reasons is very irritating.
I changed the title of your post to something more relevant to your issue (original title: Made an account for this issue specifically). This will help the right people see your post and offer help.
Did I guess correctly that this is happening when you use the fill tool? We can edit the title if I am incorrect.
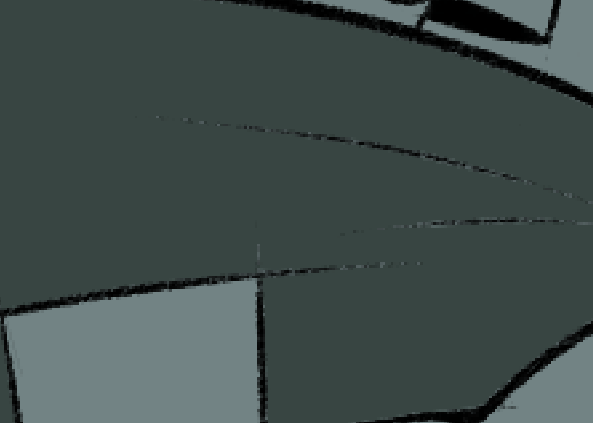
Krita is a raster graphics program, and like all such programs, the images are made up of individual pixels. If someone zooms further and further into an image, these individual pixels become better and better recognizable.
In addition, the appearance of your strokes naturally depends on the chosen brush and its stroke pattern, and it seems that you have chosen a brush here that shows a certain roughness or graininess in the stroke pattern, and this graininess can also be seen better and better the further you zoom in, thanks to the technical aid “zoom”, an electronic magnifying glass if you want to call it that.
And if you now try to display two colors next to each other on one layer, then you will see these artifacts when zooming in, at least on the lines that are not 100% vertical or horizontal, because with an oblique line of individual pixels, raster software can only ever interpolate and must decide where to set a sharp point for a pixel of your lineart and where to set the next adjacent pixel for the fill color, and these effects can then arise.
If @sooz guessed right, then try to double your lineart layer and fill the bottom layer with an extra one or two pixels of grow or add some feathering as well, so you should be able to make the effect invisible, technically it is unavoidable, but you can make it (almost) invisible by “underfilling”.
And the monitor you use adds to the problem too, because also monitors use pixels too to show you your work and if the pixel-borders of your display (extremely tiny nowadays) and those of the picture you paint are unluckily “paired” it can add even more of this effect to the picture you see.
All in all, this behavior is to expect and normal, and you are probably the thousandth user to ask this question. But this is by no means a problem, it’s just to show you that you’re not alone.
sort of, I’ve also tried just manually coloring it in when selecting areas on my piece with the wand tool and I get the same effect, unsure how to really change or remove it since stuff like the “grow” property on the bucket tool doesn’t really help either
You can try increasing the Threshold value when using the Fill Tool in Fill a Contiguous region mode or when using the Contiguous Selection Tool.
The problem is that your lineart is fuzzy at the edges and tends to close up on sharp pointed ends. This is a common problem for some types of lineart.