The example shown was created using a slow and inefficient method, so I would like to know if anyone has any other methods/techniques on creating this effect, thanks!
What if you made a layer copy of the first image, pasted it into a 2nd layer and then then moved the 2nd layer over just one or two pixels. You would be able to make the lines thicker and even recolor a layer to add some kind of extra outline.
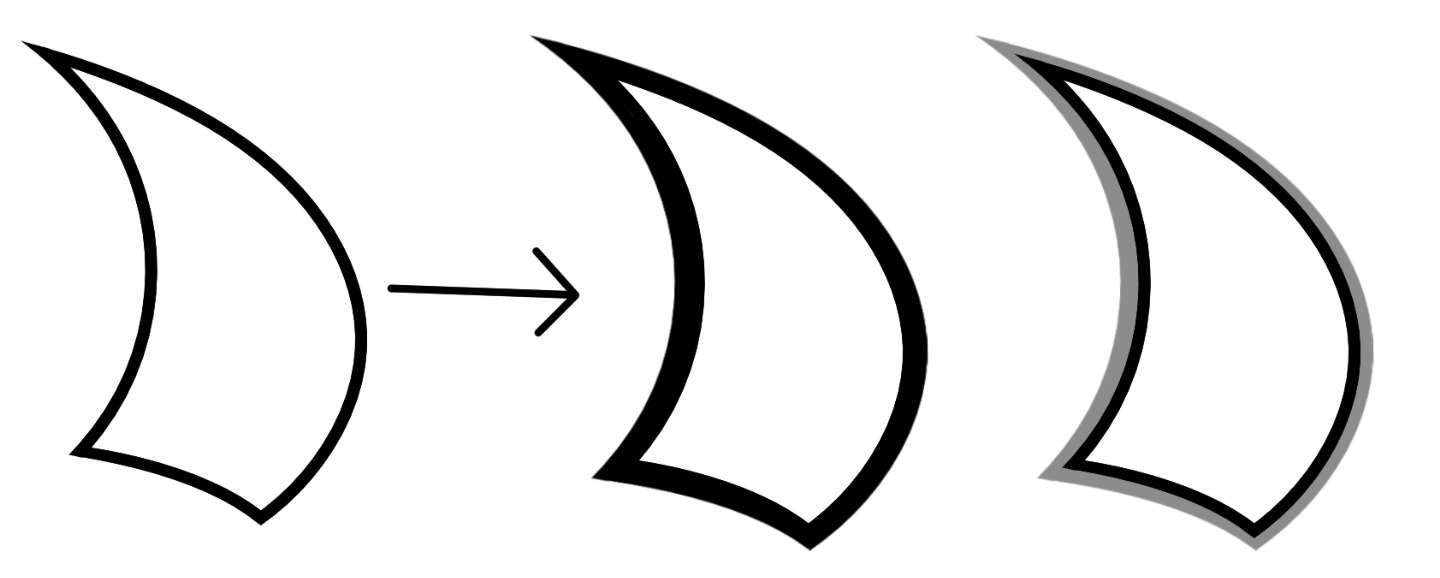
Would be good if there was some explanation on what is your inefficient method, describing the steps as just an image is not enough to fully understand what is happening.
If you need different line weight along the lines forget about using vector layers as you can’t really change the line weight along the line.
You can get some line variation with some brushes like basic 5 size but that can be hard to control. What i do is i do a simple lineart then i manually thicken some lines by making a new line to close a shape then fill it. If you have 5.1 beta you can also try using the fill enclosed to fill in faster.
Though is is still not optimal, but it’s the way i found to work in krita.
I should have described exactly what I did in my first post, my bad
What I did to make the example was to copy the first layer (with the lineart) and paste it to a second layer above it, then I move the second layer slightly over the outside of the shape to make it overlap the first layer.
This only gives me a section of the shape with the outline that I want, so I would have to repeat the process multiple times to fully enclose the shape with the outline, piece by piece.
I would also have to do some erasing to make things neat. Finally, I would merge all the “pieces” together to form a single layer, containing the outline for the shape.
But I suppose manually making the outline like you described is an option too.
Not sure, I fully understand what you’re trying to achieve, but how about this:
Create your shape as a solid - either filled vector shape (no outline) or pixel - using the outer colour. In case of vector, you need to convert it to a paint layer (you could keep a duplicate as a backup).
Make a selection of that shape (multiple ways to do that - one would be to select opaque if it’s on its own layer)
Now the “magic”: shrink selection with the desired line width as amount (uncheck “shrink from image border”)
Fill with inner line colour
Repeat shrink and then delete the inner region (or fill with third colour etc.)
Unfortunately, if you want to edit the original shape, you’d have to go through the whole process again. But at least it’s precise and easily reproduced without fiddling around with copying, positioning, merging layers etc.