Painting with Patterns

This tutorial is in relation to this topic:

So, first of all thanks for @sooz and @AhabGraybeard for the help.

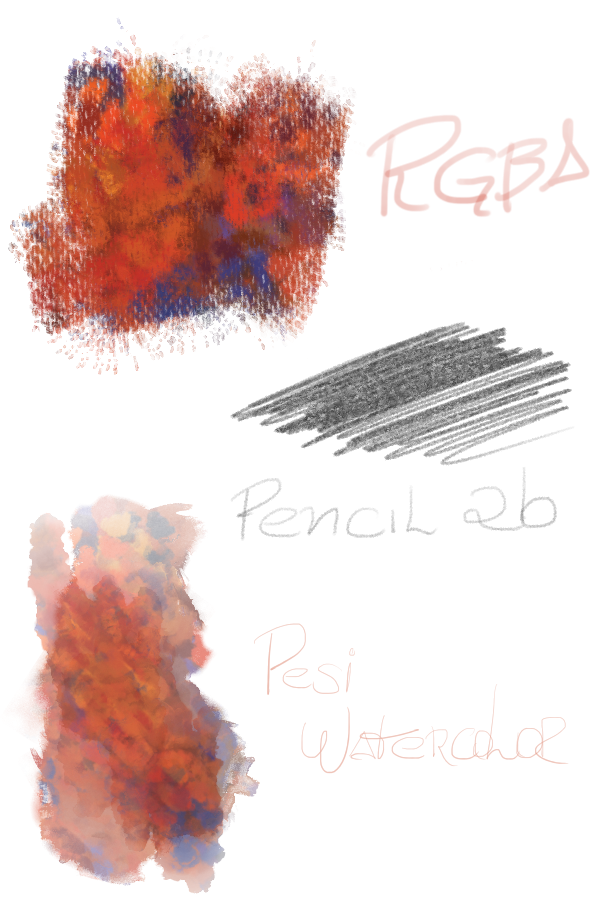
One of my favorites techniques for coloring is to lay the most amount of color variation possible, then start sculpting which colors i want to define shapes and forms. One of the possible tools to the task is applying color variations through the Hue, Saturation and Value setting in the brush editor.

Another one, my personal favorite, is to use patterns from references or made by yourselves. Here’s what i mean:

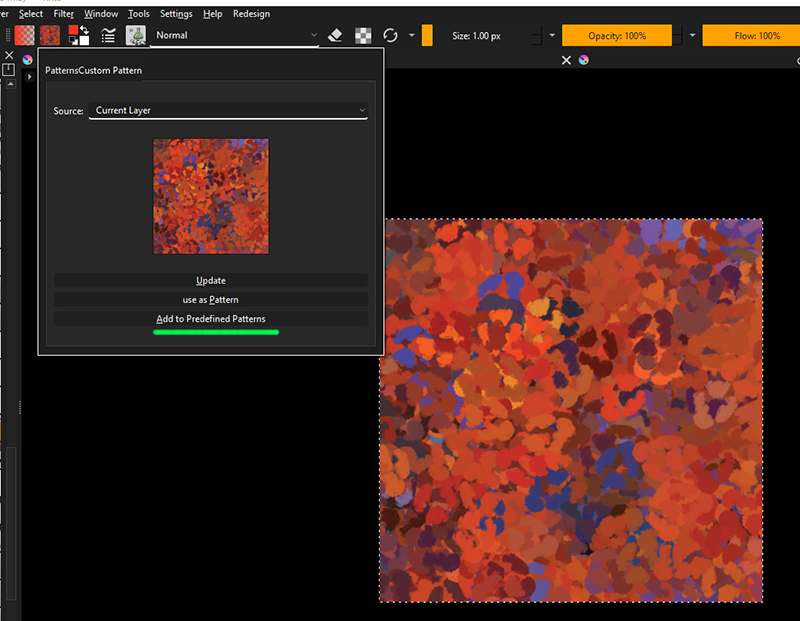
Open a desired pattern (for this example, i’m using a pattern provided for free, for Photoshop, by Creators Couture, on their website), but any will do the trick. I’ll be using a PNG with 500x500 pixels.

Once opened, go to “Fill Patterns”, then “Custom Patterns” and “Add to Predefined Patterns”. This will save the current Pattern as .PAT in the Krita folder. (Click “Update”, in case your don’t see the pattern load in the preview) With the pattern saved, select it.

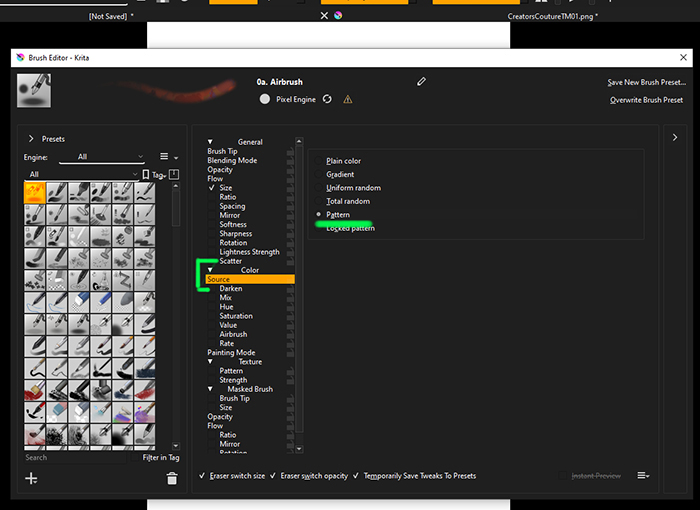
After that, open the Brush Editor, look for the “Color” tab, and right under it “Source”. The option we’re looking for is “Pattern”, click to select.

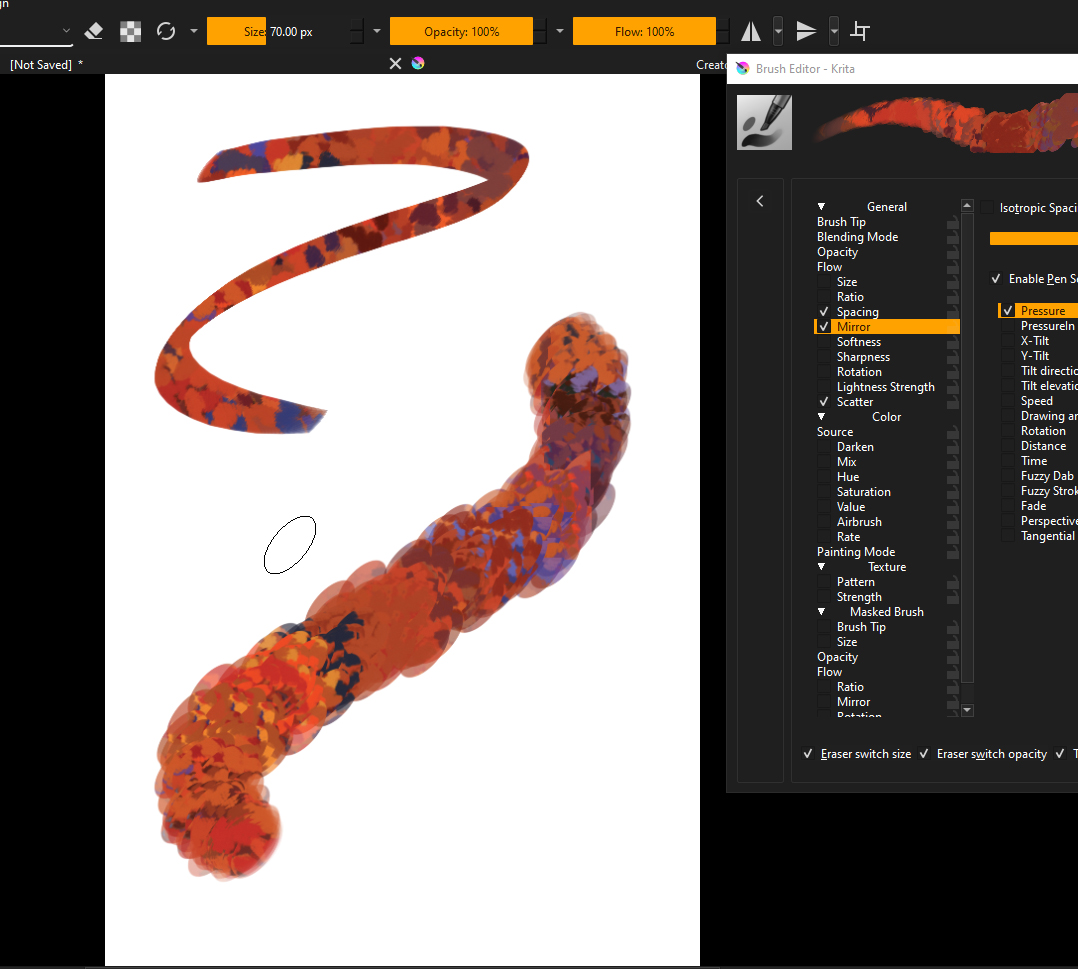
Done, now you can paint with patterns. This works for “Pixel” and “Shape” engines (that i’m aware)

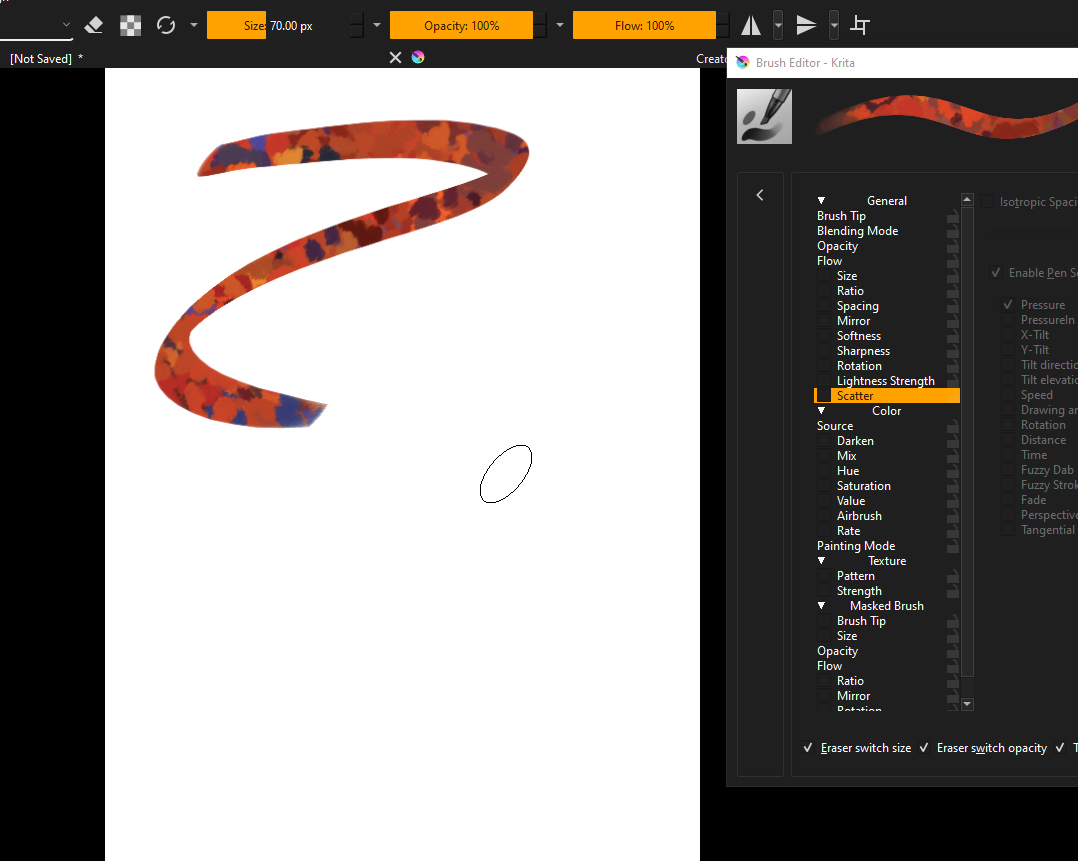
Now comes the part of “How or where to use?”, so let your imagination play a bit. This can be used to apply certain textures (clothes, for instance), or even colors, to your paintings. Plus, remember that we are sourcing the “colors”, not the pattern themselves, which means you can still add patterns and other setting to the brushes, customising effects even more. Very few tweks can get some really cool impressionistic brushes, for example.

Hope this can bring some fun to you all!.
Take care!

If i made something wrong, or someone has any question, i’ll be glad to help!

18 Likes

This is great! Thanks for being so generous with your knowledge, @Tamoha.

1 Like

Thanks you for the time and kind words!

Wow! I gotta check this out later! Bookmarked for my reference. :+1:

1 Like

A good and simple explanation :+1: I hope you can discover more techniques and can make tutorials explaining them :slight_smile:

2 Likes

I like to apply the pattern on a separate layer and edit it with transparency mask and different layer modes and opacities.

There are free patterns here. :slight_smile:

2 Likes

Yeah, that works too. Even though, being lazy like me, i’ve find this way kind of annoying, having to manage different patterns and different layers haha

The good thing is that you can combine both ways (depending on the pattern used).

Often something i do when starting the coloring process, or trying different color schemes, is to use this technique (from the tutorial) with Hard Light brush mode. Very quickly you can build color on the canvas. For a more “painterly” process, i think this process can build colors pretty quickly with a good amount of variation.

1 Like

I am very new to Krita, this is very interesting. Is there a way to handle the scale of the pattern when it is used from the color?

In the toolbars of Krita you have by default 2 sliders, and if you click on the small triangle in front of the slider then a drop-down selection folds down there you can switch the slider to Pattern Scale.
The more comfortable solution in my eyes is to search for ‘‘Brush Option Slider 3’’ or ‘‘Brush Option Slider 4’’ in Krita via ‘‘Settings’’ >> ‘‘Configure Toolbars’’ and add a third or even fourth slider to be able to use Pattern Scale and Flow comfortably.

But if this will work in the Brush Editor and with this technique, I have not checked by now.

Michelist

3 Likes

It seems the Colour pattern can’t be scaled but it can be used at the same time as a Texture pattern in the Brush Editor and that can be scaled:

3 Likes

@AhabGreybeard, cool! I was going to test it after trying to answer another question, but now your unbridled joy in experimentation :hammer_and_wrench: :mag: :microscope: has beaten me to it. Thanks! :+1:

Michelist

3 Likes

Thanks @AhabGreybeard and @Michelist for helpful answers.

The best bet maybe would be, for now at least, use a brush with some marginal scatter to generate some randomized Colors. BUT you still stuck to the pattern with same (original when saved) size.

Perhaps having the desired Pattern in different sizes helps.

Hope this helps.

1 Like

The interesting thing would be to be able to use the same scale in both options to generate the relief

You could try to simulate that by making a Colour pattern of a suitable size.

So, i tried a couple of things, not sure if helps.

In the Colors tab, at Brush Editor, click the “Lock Pattern” option. Then use the Spacing, or at the Colors tab again, click the “Airbrush” and select “Override Spacing”.

You won’t be able to resize the pattern, but you can resize the brush. Downside is, however, the pattern is stuck to a sample of the pattern, which you don’t have control over.

2 Likes

I tried it, an I LOVE it :smiling_face_with_three_hearts:
Thanks for your easy to understand explanation :hugs:

1 Like

Glad to hear it was helpful and fun.

Hope to see some of your experiments in the future, if you feel confortable sharing.

1 Like