So I followed almost every tutorial about moving grouped layers together but it still doesn’t work for some reason.
When I want to animate these grouped layers from left to right there’s only one layer that actually moves.
I’m trying to solve this problem for days now and it’s getting pretty frustrating.
Can anyone help me on this one please?
Thanks in advance.
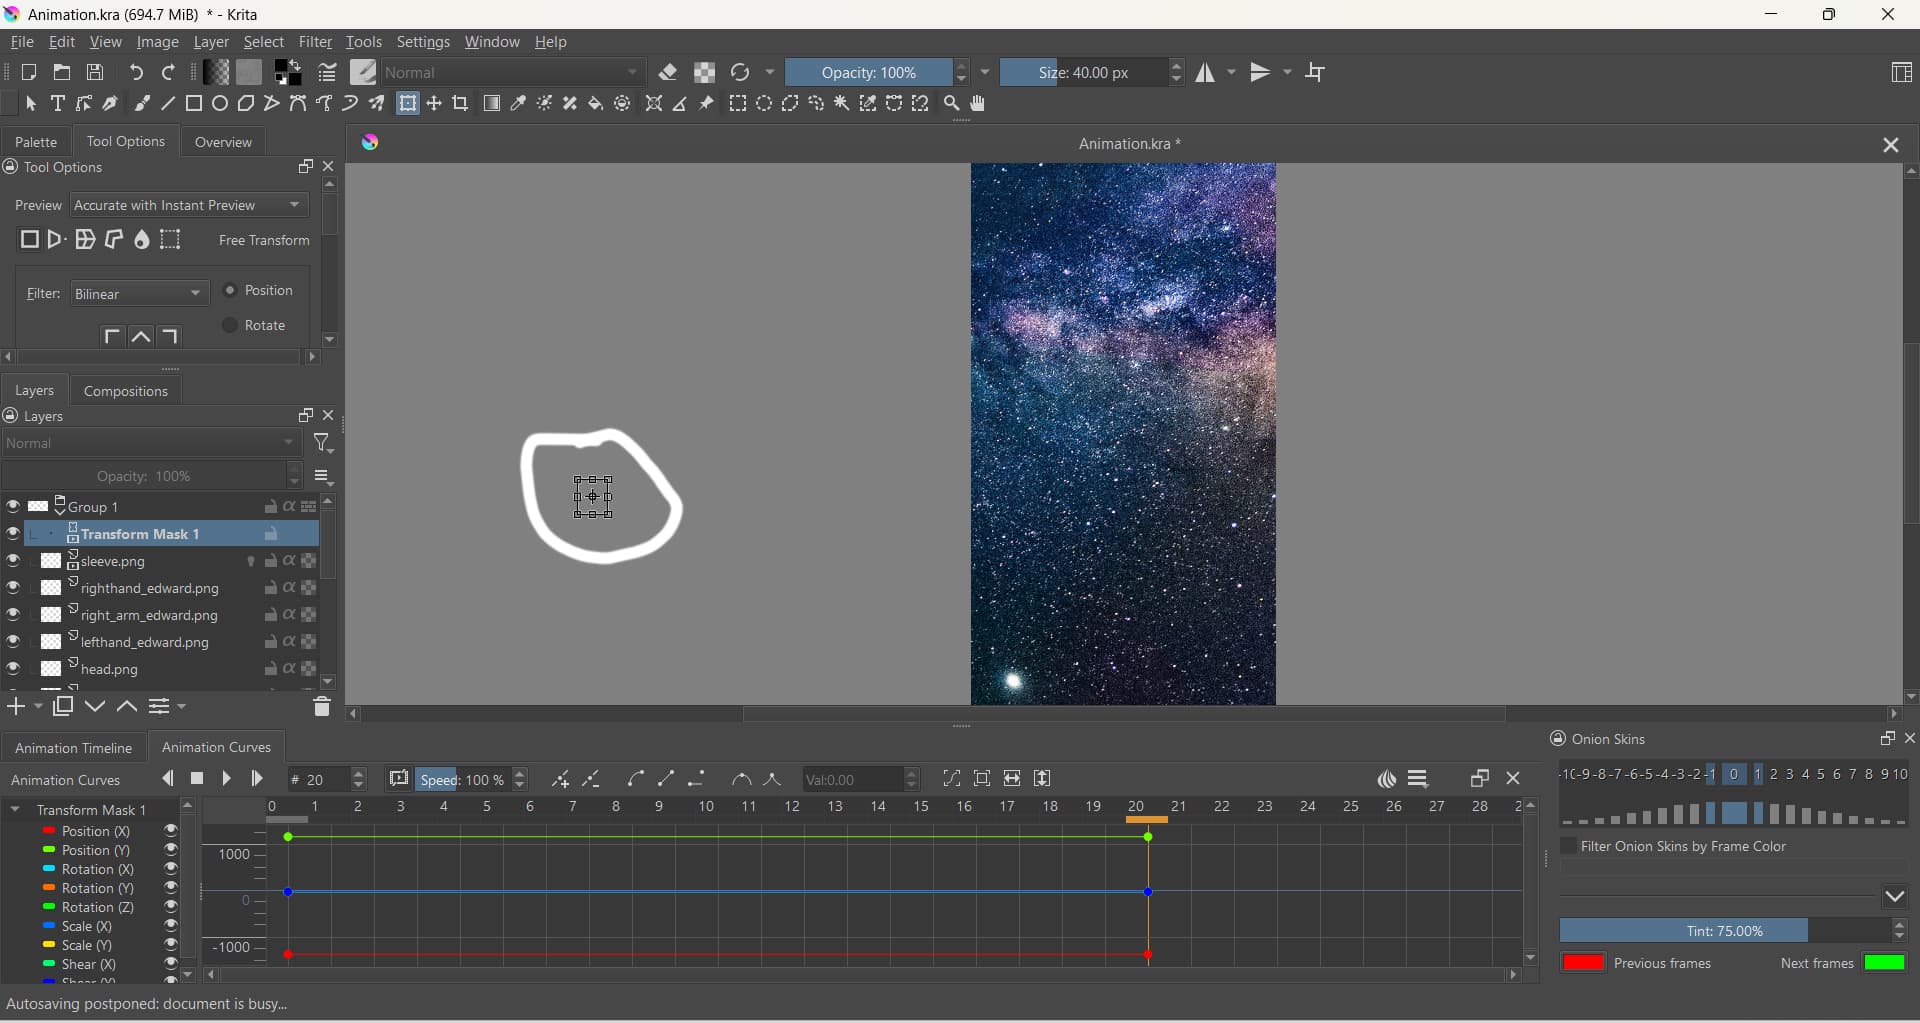
You can see from the Animation Curves docker that the X and Y positions change from frame-0 to frame-18.
All the coloured circles move at the same time together as the animation progresses.
Don’t use the Move Tool, Grab-drag the keyframe coloured control points on the Animation Curves docker to move them to where you want them to be.
You can select a coloured control point and type the required value into the Val box if you want very precise control.
If you ‘misplace’ a Transform Mask in the Layers docker, you can grab-drag it onto the correct layer/group.
You can also Duplicate a Transform Mask and grab-drag the duplicate onto another layer/group.
Ok, so I followed your example (with the circles) and it worked fine.
So I just deleted everything and started all over again. I still get the same problem.
There may be some confusion between use of the Move tool to move content on a layer and use of the Move tool to control Transform Mask parameters, for which the Move tool must be used on the Transform Mask itself.
Also, if you have an animated paint layer inside the group, where the group has an animated transform mask on it, it’s best to turn off the visibility of the animated Transform Mask before working on the animated Paint Layer, or you can get very confused about where things are.
What you see on the canvas is not the content of a Paint Layer, it’s the composited content of all layers, including the effects of any Transform Masks and that can will vary from frame to frame when using animated masks and layers.
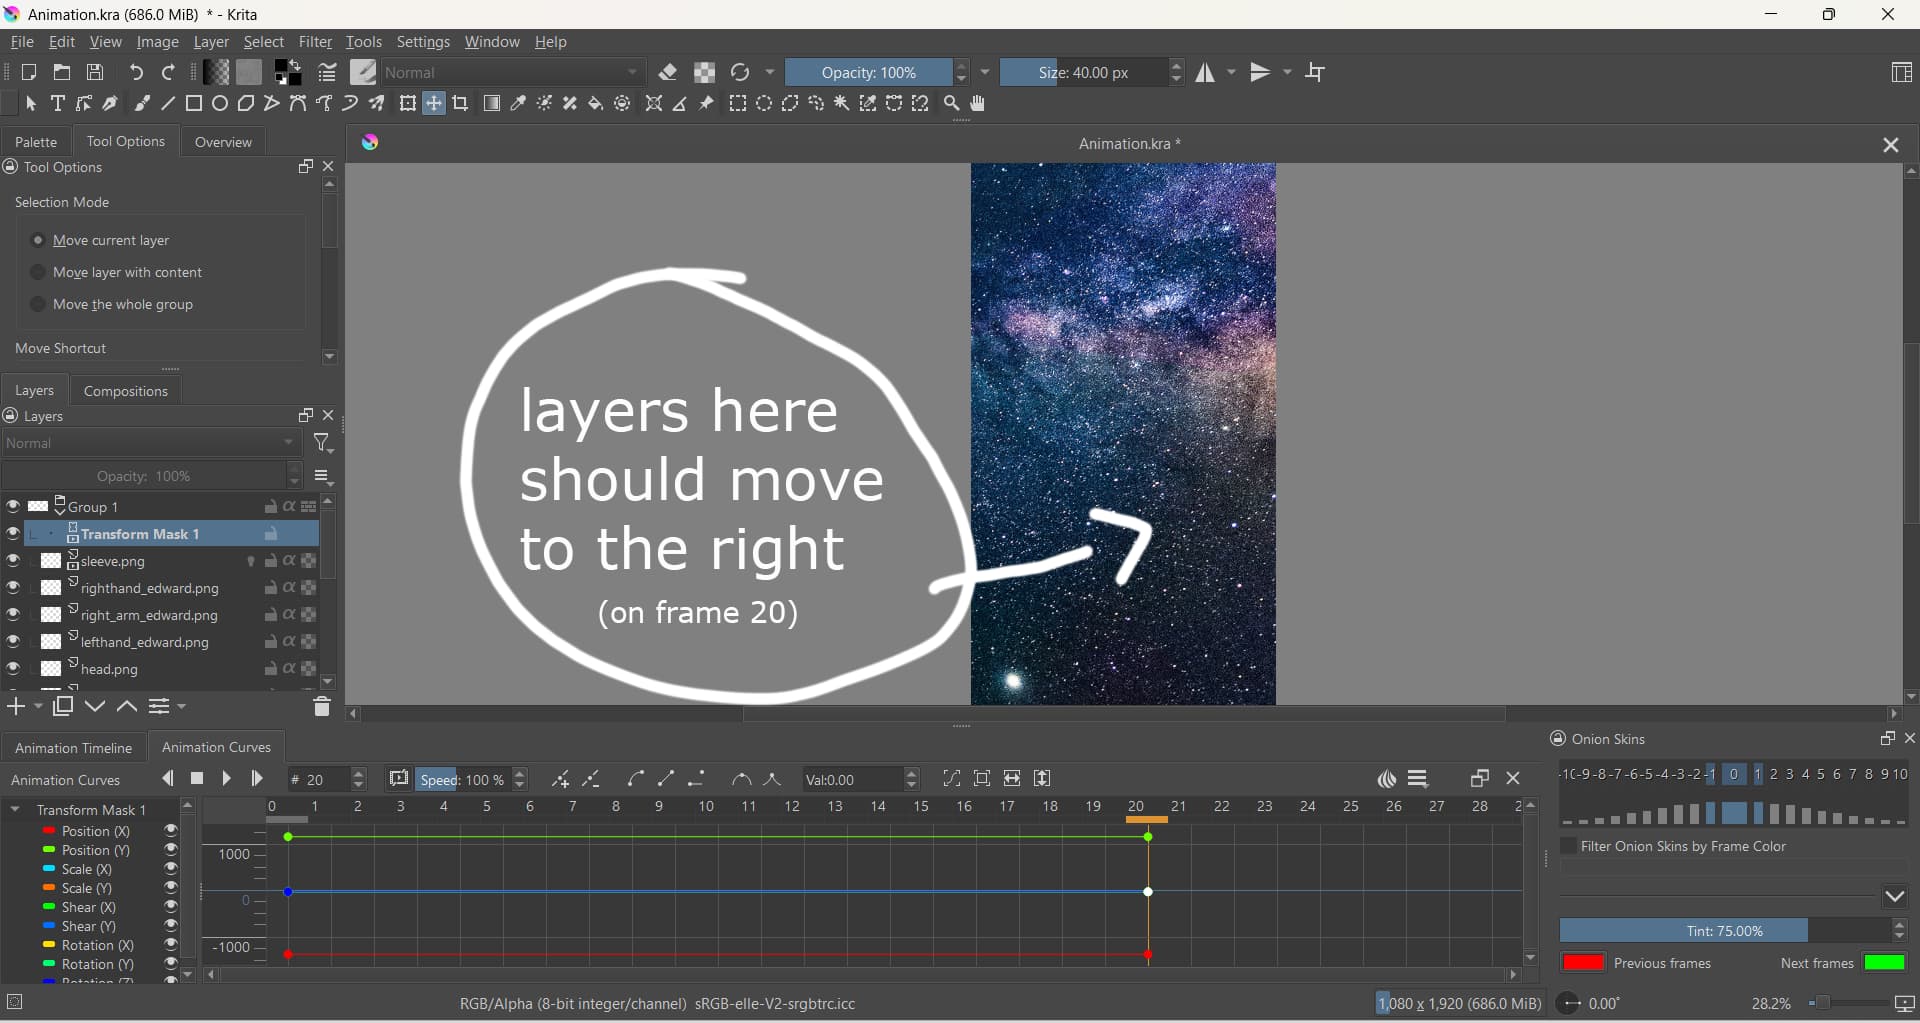
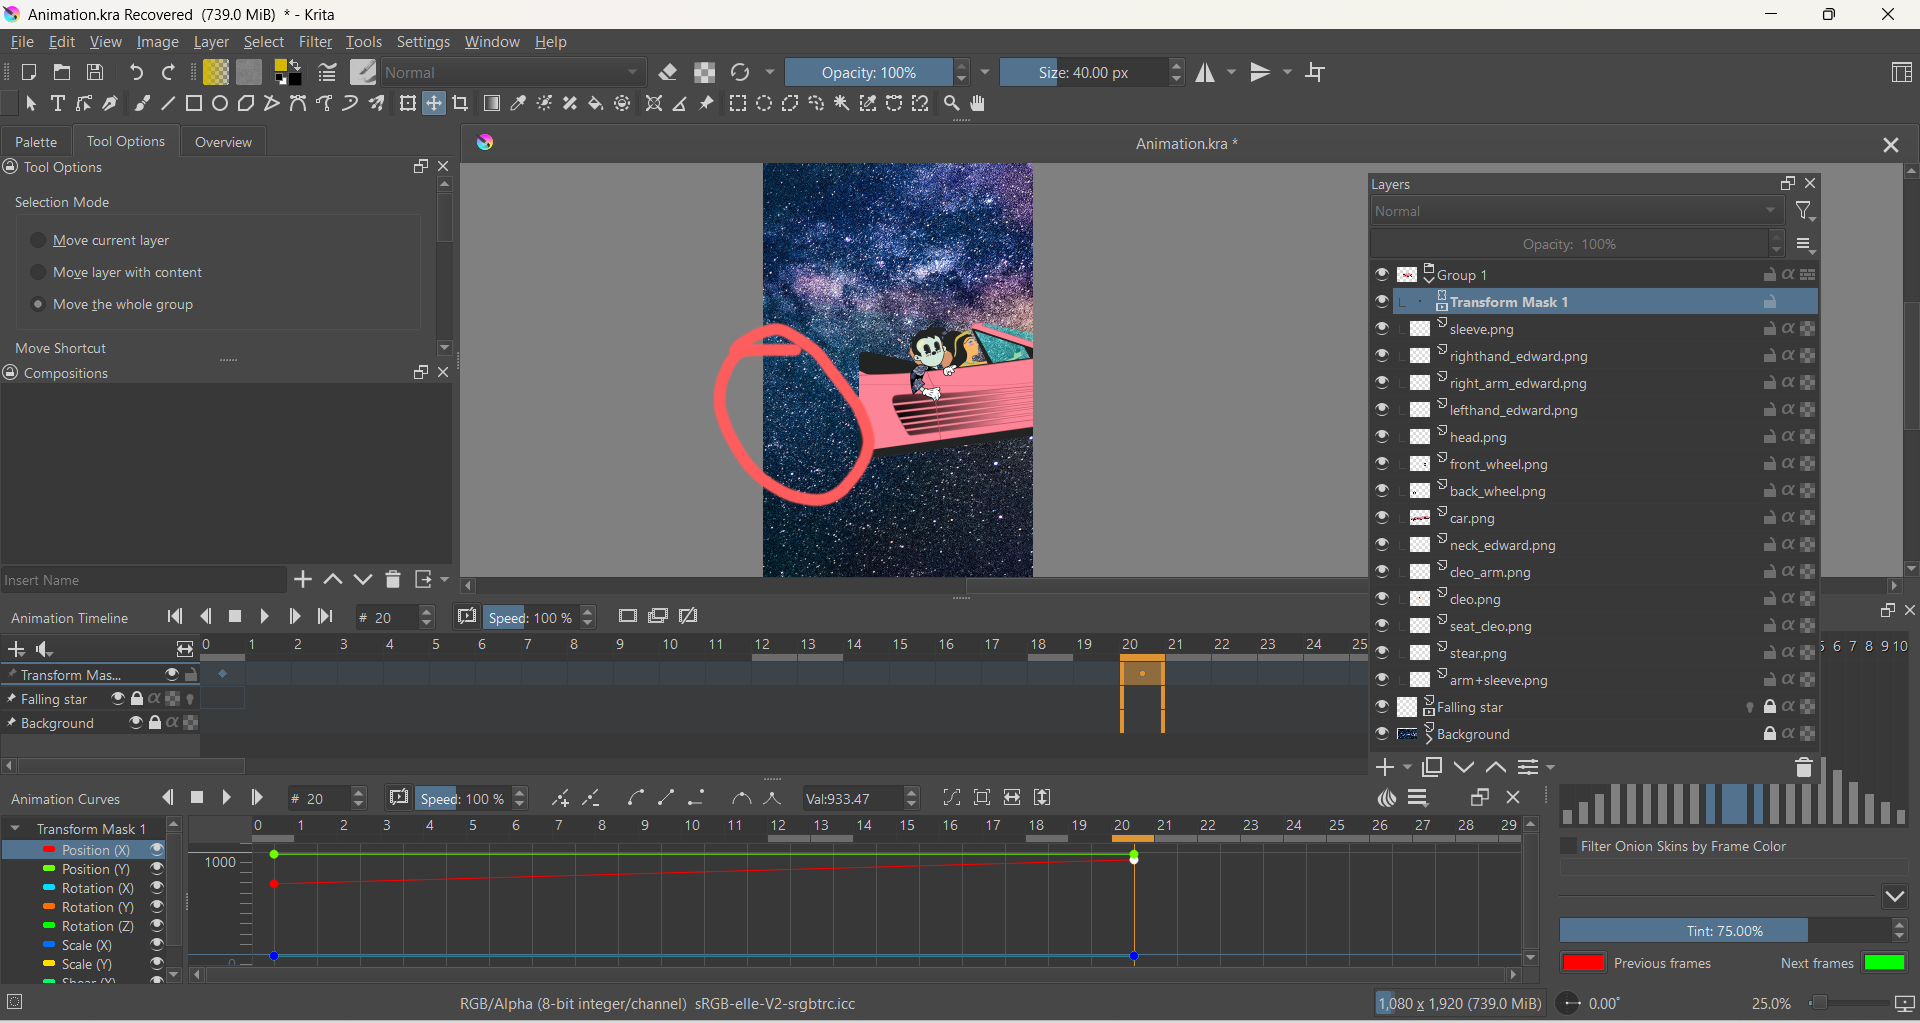
So, can you show a full screen screenshot again with Layers docker showing.
Also, describe what effect you want to happen to what component(s) of the image.
So everything inside “Group 1” should start first off screen (1.) and then enter the screen (2.)
Just by moving from left to right in a smooth transition.
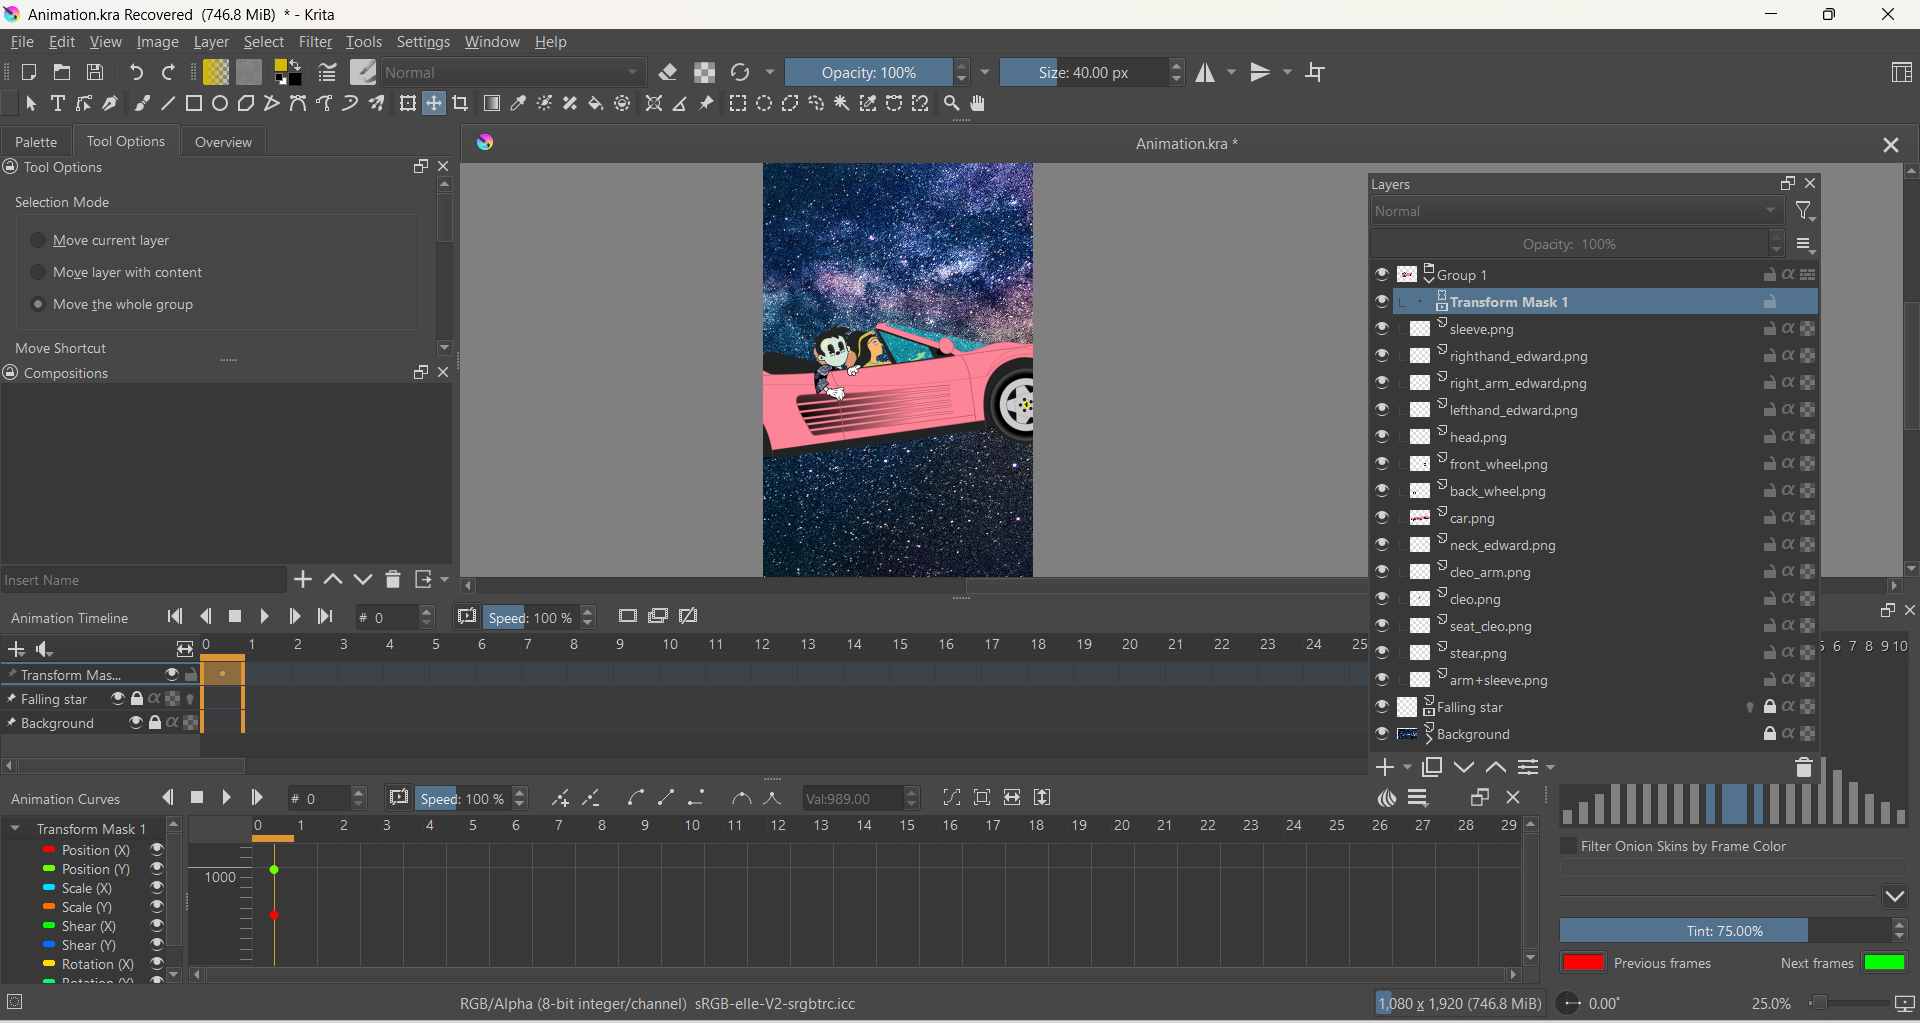
Apparently, the contents of the group is a collection of layers that make up a character called Edward and a car? The group is over an astronomy stars/nebula background layer?
I can’t see Edward or the car.
This is probably because the animated transform mask is applying a -1000 px X axis position transform to the group.
Also, again, that animated transform mask does not apply any movement at all.
What do you see if you disable (turn off the visibility of) the animated transform mask on Group 1?
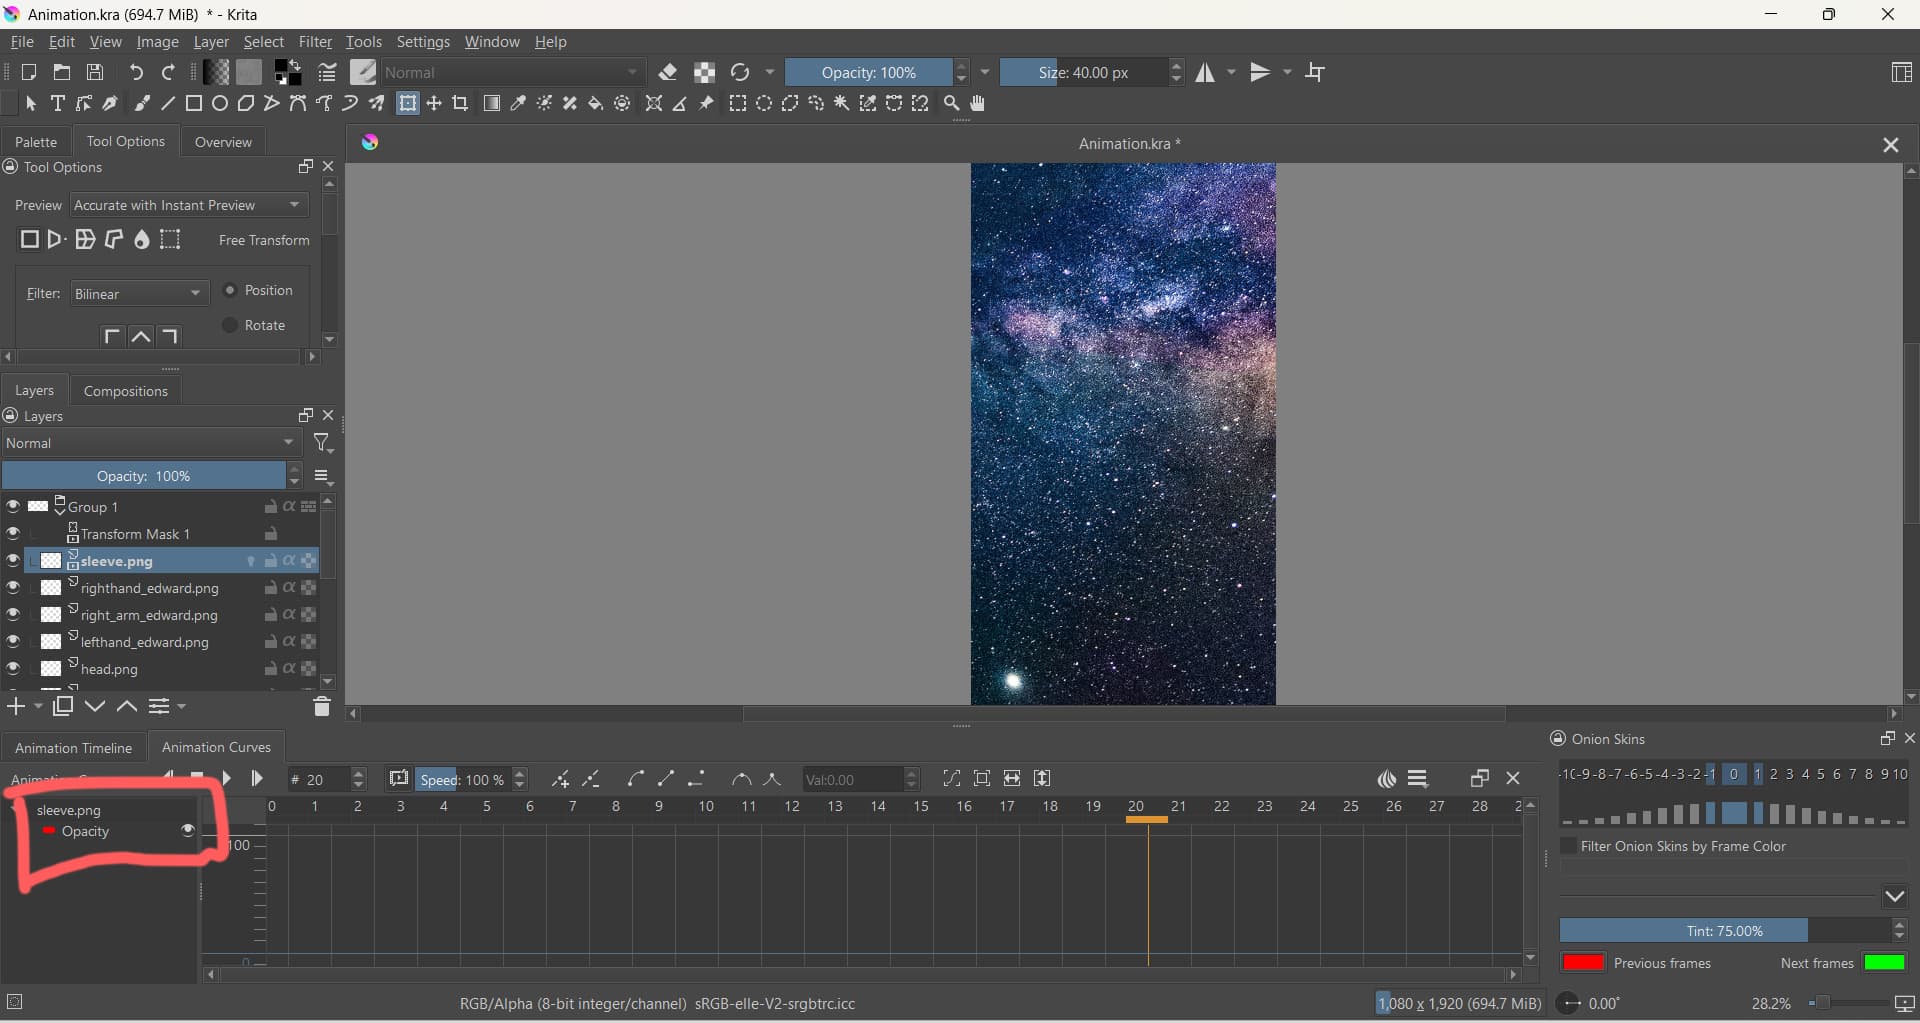
For the screenshot where the animated transform mask is not moving anything, go to the right hand side of the red line (Position X control) and click the red dot so it turns white to indicate that it has been selected.
Grab and drag that dot vertically upwards so that it’s about +700 instead of -1000.
You can use the Val box to type in an exact value if you wish.
That will make Edward and Cleo and the car move horizontally to the right (increasing X value) across the canvas during the animation.
How are you adjusting the position of the car?
Do you change the values in the Animation Curves docker for Transform Mask 1?
Is that missing part on its own layer or is it part of a larger layer image?
In case of unexpected appearance, try turning off/on the Transform Mask.
Also, I’d recommend that the car is in the centre of the canvas when the group Transform Mask is turned off. That way, you can animate sleeve.png with less possibilty of confusion.
The animated Transform Mask on the group can be used to move the car off canvas to the left for frame-0 then move it to the right for frame-20.
So I just click on the dot (for example: Position X on frame-20 and then I’m sliding it up verticaly).
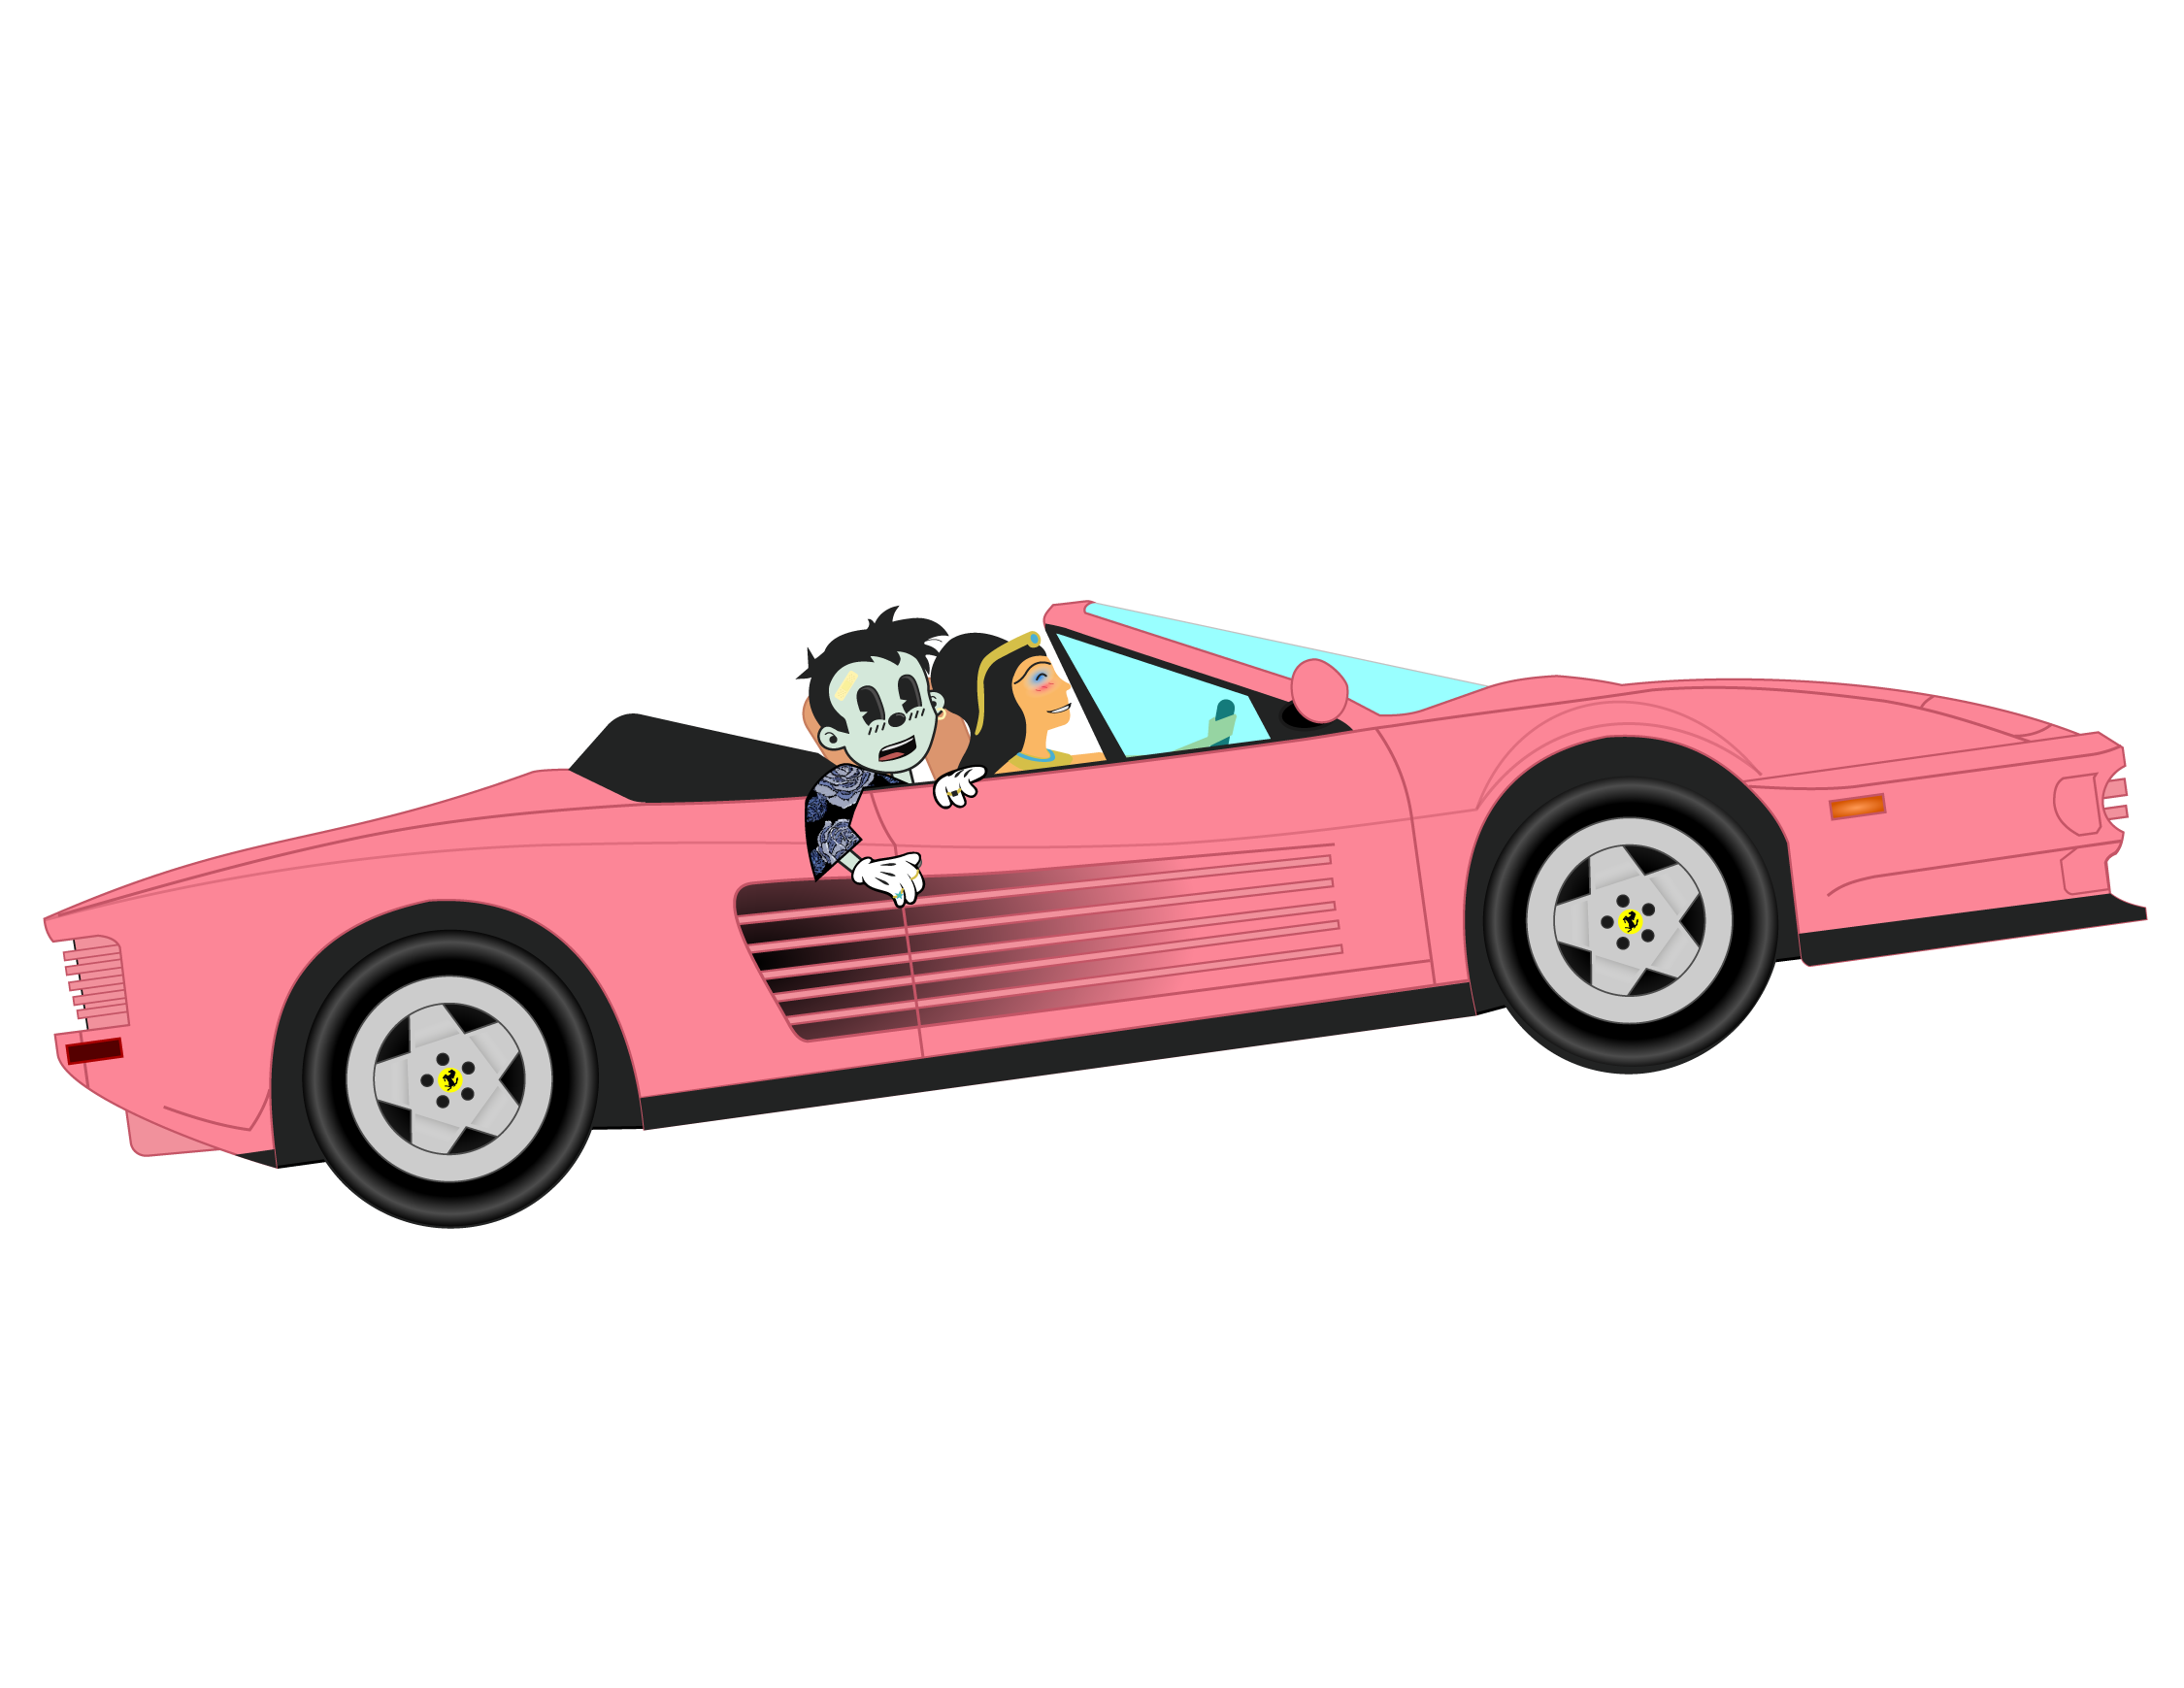
The missing part is part of the car. Here’s the image of how it normaly looks:
You can change the vertical (and horizontal) scale of the Animation Curves docker with the vertical and horizontal arrows at the top.
You can also move the curve/graph up and down by mouse-wheel scrolling on it.
If you’re not using Scale(X) or any other parameter then you can turn off their visibility using the ‘eye’ icons to make the remaining parameter curves easier to see and find and adjust.
These are all skills and techniques that should be learned and practiced before you try to do anything complicated with animations.
You can also stack the Animation Curves docker with the Animation Timeline and tab switch between them so they both have more vertical space.
I already did everything you told me, and thanks for that.
However, even tho I’m doing everything correctly, Krita needs to fix these bugs,
for example like the car that suddenly appears in half etc.
I think I might swith to another program because I’m losing a lot of time with fixing
problems that doesn’t appear to be logical.
As it is at the moment, can you Save it then make the .kra file available using a link to a file sharing service/website.
I’d be interested to have a look at this.