Weird because i have tested the 4.3 git 908bd91. dk1 and works fine. i am going to record a video to show how i use these brushes.

2 Likes
Oh… that seem to be my bug. For some reason “Preserve Lightness” gets activated for normal brushes when it shouldn’t
Hi, @Voronwe13, @RamonM, @Szilo!
I have fixed a bug in the latest package, here is the fixed one (dk3):
Please compare it with the original package (dk1) and tell which light mapping algorithm you like more. In (dk3) lightness is mapped linearly over the current painting color, and in the original package (dk1) light is mapped in a non-linear way, which should be a bit more tolerant to brush masks creation mistakes.
1 Like
This is awesome guys, you are great. I will test them tomorrow to see what fits my needs but is not only my choice, so is a good oportunity for all to test it and share opinions and ideas
1 Like
I already want to try those brushes, it will be great, thanks a lot to you and to the whole krita team for doing such amazing things !!!
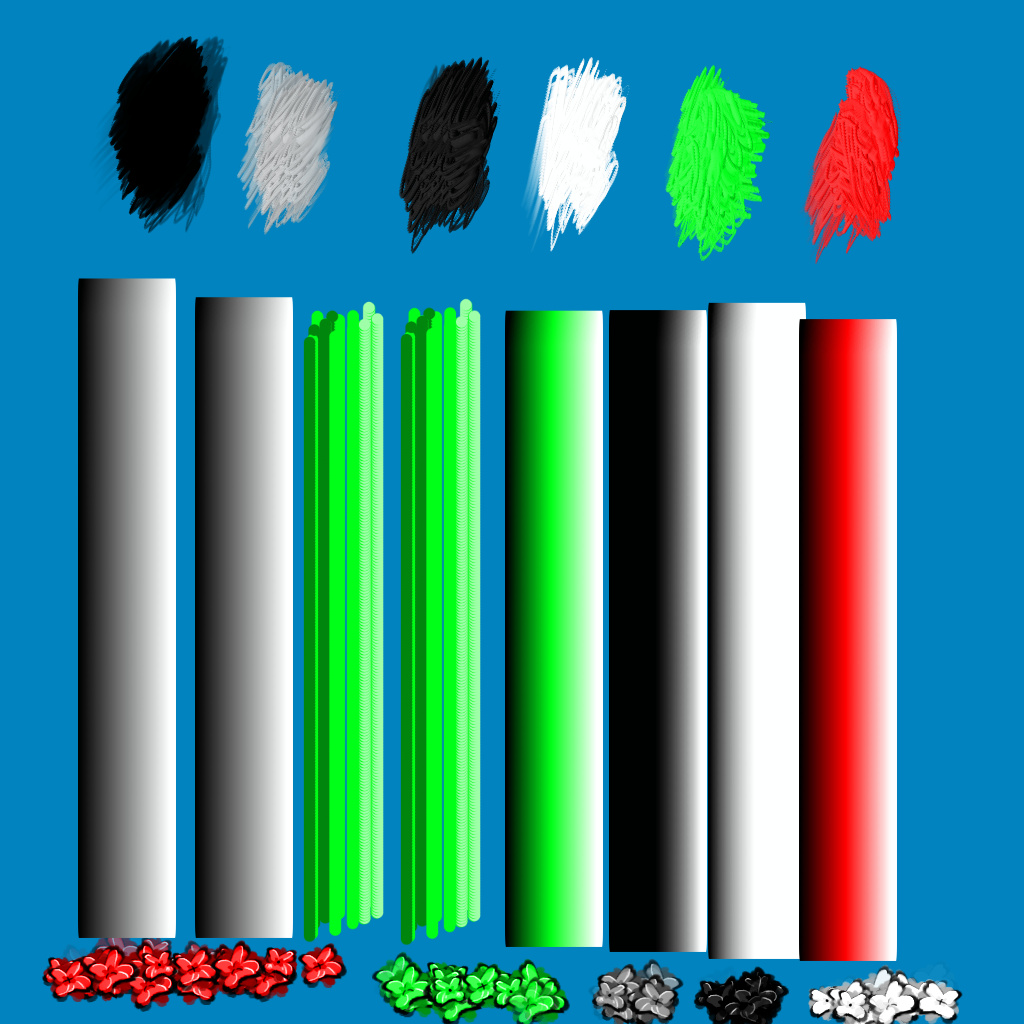
This version works, but the color gradient is off. In the attached image I show a brush that is a perfectly smooth gradient from white to black, first as the original image (alpha and lightness options turned off, so it’s strictly a stamp), and then with lightness turned on, and you can see that it’s quite off. The second set of strokes is another one where I show a quick brush I made, this time with color in the original image, and then using that tip as lightness map, and the dark green areas turned black and light green areas turned white. The dark green areas should only be a bit darker than the middle of the brush, and light green only a bit lighter.
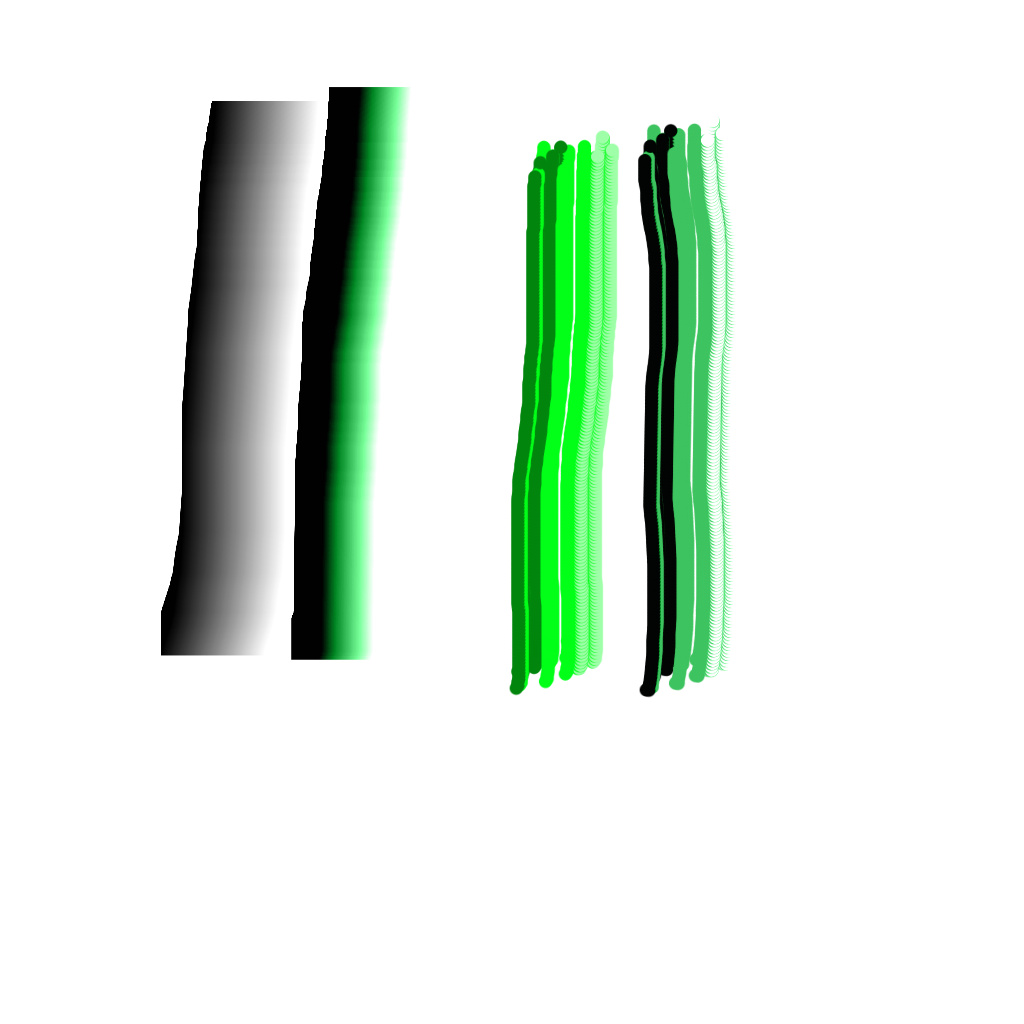
Here’s the same experiment with dk1. It’s a lot better, though I would be curious to try it with a strictly linear gradient, instead of the quadratic one I used for the original code.
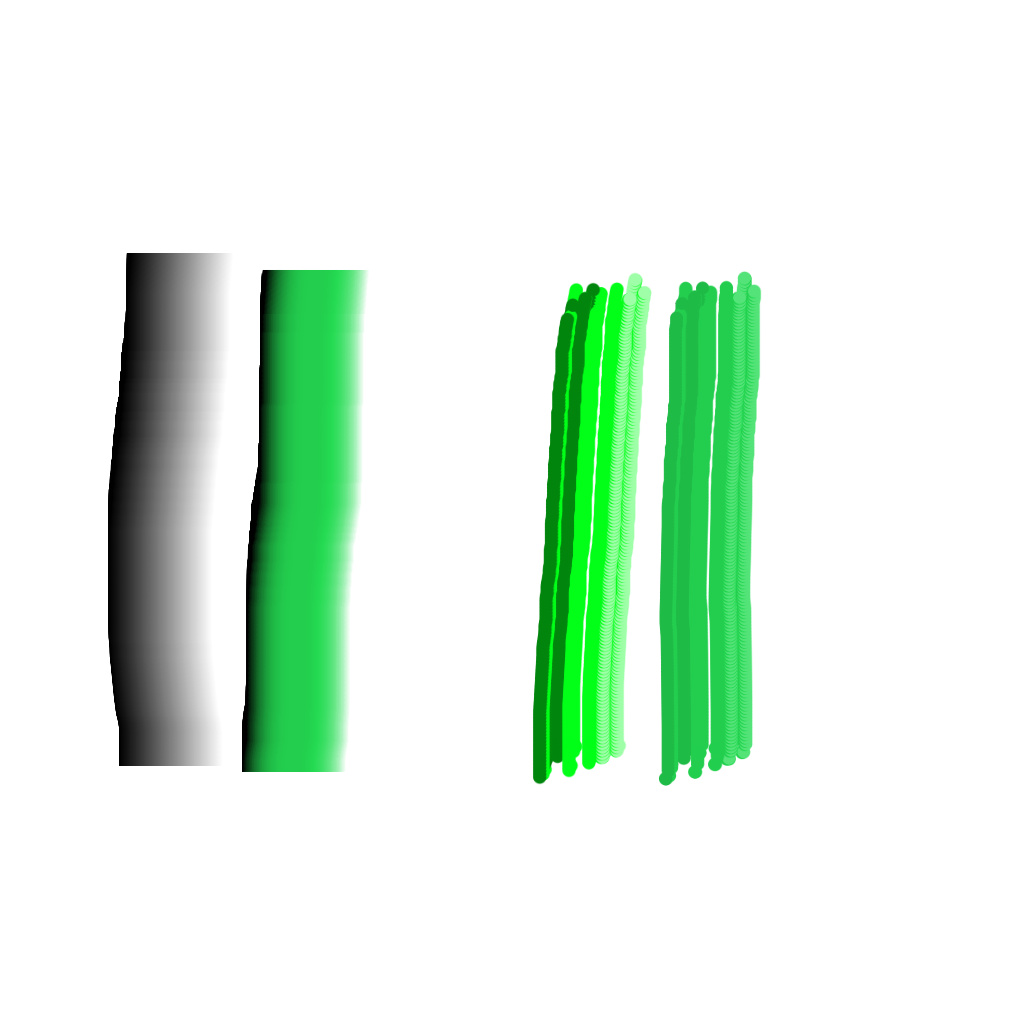
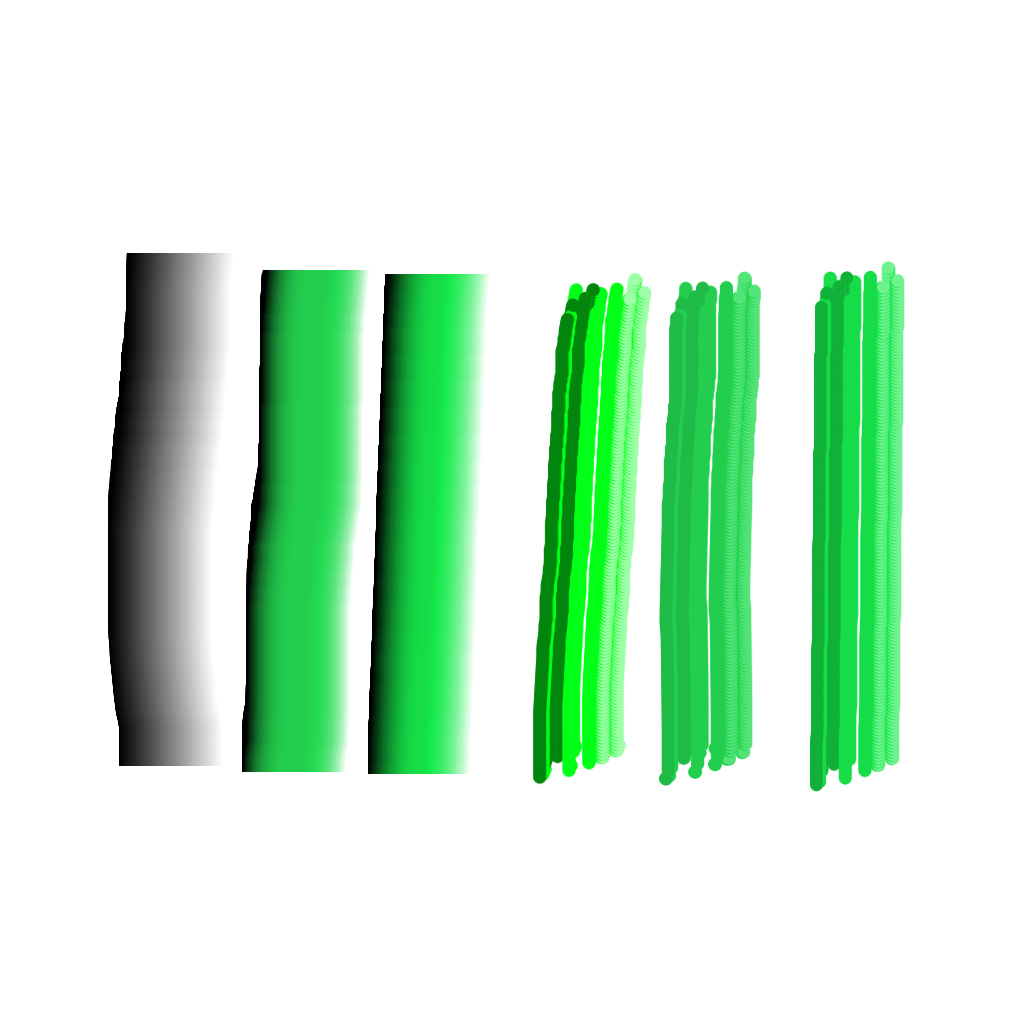
Here’s the same picture as above, but the third line is with a linear gradient. It’s a subtle difference on the gradient brush, but more noticeable on the other brush. I think the linear version is a little better.
1 Like
Hi, @Voronwe13!
Is it theoretically possible to make the brush tip add “white specular” to the brush? Looking at the formula, I feel that it should be possible, but your images seem to not prove it…
UPD:
I mean, when emulating the oil paint, we might really want to add bright speculars to our stroke. They might look as really small spots at the tip of the brush. And, obviously, the brush image should be prepared in a special way for that. But the engine should technically support that.
1 Like
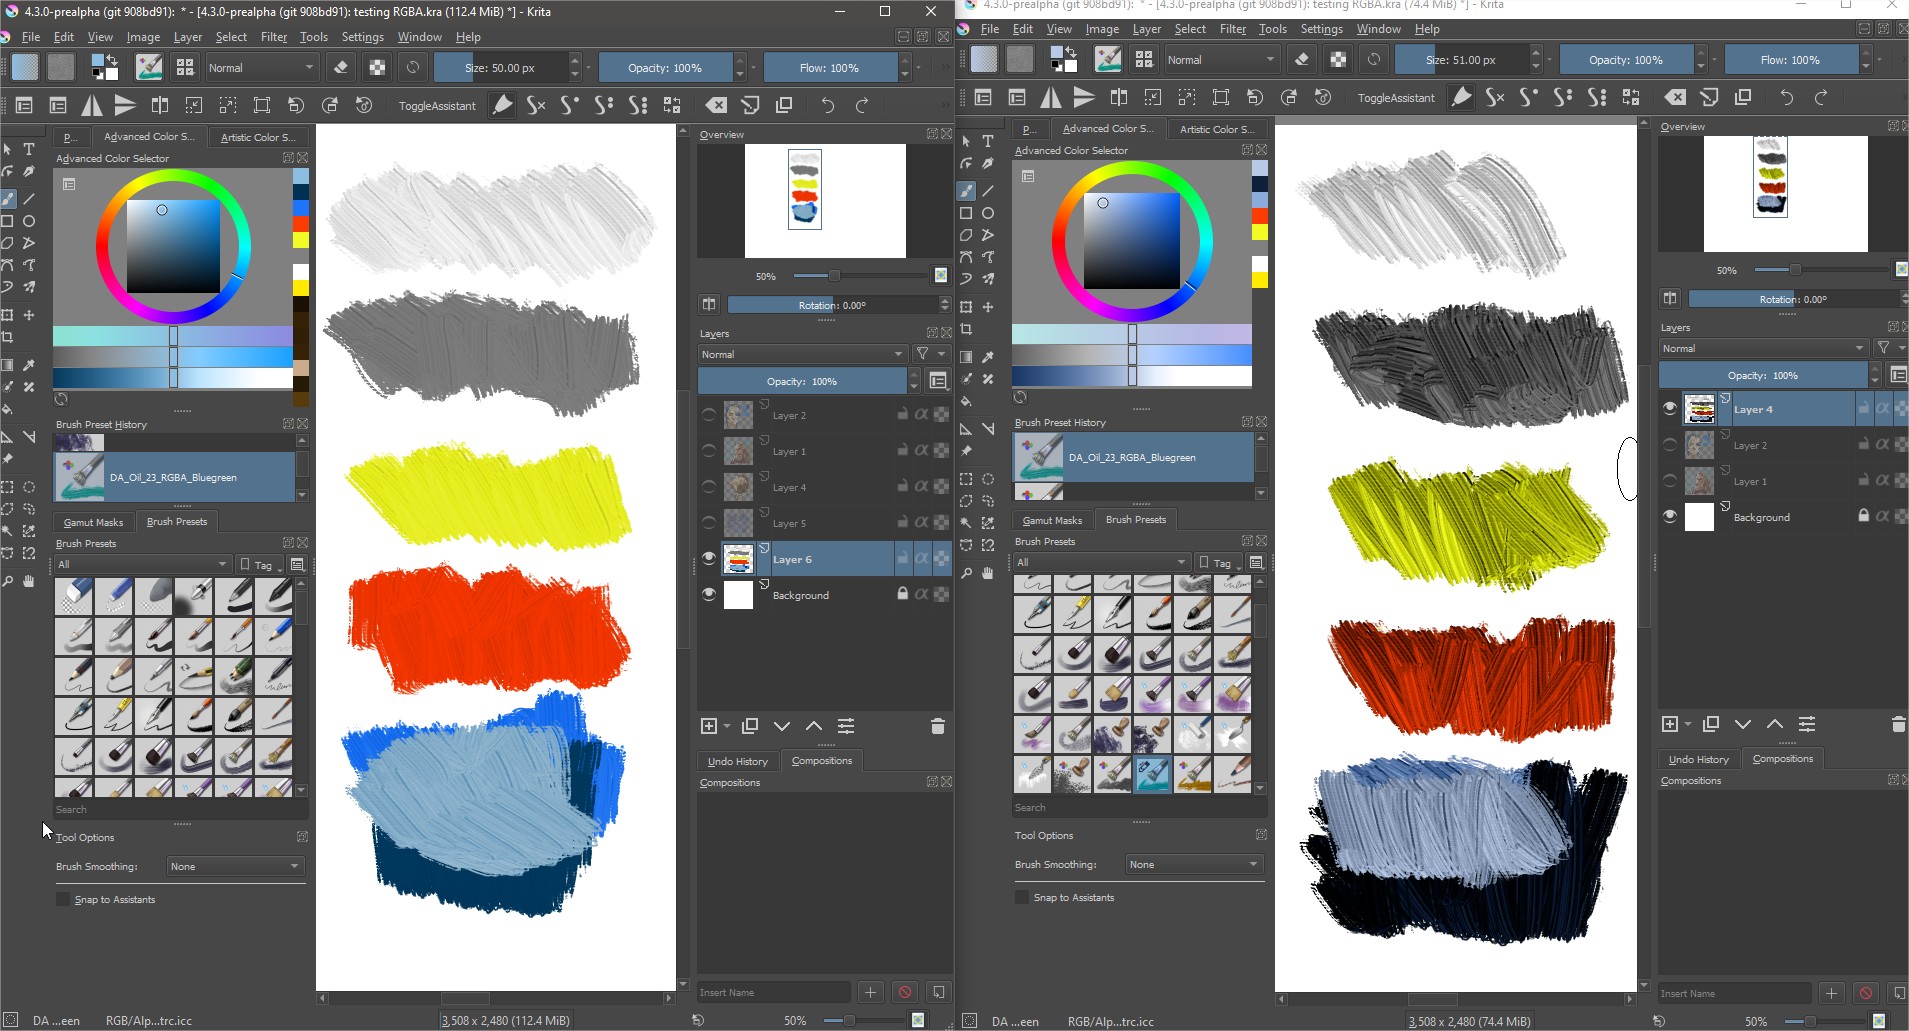
Hi all, i am doubting bewteen DK1 (left) and DK3 (right). I have done a video to show what i mean here.
https://drive.google.com/file/d/1n0xr_2NWc-7MHJqvjXRb7qkk7vuOAFbl/view?usp=sharing
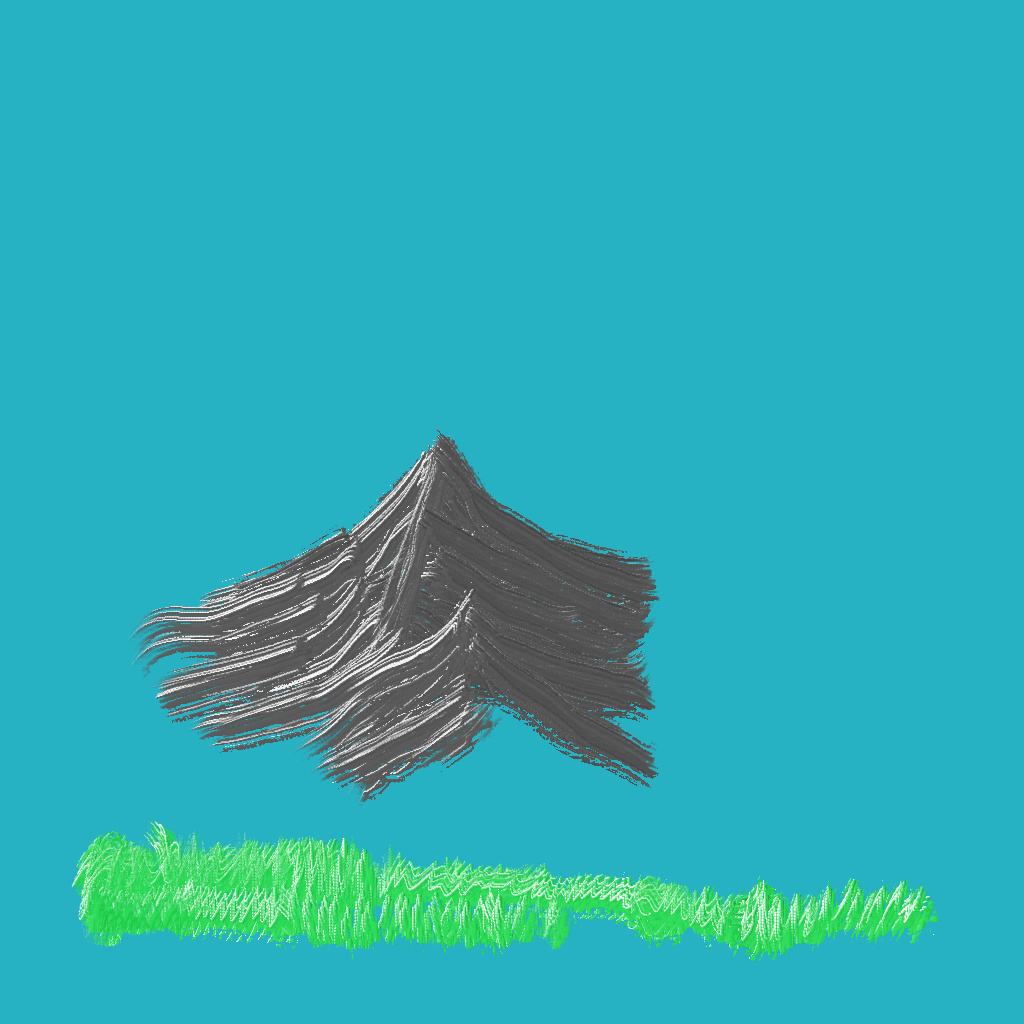
Yeah, white specular is possible, you just need full white spots on the tip. I edited the Atelier Oil brush tip from above to blow out the highlights on it (it already had some light spots, but they weren’t white), to make the white parts obvious. Attached is an image using that (with the linear gradient algorithm).
Hi, @RamonM!
Looking into your video, I guess we should first implement brightness/contrast adjustment for the brushes, so that you could adjust the level of the effect. And then we will probably use @Voronwe13’s linear version of the mapping.
I wanted to implement this adjustment today, but didn’t feel well enough for that ![]()
I think the linear mapping by itself will help, since it’s kind of in between the dk1 and dk3 settings, but brightness and contrast adjustments for the brushtip would be pretty cool. There are already several options under the Color dropdown in the brush chooser, so those could be added there.
I remember attempting to get this to work, but then dmitry merged the multithreaded brushes, and I couldn’t figure out anymore where to implement this…
1 Like
Hi, @RamonM and @Voronwe13!
I have make two packages with brush configuration options. DK4 uses standard linear overlay for lightness mapping and DK5 uses @Voronwe13’s blending method (‘abs’ version of it, which is basically quadratic):
DK4: krita-4.3.0-prealpha-preserve-lightness-dk4.zip — Яндекс Диск
DK5: krita-4.3.0-prealpha-preserve-lightness-dk5.zip — Яндекс Диск
UPD: don’t set contrast to 100% please, you’ll get division by zero ![]()
UPD2: I’m going to change the adjustment algorithm a bit. But the blending itself should be the same.
Hi, @RamonM and @Voronwe13!
I’ve made two more packages with a bit different brush adjusting algorithm. Now there is “Neutral point” option. It specifies exact pixel value of the brush to make no change of the brush color. All pixels darker than neutral value will make the brush darker. All pixels lighter than neutral value will make brush lighter.
This new option is different from “Brightness” option. Because brightness option just makes brush value 127 lighter, which is not exactly what the user need in this case. I actually wonder if we really need this “Brightness” slider at all?
Btw, neutral point for “DA RGBA grey” is placed around value ‘91’.
Could you please briefly check the packages and answer the following questions:
- Which blending effect you like the most, DK6 or DK7?
- With “Neutral point” option, de we still need “Brightness” option? Does it give any benefit?
DK6: linear-overlay: https://yadi.sk/d/h8hYTQTLJkybxg
DK7: linear-lerp (quadratic blending) by @Voronwe13: https://yadi.sk/d/DFwfVJvjGMsgWg
UPD: I have a feeling like DK6 has a bit sharper result… and I cannot get the same sharpness with DK7
1 Like
I haven’t tested your new packages yet, but I think I worked out the perfect algorithm to get a perfectly smooth gradient. I realized my lerp method has some issues, particularly if you choose white or black as your color (or colors close to those). I went back to the drawing board for the math, and thought about how to get a gradient where brush=0 results in 0 regardless of color, brush=1 results in 1 regardless of color, and brush = 0.5 results in color lightness exactly, but where everything in between scales well. I came up with a quadratic equation solution that matches the starting gradient pretty closely and provides almost perfect results no matter what. I think an exponential function will actually work better (the quadratic has to be clamped to [0,1], so it’s not perfectly smooth from brush 0 to 0.5, or .5 to 1, for dark or light colors), but I haven’t worked out the math on that yet. I’ll update here when I solve it. For now, the quadratic solution looks really good.
FinalLightness = A*(brushLightness)^2 + B*(brushLightness) where
A = -4*colorLightness + 2
B = 4 * colorLightness - 1
FinalLightness = clamp(FinalLightness,0f,1f)
This is the solution using values 0-1 for lightness. You’ll have to adjust to use 0-255 values, or just multiply by 255 afterwards.
I’m attaching an image I made using this algorithm, that shows how this affects gradients and images and Atelier Oil brushes with different colors and such.
If I can work out the exponential version, I’ll create a new image showing that. The difference will probably be slight, but may provide better transitions for light or dark colors.
BTW, I would suggest moving the brightness and contrast options to the color dropdown, as options that can be mapped to pen input. I can imagine that you could get some really nice effects on brushes with that.
1 Like
Hi, @Voronwe13!
There is no much use in testing different algorithms on DA brushes without adjusting their neutral points. It might be that your last formula looks better on DA brushes because by expanding quadratic equation you just moved the neutral point to a better position (in DA’s grey brush, the neutral point is somewhere between values 90 and 100) . Though I didn’t check that.
Please try this formula based on this commit, it has all the adjustments:
You can adjust the formula in KisColorSpacePreserveLightnessUtils.h file. And make sure you set the neutral point of the brush properly before testing the formula.
I’ve written it into KoColorSpacePreserveLightnessUtils.h, but I can’t test it yet because I’m running into weird issues trying to build your branch. Some of the dependencies don’t want to build for some reason. I’ll update when I finally get it to build and can test it.
And no, my math did not move the neutral point (you can tell if you actually look at the test image I made), but I did work out the more general equation for any given neutral point, if you want to pass that to the function.
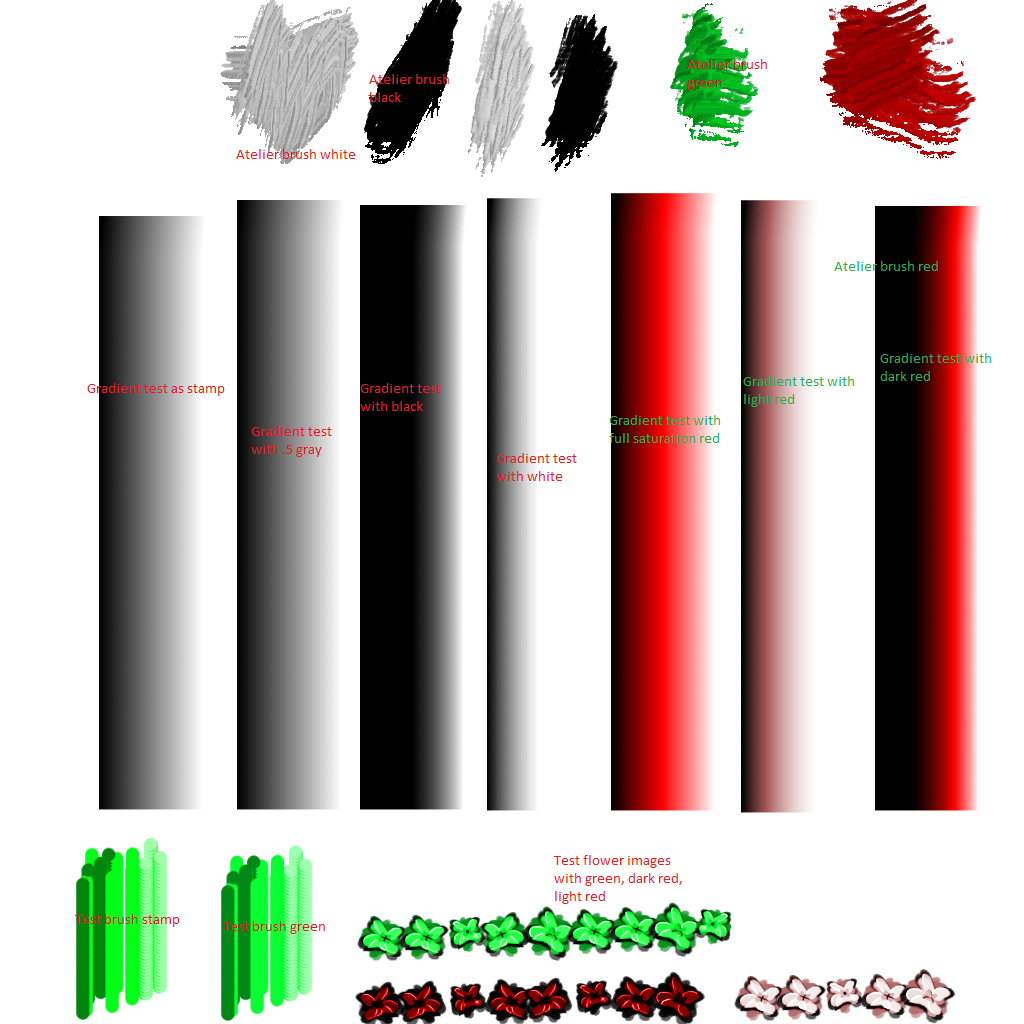
Okay, finally got it to build (directory name was too long, stupid Windows limitation). Here is an image, again showing the perfect gradient brush on the left as direct image, and next to it the same brush with lightness turned on, and using .5 gray. They look identical, so I would say it’s about as perfect as can be. After that I have a simple image brush I made from color, again on the left is as the original image, and on the right is using the lightness setting and the primary color. Again they look identical, so I count that as a perfect success. On top I have the Atelier brushes, with the first two being black and white with the original (127) neutral point, and to the right of that, the same brush with a neutral point of 88. The neutral point change makes them look like they have the correct color of paint, rather than being too dark. At the bottom, I have some stamp brushes I made that show off both outlines and highlights, using colors and black and white. Everything looks exactly as they should, so I think this is the winner. At least, it’s exactly what I wanted when I set out to make this change.
The only changes I’d like to see now are to make the sliding scale options for the lightness brush be controllable by pen pressure. Especially with the contrast setting, I can see that being really useful for some of the brushes I want to make. Also, I would recommend changing the neutral point to be shown as 0.0 - 1.0 (or 0% - 100%) instead of 0-255, since that’s more universally understood.
I don’t think I can push my edited file to your branch, so how would you like me to send it to you?