Use alpha channel in brush tips, or add an overlay tip

@Deevad Yeah, I don’t intend for the original brushes to be replaced.

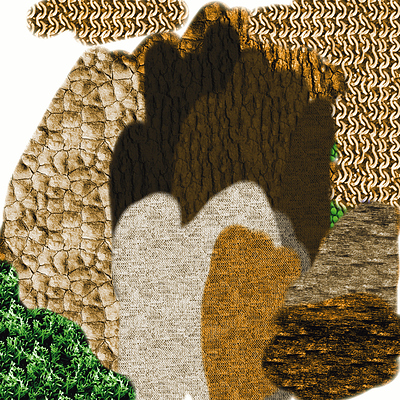
That said, both the leaves and the grass actually look pretty much identical to the originals (except for the fuzzy dab on value I added) when you choose them as mask instead of lightness. The herbals stamp does look a bit different, because the original had too much alpha to work with, so I added more solidity to them before adding shading.

The new stamps are much more useful to me as a one-man game development studio, since I can’t afford the time to go in and add detail to large backgrounds. In this setting, a little artificial is fine, and the time saved by just being able to paint grass and leaves directly without having to add anything is immensely valuable. I suspect I’m not the only one who wants these, so I’d be happy to have these included as an option.

2 Likes

I understand it is useful then @Voronwe13 , no problem. That’s of course nice if a single pattern can be useful for more than one type of usage (as you described; default and lightness). It will avoid getting duplicates and I like that.

I have a starting point for the texture modification now. I’ve got two different modes for it, though I’ve only written one of them so far. The first mode is Value, where the texture sets the value instead of the alpha. I chose this because a lot of the textures already given appear to be intended to be color and shading, no highlights. The second mode will be a Lightness mode, which will work like the brush tip option I created, so textures can have highlights and shading.

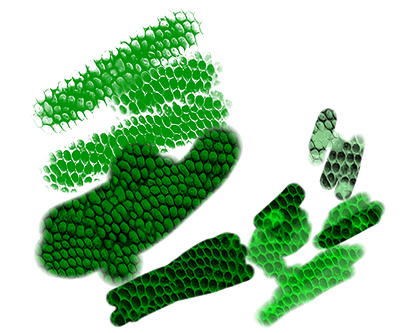
I’ve written the value mode, and I’m attaching a quick image I made with some strokes using the original mode of the Reptile Texture, and then several with the Value mode (some inverted, some not). Currently the performance with the Value mode is horrendously bad, so I still need to do some tinkering with it, but it does technically work, as you can see in the image.

Just wanted to post an update, so anyone looking forward to it can see there’s some hope it will see the light of day. :slight_smile:

3 Likes

@Voronwe13 - Yes ! It’s already great!
Do you think it would be possible to be able to choose different colors for the foreground and the background? Just like a gradient…

@elode - It’s probably possible, but I don’t know how to do it at the moment. I’ll look at it as a third additional mode. I just need to figure out how to get access to the background color from the texturing function.

@dkazakov - I figured out the performance issue… or rather I located it, though I don’t know why it’s an issue. I convert each pixel into a QColor so I could easily access the Value, then convert it back after I adjust the value based on the texture. The weird thing is, when I do this conversion using the already existing KoColorSpace::toQColor() and KoColorSpace::fromQColor() methods, the call to each of them causes extreme lag (I commented lines of code to single out which lines were causing the slowdown, and if I had either one in, the brush was really slow, but nothing else would slow it down). So I changed the code to what I have below, which basically does the exact same thing in almost the same way, and there’s no performance issue… I can play around with it more to see if those functions can be optimized, or if it’s just an issue with passing parameters around, but it’s weird… Here’s my current code for KisTextureProperties::apply():

void KisTextureProperties::apply(KisFixedPaintDeviceSP dab, const QPoint &offset, const KisPaintInformation & info)
{
    if (!m_enabled) return;

    KisPaintDeviceSP fillDevice = new KisPaintDevice(KoColorSpaceRegistry::instance()->alpha8());
    QRect rect = dab->bounds();

    KisPaintDeviceSP mask = m_maskInfo->mask();
    const QRect maskBounds = m_maskInfo->maskBounds();

    KIS_SAFE_ASSERT_RECOVER_RETURN(mask);

    int x = offset.x() % maskBounds.width() - m_offsetX;
    int y = offset.y() % maskBounds.height() - m_offsetY;


    KisFillPainter fillPainter(fillDevice);
    fillPainter.fillRect(x - 1, y - 1, rect.width() + 2, rect.height() + 2, mask, maskBounds);
    fillPainter.end();

    qreal pressure = m_strengthOption.apply(info);
    quint8 *dabData = dab->data();

    KisHLineIteratorSP iter = fillDevice->createHLineIteratorNG(x, y, rect.width());
    for (int row = 0; row < rect.height(); ++row) {
        for (int col = 0; col < rect.width(); ++col) {
            if (m_texturingMode == MULTIPLY) {
                dab->colorSpace()->multiplyAlpha(dabData, quint8(*iter->oldRawData() * pressure), 1);
            }
            else if (m_texturingMode == SUBTRACT) {
                int pressureOffset = (1.0 - pressure) * 255;

                qint16 maskA = *iter->oldRawData() + pressureOffset;
                quint8 dabA = dab->colorSpace()->opacityU8(dabData);

                dabA = qMax(0, (qint16)dabA - maskA);
                dab->colorSpace()->setOpacity(dabData, dabA, 1);
            }
            else if (m_texturingMode == VALUE) {
                int pressureOffset = (1.0 - pressure) * 255;
                qint16 maskValue = *iter->oldRawData() + pressureOffset;

                qreal maskValueF = qMax(qint16(0), qMin(qint16(255), maskValue)) / 255.0f;
                int channelnumber = dab->colorSpace()->channelCount();
                QVector <float> channelValuesF(channelnumber);
                QColor dabQColor;
                //dab->colorSpace()->toQColor(dabData, &dabQColor); // - slow!!!!
            
                dab->colorSpace()->normalisedChannelsValue(dabData, channelValuesF);
                dabQColor.setRgbF(channelValuesF[2], channelValuesF[1], channelValuesF[0], channelValuesF[3]);

                qreal dabValue = dabQColor.valueF();
                qreal dabHue = dabQColor.hueF();
                qreal dabSaturation = dabQColor.saturationF();
                qreal finalValue = maskValueF * dabValue;

                dabQColor.setHsvF(dabHue, dabSaturation, finalValue, dabQColor.alphaF());
                //dab->colorSpace()->fromQColor(dabQColor, dabData); // -slow

                channelValuesF[0] = dabQColor.blueF();
                channelValuesF[1] = dabQColor.greenF();
                channelValuesF[2] = dabQColor.redF();
                channelValuesF[3] = dabQColor.alphaF();
                dab->colorSpace()->fromNormalisedChannelsValue(dabData, channelValuesF);
            }
            else {

            }

            iter->nextPixel();
            dabData += dab->pixelSize();
        }
        iter->nextRow();
    }
}
Yes the to-/fromQColor() functions go through the whole color managment system, which I guess is pretty inefficient especially if you do it pixel by pixel. If that’s an LCMS colorspace, it even seems to involve a mutex locking :scream:

I’m not very deep in brush engines, your code changes however seem to assume that the dab is in RGBA color space. Is that really the case if you paint in Lab, CMYK etc.?
Although I’m not sure if that ever is such a great idea to bein with…

The only idea I have is to convert the whole dab device to a specific RGBA space, that looks a lot more optimized than doing it pixel by pixel, but I guess Dmitry knows a lot better how to avoid unnecessary overhead.

@Lynx3d Hmm, you’re right, it does assume RGBA. I copied it from the KoRgbU8/16ColorSpace implementations of from/toQColor. Ideally I’d call the from/toQColor since that would guarantee the correct conversion regardless of colorspace, but the performance is unusable when I do. For now I’ll add in a check for the colorspace and use my method if it’s “RGBA” or “RGBA16” and call to/fromQColor() if it’s something else. If I find a better solution, I’ll update it, but for now I guess anyone who wants to use CMYK or LAB and wants these texturing options will just have to deal with the performance issue.

@dkazakov Do you want me to create a new merge request when I finish, or should I send you the changes some other way?

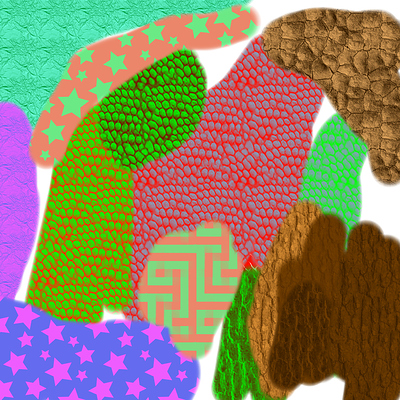
Okay, implemented Lightness, and it works great (same performance issues as Value, if not using RGBA color space). Here’s an example image from me playing around with a texture brush using a bunch of the built-in texture patterns. Some work better with Value, like the snake skin, and some work better with Lightness, like the cloth texture. Anyway, this was a pretty simple change, so it should be easy to merge in.

Eventually we should figure out why the to/fromQColor() methods are so slow. @dkazakov: are you able to run a profiler on it? I haven’t had any luck getting Visual Studio to attach to Krita…

1 Like

Hi, @Voronwe13!

Please make a merge request and set a checkbox “Allow other people to push changes”. And I will convert your code into something not using to/fromQColor, which is slow.

You can also try to convert it yourself: the code should be moved to KoColorSpace and use KoColorSpaceTraits templated class to do all the arithmetics. You can check examples in KoColorSpace::fillGrayBrushWithColorAndLightnessOverlay (default implementation) and Rgb{U8,U16,F16,F32}ColorSpace::fillGrayBrushWithColorAndLightnessOverlay (optimized implementations).

1 Like

Magic tool !!

Intel’s VTune is a very good profiler, and now free both for Linux and Windows.

Thanks, I got the other colorspaces working fast by converting to RGBA16 like you do in KoColorSpace::fillGrayBrushWithColorAndLightnessOverlay (default implementation).

Do you have any suggestions for how to access the background color selected, to implement @elode’s request (which I would like too) to use the texture as a map between two colors instead of as a value/lightness map? The implementation is easy (just lerp between the color from the brushtip and the background color using the texture value as the ratio), but I haven’t gotten into the full code of Krita enough to know where the background color is stored or how I could possibly access it from within this method…

1 Like

Accessing background color from the texture option is not very easy. You will have to pass the color from painter->backgroundColor() in KisBrushOp to DabRenderingResources and down to KisTextureProperties::apply()

Every time I try to blend colors with ctrl+color pick it gets darker and end up in black. Is this intentional? Or am I missing something?

I used the latest nightly which seems happen to have this patch.

Depending on the brush tip, it might be intentional/easily explained. If the brush tip is darker than the midgrey or you click on the pixel that was painted with the part of the brush tip that was darker, then you effectively make your color darker and darker, because the color that you pick is not the color that was selected for the stroke in that location.

Unless you weren’t using those new brushes and you noticed that behaviour on an old brush preset?

If you’re using the original DA_Oil brushes with the new lightness option, you need to set the neutral point lower (I usually set it about 90). The original brushtips were made with a lower lightness value than 128 as the midpoint (because they were made before this was even a feature). So what’s happening is when you draw, it’s always drawing a darker color than what you selected, so when you color-pick, you’re picking a darker color than what you had selected before. Set the neutral point lower, and it shouldn’t get darker like that.

1 Like

@dkazakov dang, I was hoping there was some sort of static resource manager I could get it from.

This solves the problem. Thanks. :grinning: (For me 90 is too low, around 100 look close to the ideal.)
Guess I have to wait for new presets using the right brushtips.

The code you are working with is being executed in a multithreaded environment with heavy caching, so you cannot access normal static providers.

As a temporary “hack” approach, you can pass this color to KisTextureProperties in the constructor of KisBrushBasedPaintOp::KisBrushBasedPaintOp(). It will work for testing at least. But we will have to refactor it before merging.

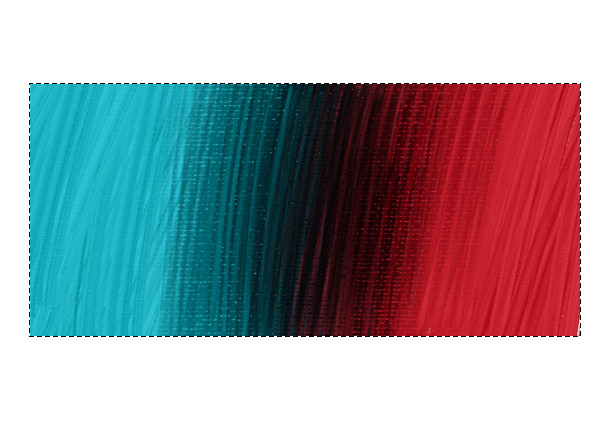
Well, that was painful, but I did it… I got the gradient mode working by passing parameters from KisBrushOp, and added backgroundColor to DabRenderingResources for it to get passed around until the textureOption->apply() call, to which I added the background color as a parameter. It’s tested and working, and allows some really cool effects with the texturing, so it’s worth putting in. However, I think I’m going to do two separate merge requests, because the value/lightness options don’t require many changes and can be tested easily, but this change touched a lot of files, so more testing will be wise to make sure there’s no side effects.

Anyway, here’s an image of me testing various textures with the new gradient option. Definitely something to look forward to!

Hmm, just realized that instead of using background color, I could try to pull the currently selected gradient, and use that for the mapping… One of the gradients is foreground-background, so it would still work, but it would allow more specific mapping for in-between colors. Dang, now I have to look at how the gradient is stored, and how to pass it so I can use its mapping function… Ugh, I hate making more work for myself!

7 Likes