For sake of demonstration just opening Blender will show you a cube this cube already has UVs so you just need to press the TAB key to see the UVs ,that are on the left side.
# Blender v2.90.0 OBJ File: ''
# www.blender.org
mtllib Cube_Mesh.mtl
o Cube
v 1.000000 1.000000 -1.000000
v 1.000000 -1.000000 -1.000000
v 1.000000 1.000000 1.000000
v 1.000000 -1.000000 1.000000
v -1.000000 1.000000 -1.000000
v -1.000000 -1.000000 -1.000000
v -1.000000 1.000000 1.000000
v -1.000000 -1.000000 1.000000
vt 0.625000 0.500000
vt 0.875000 0.500000
vt 0.875000 0.750000
vt 0.625000 0.750000
vt 0.375000 0.750000
vt 0.625000 1.000000
vt 0.375000 1.000000
vt 0.375000 0.000000
vt 0.625000 0.000000
vt 0.625000 0.250000
vt 0.375000 0.250000
vt 0.125000 0.500000
vt 0.375000 0.500000
vt 0.125000 0.750000
vn 0.0000 1.0000 0.0000
vn 0.0000 0.0000 1.0000
vn -1.0000 0.0000 0.0000
vn 0.0000 -1.0000 0.0000
vn 1.0000 0.0000 0.0000
vn 0.0000 0.0000 -1.0000
usemtl Material
s off
f 1/1/1 5/2/1 7/3/1 3/4/1
f 4/5/2 3/4/2 7/6/2 8/7/2
f 8/8/3 7/9/3 5/10/3 6/11/3
f 6/12/4 2/13/4 4/5/4 8/14/4
f 2/13/5 1/1/5 3/4/5 4/5/5
f 6/11/6 5/10/6 1/1/6 2/13/6
On the OBJ file that is just a text file called OBJ (waveform) if you notice:
v are the vertex entry
vt are the vertex texture entries that are just 2 values and ranging from 0 to 1. These are the UV locations to assemble the texture map for the object.
vn are the vertex normals
f are the face combinations componded by v/vt/vn and are composed by 4 entries each on this case because it is a object with only quads (4sides).
Idea:
So after reading these values what was the idea?
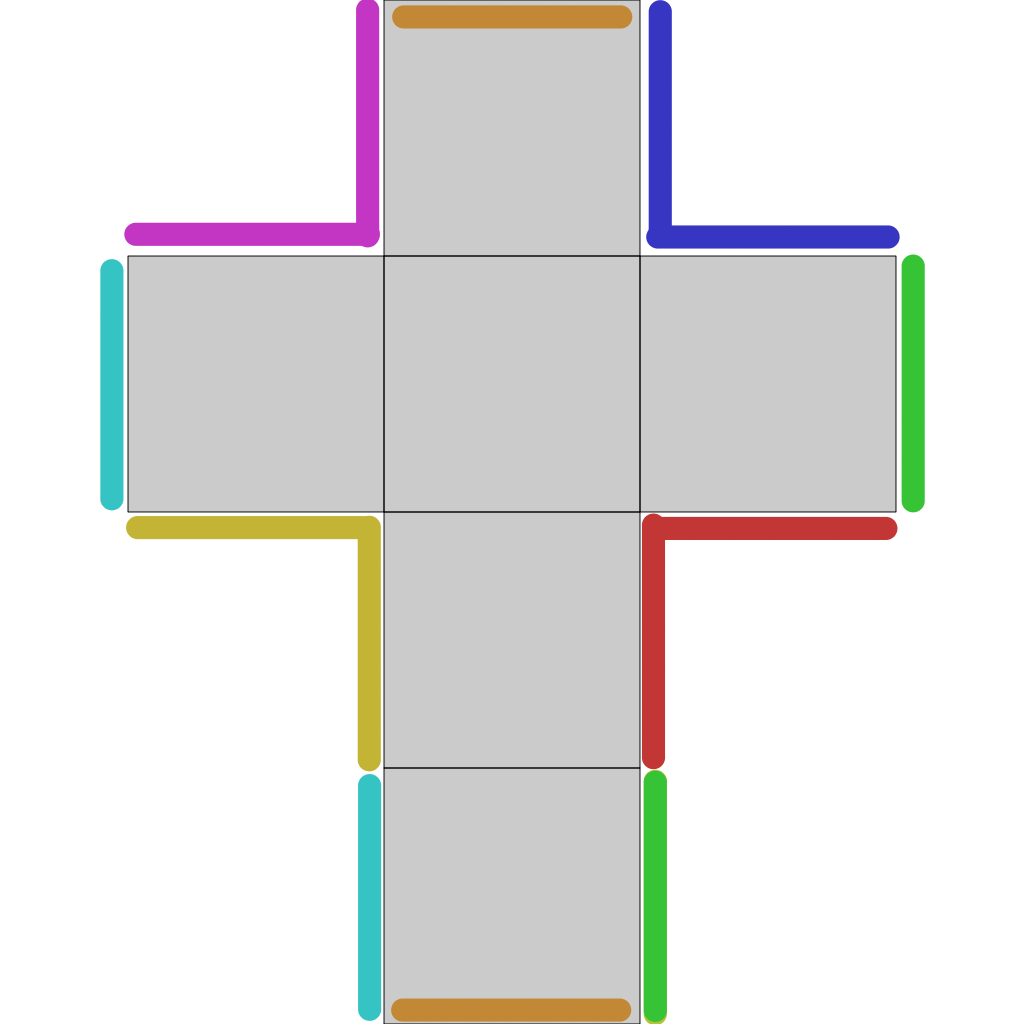
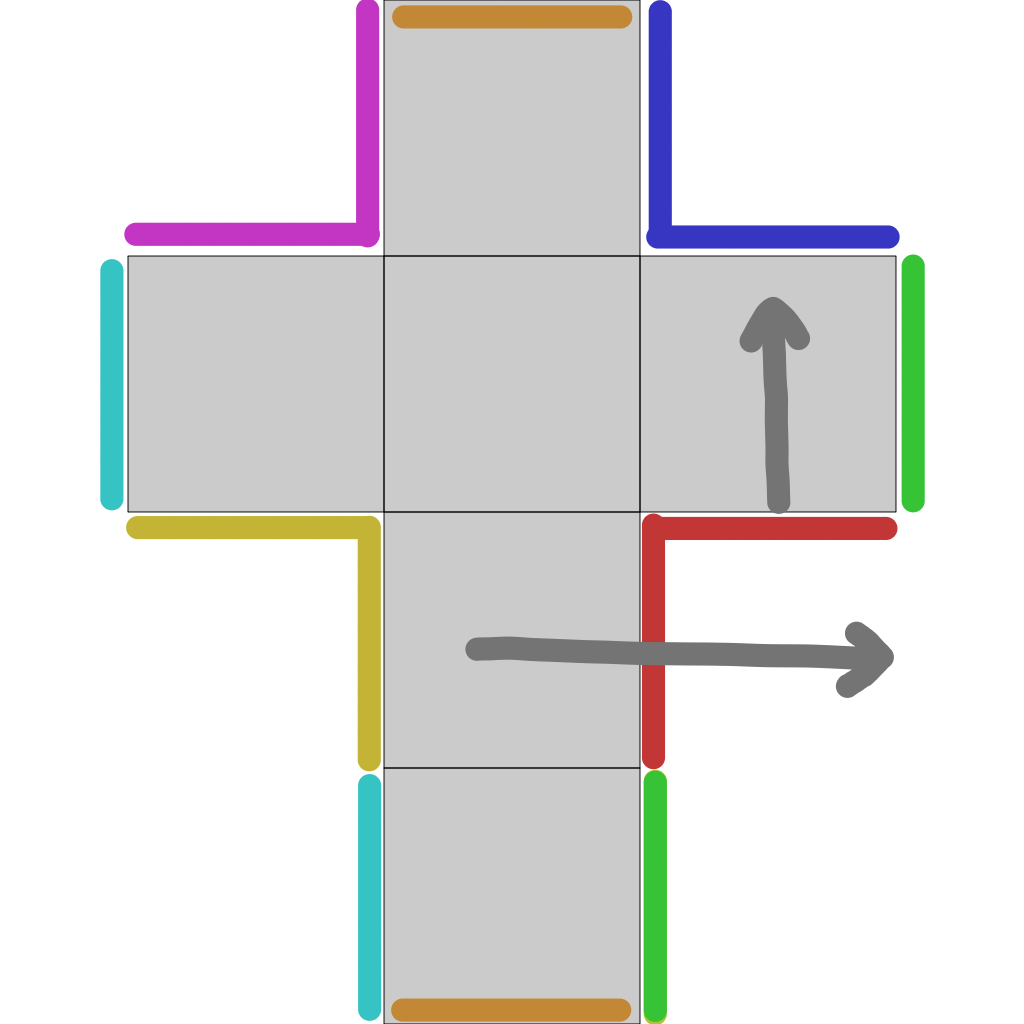
The Idea was to have a layer set as the ruling layer mask that would accept the input of the OBJ file and with that create a mask where, when the brush paint outside the edges of the island it would create a clone on the same side of the object considering where it exited.
Similar to the clone tool brush.
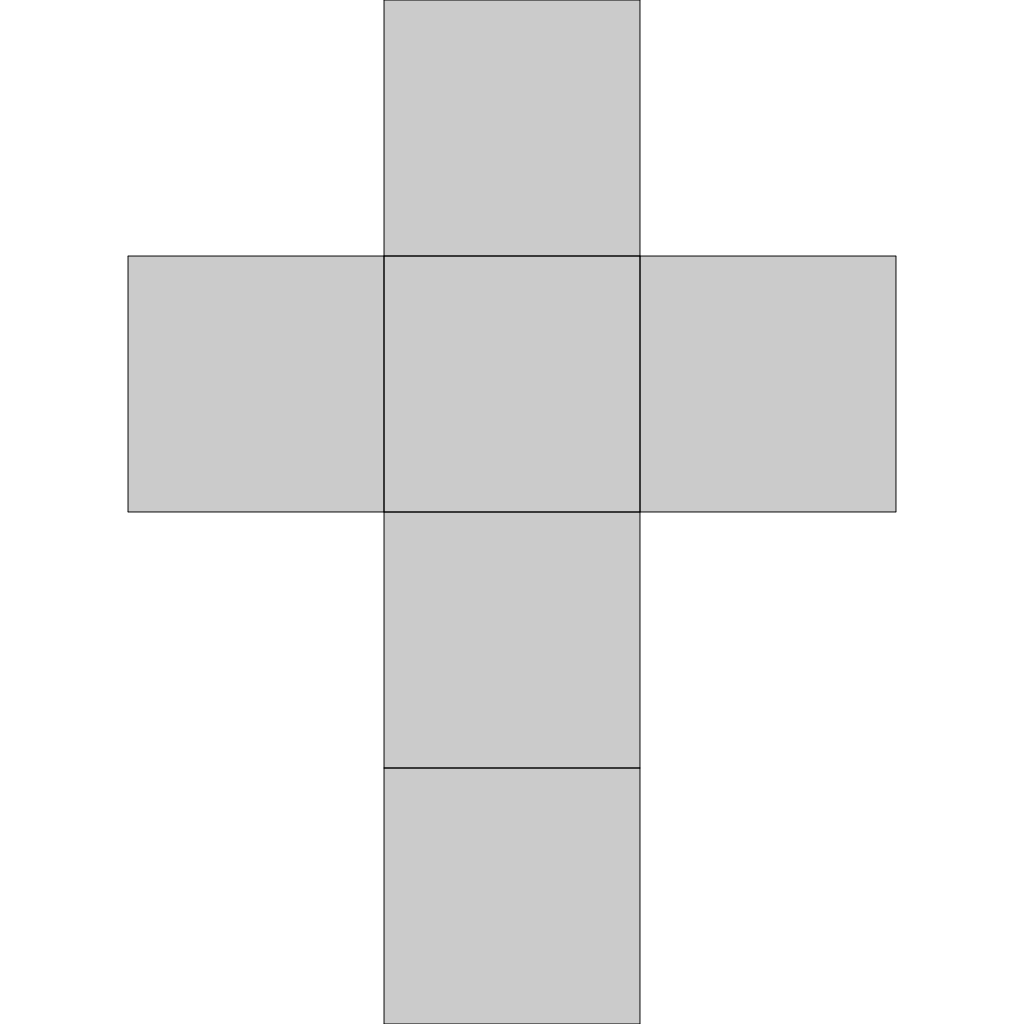
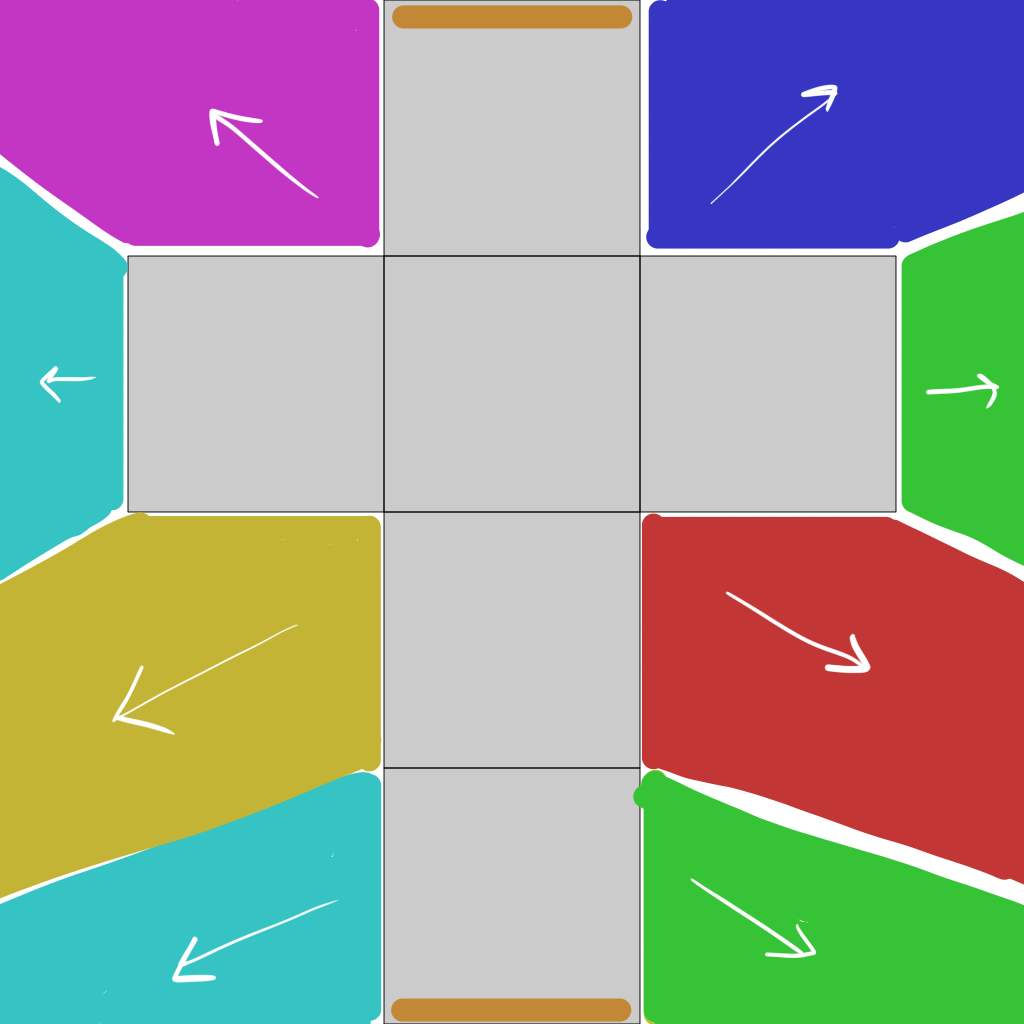
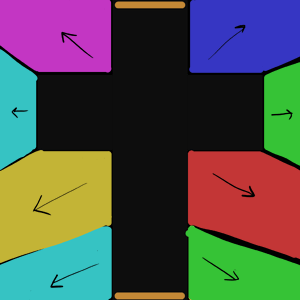
Considering the example cube what are the same sides? Here they are connected by colors.
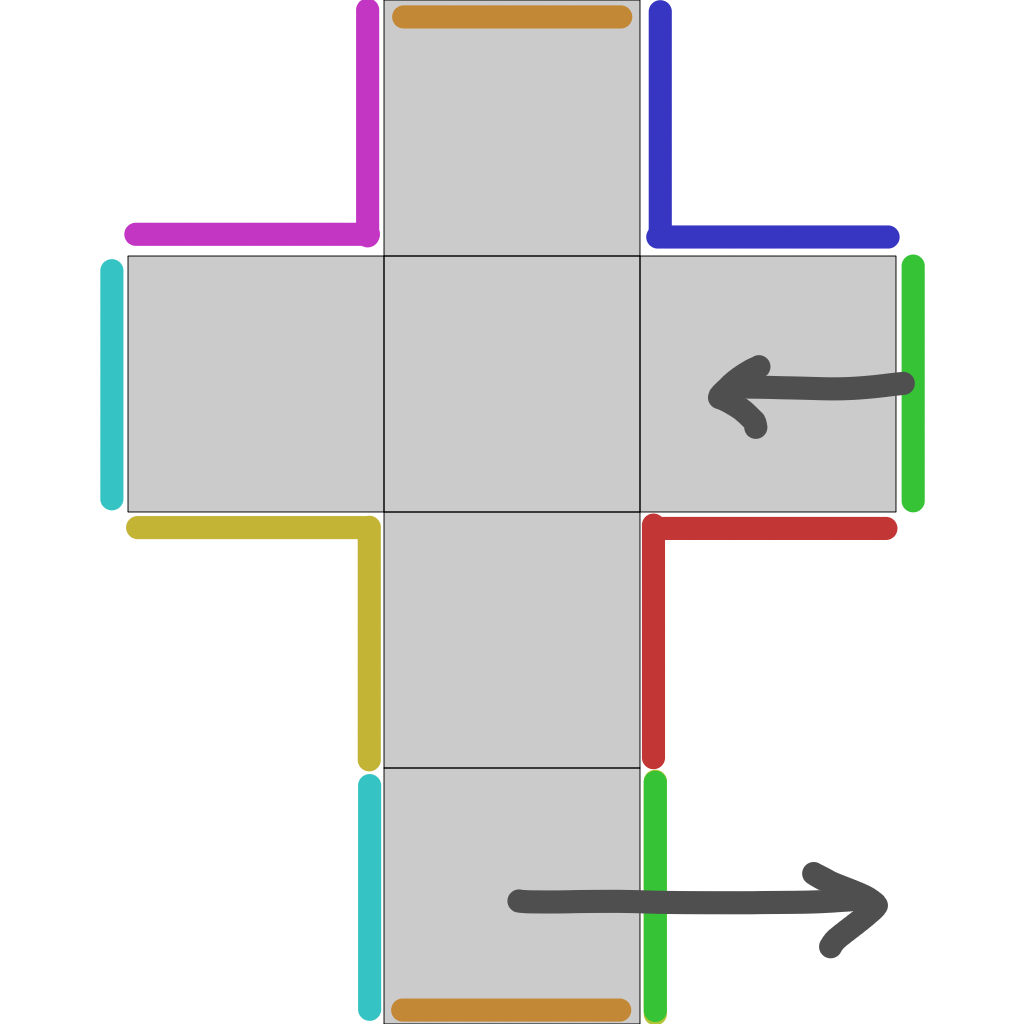
After painting the object a option to bleed the edges of the object would be nice but this can be done too manually. Texture bleed could be like a filter that would hold the pixels on the edges of the UV lines and stretch it out like so.
Nice, if it can be done. I’ve only played with this a little and even then my interest was in sculpted objects which I think are more tricky and complicated than the ‘geometric’ objects for the UV map.
UV maps look more complicated but really are not more complicated than this cube.
The only thing I can think of that could annoy more to implement this is if the output edge has a different size than the receiving edge, but this is still a linear transform regardless.
But it would be bad unwrapping or a choice. I say this because seams should never be visible so one stroke of 20 pixels on one side and on the other side having 5pixels is noticeable the difference but it should not be seen. As long as things match it would help alot already.
This is a nice idea. At the same time, it’s my understanding that texturing has largely moved away from painting on UV maps, in favour of specialised 3d paint packages like substance painter, Mari etc. I wonder how many users this would get?
I can name a couple of occasions something like this would have help me out just because I was not on the right computer on a production.
Making textures on the UVs is not dead though. I still use it time to time and I feel why are none of the brushes decent like in Krita but that is just me there.
And this would just be a weird edit to the Mirror tool behavior probably. It would not starting from scratch.
Honestly all those alternatives are not open source, Mari surely out of normal people budgets and Substance was bought by Adobe wich is more of a hinder than a boon in my book. Not sure how that is holding up my perdiction is that once the original team goes out it will become like all other adobe projects I hate. Only option you really have is Blender that has some bad brushes to be honest and the color picker is awefull too.
Replying on this old thread again, I was wondering about the bleed you were talking about with this example:
You had mentioned how this outward bleed could be done manually. Did you mean by just painting there or is there a filter or plugin that could help me with this? Because I have been looking for something like this, I have a large number of UV textures to paint. There is a plugin for GIMP that does this, I have been wondering if it is possible to copypaste-fu from there to make a script for Krita.