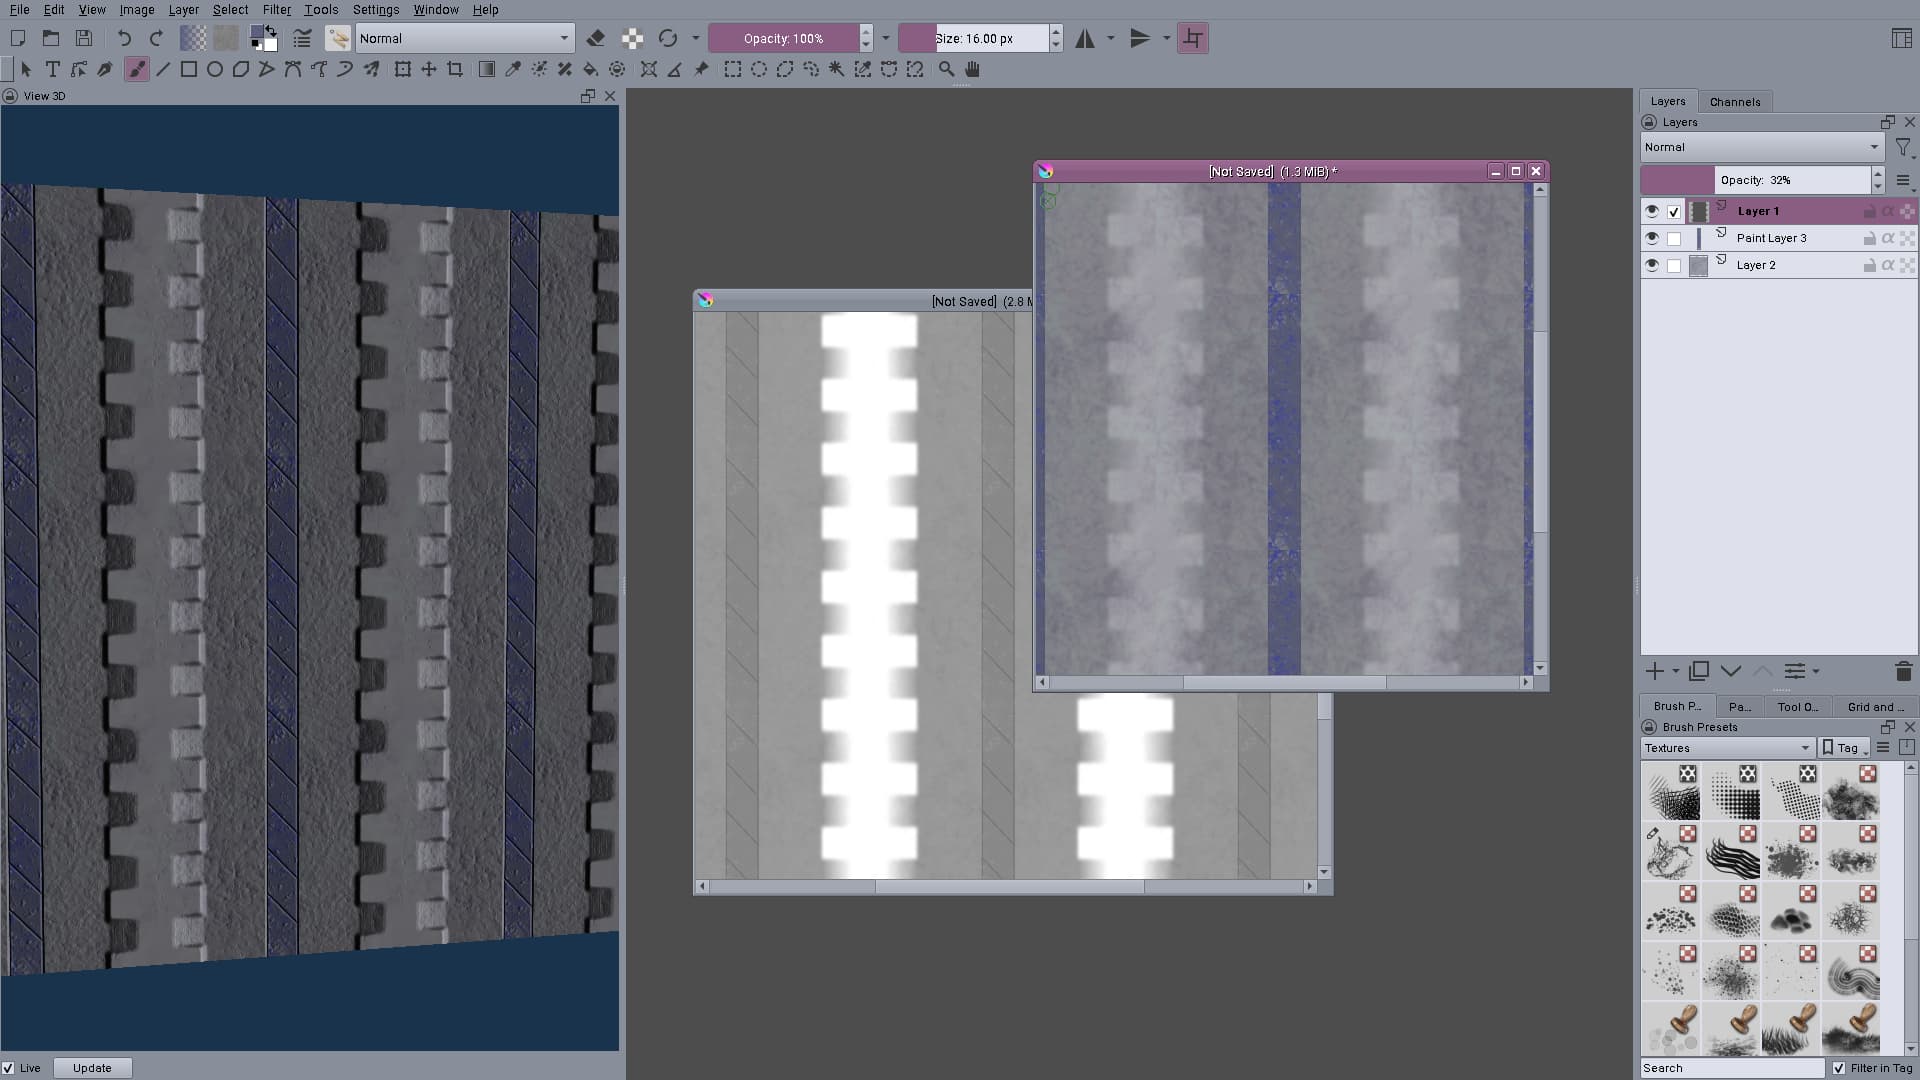
Some more bump mapping testing, i’m mainly playing around now to see what sort of workflows could be used. I might check out…
…this video at some point later. Thanks for linking to it. Any other videos about using 2D painting programs for texture mapping (especially for stuff outside painting the diffuse/color/texture map) would be useful to get some ideas, even if they’re largely retro stuff.
Yeah i know about the Polycount wiki, but i was looking for videos where people do stuff as these are more useful for seeing in practice how some software is used - and where it could be improved or alternative workflows made :-).
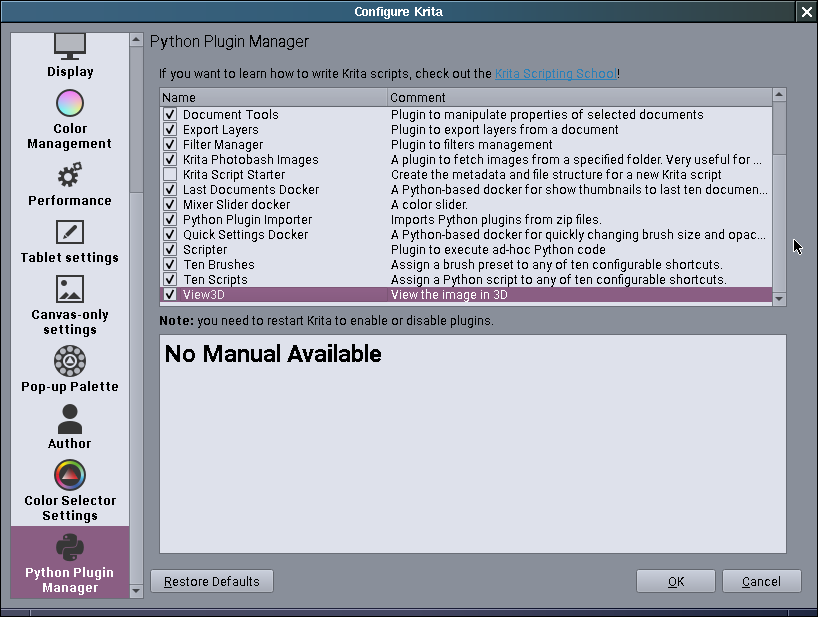
Hello, @badsector . I’m a 3D artist and I’m interested in studying more about concept art. I just found out this very interesting plugin. I tried installing but unfortunately the 3d view docker has not appeared under the settings>dockers menu. I’m not a Krita hard user at the moment so I’m not sure if I did something wrong.
I followed the instructions in your website.
Could you provide a plugin installation installation video?
To install the plugin, you have to unzip the view3d.7z and in it, you will find a folder view3d which contains another folder named view3d together with a file named view3d.desktop. In Krita, you have to open the resource management dialog via ‘‘Settings’’ >> ‘‘Manage Resources…’’ where you have to click on ‘‘Open Resource Folder’’, which will open Krita’s resource folder where you will find a folder called pykrita in which you have to copy or move the file and the folder that were in the other folder, now restart Krita, enable it like @badsector’s screenshot shows it, restart Krita again and you should find it together with all the other dockers.
Alternatively, you can download the plugin in installable form like Krita plugins usually are shipped nowadays, I just made it for you:
And then you can use this “installer” instead.
Just open the menu
‘‘Tools’’ >> ‘‘Scripts’’
select
‘‘Import Python Plugin from File…’’
from where you browse to the file you just downloaded, select it and hit enter, confirm the question Krita asks, restart Krita and it will be found together with all the other dockers.
Looks like the only difference is that the archive file format is zip instead of 7z, so i guess from next version (whenever i get around finishing it) i’ll use zips too (the file size is only ~40K larger as a zip file anyway).
Another difference is that extra folder you have in your 7Z archive, if Krita could read 7Z it maybe could have imported it, depending on the version of Krita.
Older versions showed in an experiment I did a long time ago with Ilya Portnov’s scripts and Krita 3, if I remember correctly, that they require the plugin folder and the desktop file in the first level, newer versions seem to look even deeper into stacked folders in an archive (but I never checked that thoroughly, and it was a fiddly thing to handle the scripts). But it’s not impossible that I did something wrong back then, when Krita had just learned how to handle bundles, and also the new capabilities I’d have to test more thoroughly again to be up-to-date.
@badsector@Michelist Thanks. It seems to have worked now. I had put the 3dview folder that had another 3dview folder and a file named vied3d.desktop inside in the pykrita folder and I think that is why it didn’t work. But now I thin it is nicely set up. I’m a bit busy now because I returned from vacation to my job but sooner or later I’ll test the plugin. I might even show something here if I have good results.
No new feature or anything, i just updated Krita to 5.2.6 and everything seems to work fine with the WIP version (i still need to implement the code that merges the bumpmap with the normalmap to make a new normalmap… but i haven’t had the need for that, so it has been a while since i spent any time).
The “align canvas to view” command ends up being one i use a ton - though that might also be an indication of how derpy my texture coordinates are . It is also the hackiest feature, which is basically the first thing i’m checking every time Krita updates .
Uploaded a new version, v20241110. The only difference between the previous and the new one is some very basic support for loading OBJ files: for an OBJ file to be loaded properly it must be triangulated (quads or ngons will not be loaded properly) and it must have texture coordinates and normals (smoothing groups or other automated normal generation is not supported).
Essentially the same functionality as what JTF provides - JTF is still recommended if you have Blender as it is more precise, faster and makes smaller files. This is really for use with other 3D tools (e.g. Wings3D) that do not have a JTF exporter to avoid having to go through Blender.
Uploaded a new version v20250226. Again a minor version, it is a bugfix for the OBJ support i added last time where i forgot that texture coordinates are flipped vertically in OBJ files. This version fixes the bug.
I also built the Linux version in a Ubuntu 20.04 container so you don’t need to be using an up to date rolling distro.
Beh, i uploaded the new version to codeberg but i forgot to upload the site changes. I did change the site, added the new version and even a link to this post for people to find/post more comments but i forgot to upload it to my server :-P.
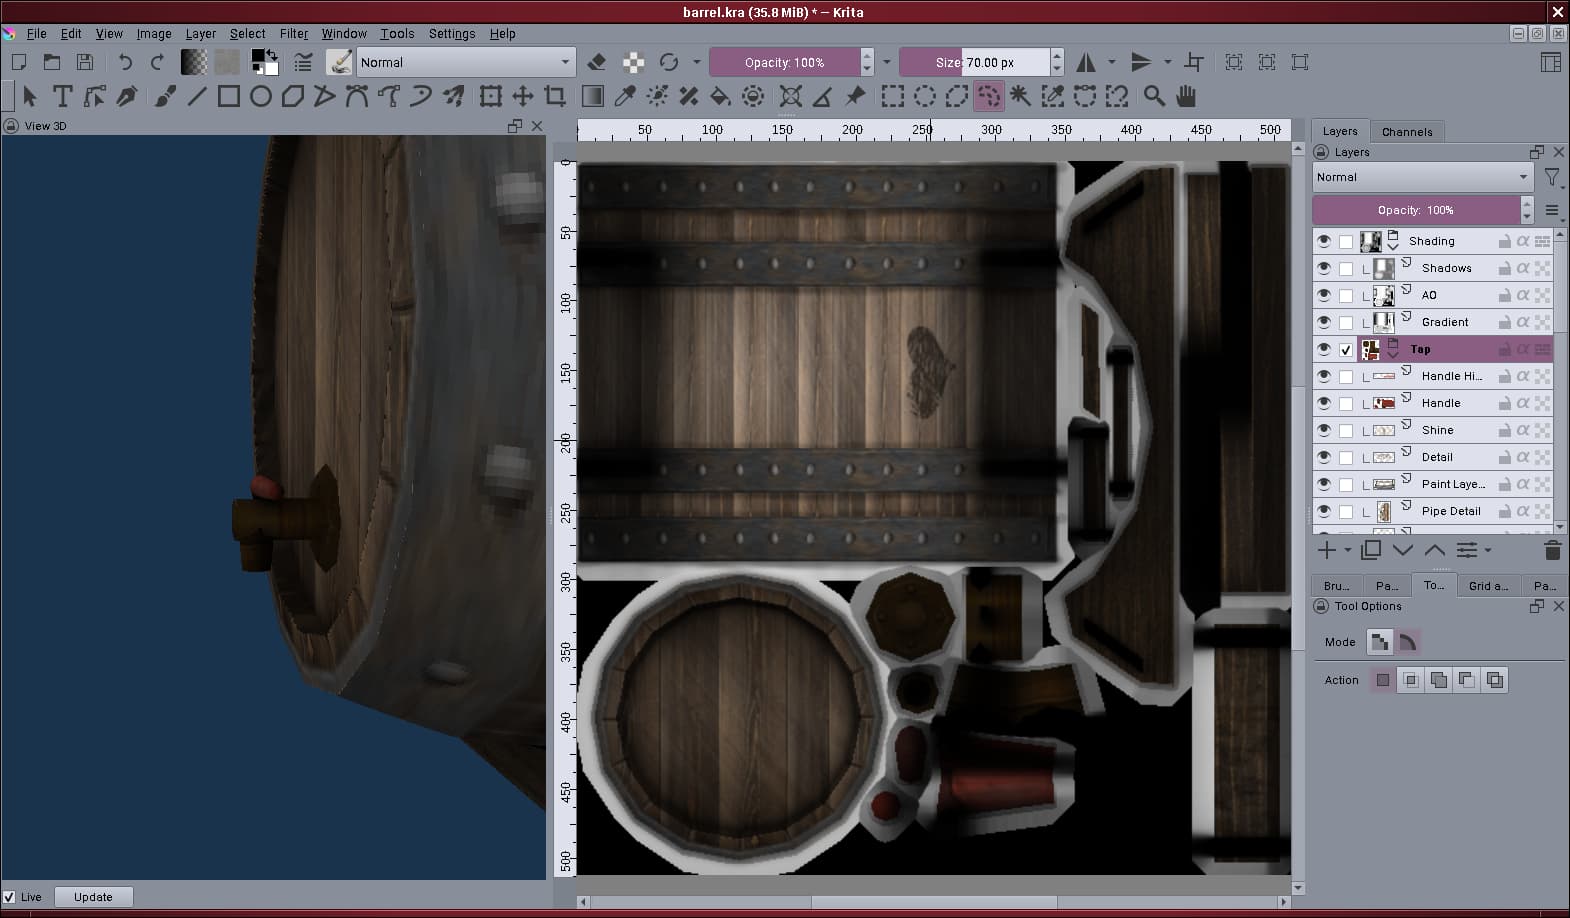
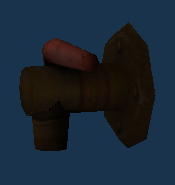
I added a new feature: visibility mask. It is basically a mask that allows you to hide parts of the 3D model using the underlying texture. As an example consider this setup where i want to work on the barrel tap:
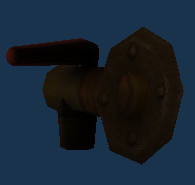
The issue here is that while i can see the tap from front, the barrel obscures the tap’s back and the sides while visible are a bit hard to see. With this new feature i can make the tap only visible.
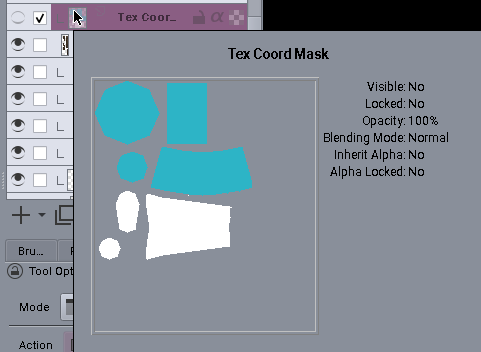
To do that first i select the part of the texture that the tap uses. I already have a layer with a mask for this (generated using “Images → Create Texture Coordinate Mask”):
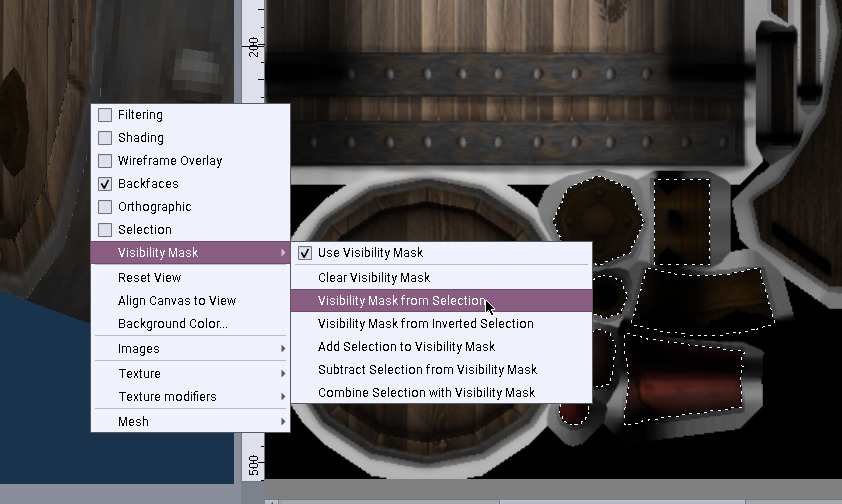
Right clicking on the layer i can use the “Select Opaque (Replace)” command to select the mask. Then i can use the new “Visibility Mask → Visibility Mask from Selection” command to use the current selection to create the visibility mask:
The “Visibility Mask → Use Visibility Mask” checkbox can be used to toggle the use of the visibility mask without clearing it (useful for switching between the full model and an isolated part without having to select the part again in the texture).
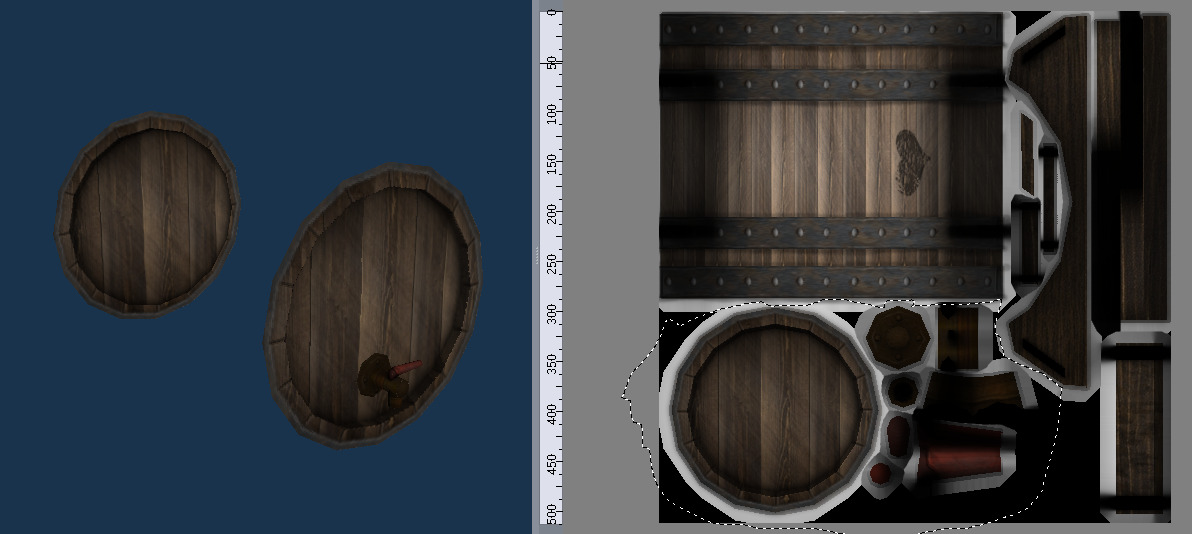
Note that the mask is actually used during rendering to setup a stencil buffer (i.e. it is not skipping the underlying geometry, it causes pixels to not be drawn). This means that, e.g., if some part of the texture is reused like the example below (where both the front and back side of the barrel use the same texture part) then all parts will be visible:
There are still a couple of issues to fix (e.g. backprojection doesn’t work) and i’m also working on a new site for the plugin with screenshots about the program’s features and how they could be used, so no new version yet.
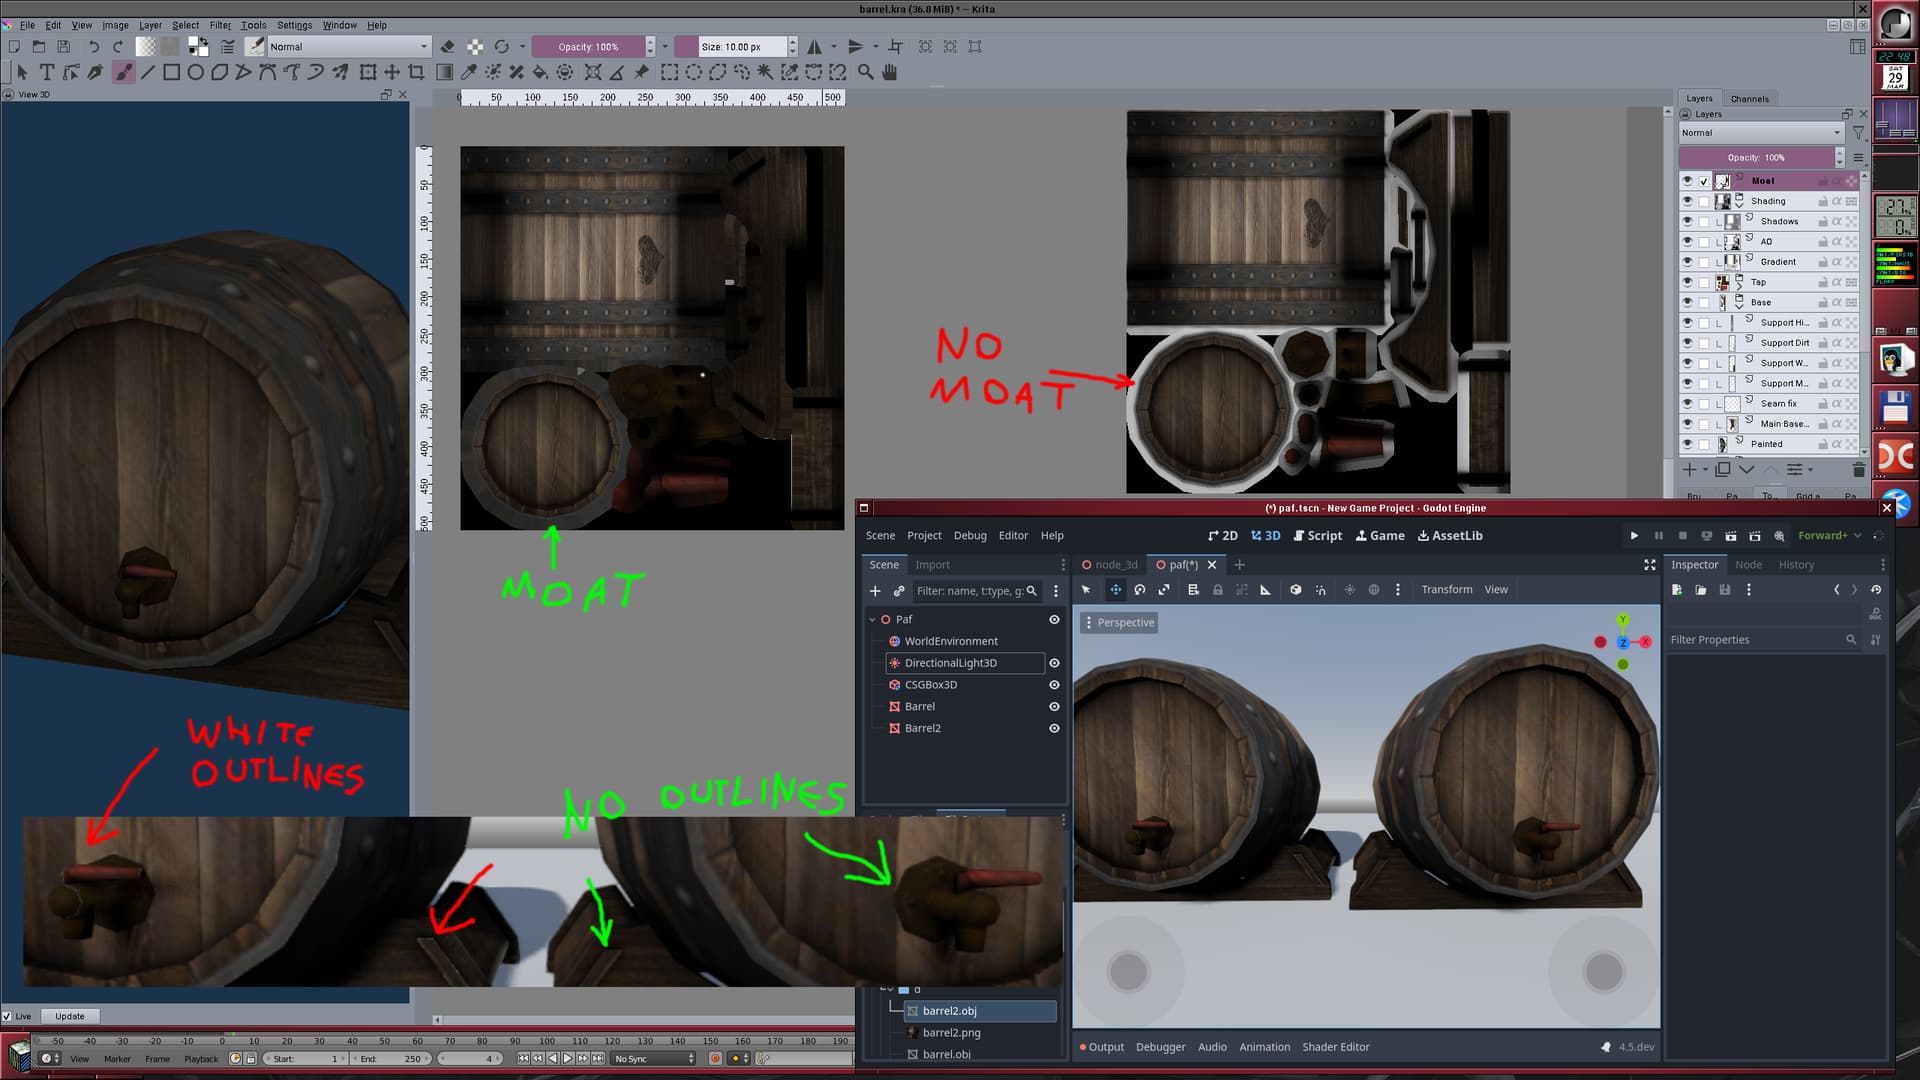
Fixed the issues i had with the projection (i treat the view mask as another alpha mask which does the trick). Also added a new command to generate a “moat” around the texture coordinates:
What this does is to find the unused pixels surrounding the used triangles on the texture and copy the closest used value - essentially “expanding” the used textures. This is useful for filling “holes” between the unused texture space, which is especially important for mipmapping as that can cause previously invisible/unused parts of the texture to affect the image.
The screenshot above shows the texture with (left) and without (right) the moat. Also it shows how it looks in an engine (in this case Godot) which does mipmapping. Without the moat (red arrows, left side in the Godot window) there are small white outlines that “leak” from the image data surrounding the textured area. With the moat (green arrows, right side in the Godot window) there are no such outlines.
Hello, first and foremost, thank you for the work you’re doing, it’s actually very impressive !
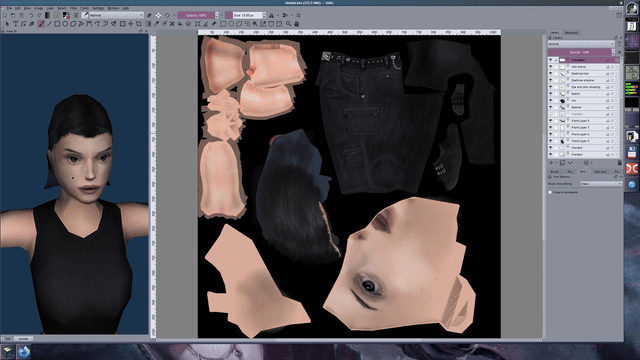
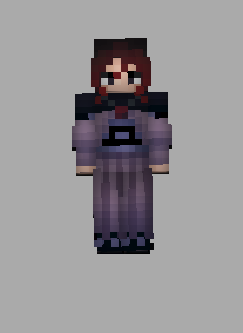
I’ve been looking for a way to work on Minecraft skins directly in Krita with a 3D preview on hand and View3D ended up being the way to go. However, Minecraft skins have 2 visual layers ; a “core” one and an “overlay” for more visual details and depth.
My issue is that whenever I wish to work on the model with the View3D shading turned off, the overlay wrapping around the core has its alpha channel doing weird shenanigans and ends up seeing directly through krita straight to anything behind it (for example, my desktop background) which forces me to work on the skin with the default black shadows all over it, not ideal for my case.
Is there any chance I could toggle off the shading while retaining the ability to see both layers of the skin ? I’ve tried several things and even looked into the .py file directly in case there was something I could’ve tinkered with, but my knowledge of python is close to nothing unfortunately.
Thank you so much in case you find the time to answer my question o7 !