I thought about making a proper Tutorial topic for this but that would be a lot of work.
So here is a Sketchbook topic instead, with the .kra file included.
After taking part in this topic: Animation curve not working properly ,
I realised that I’d never made a linked assembly animation. I think they’re called ‘armatures’ in 3D animation, hence the title of this topic.
I wanted to establish a simple structure that was fairly easy to understand and also extensible. I knew, in the back of my mind, that it was possible but I’d never done it before.
So I made this:

Here is the structure:
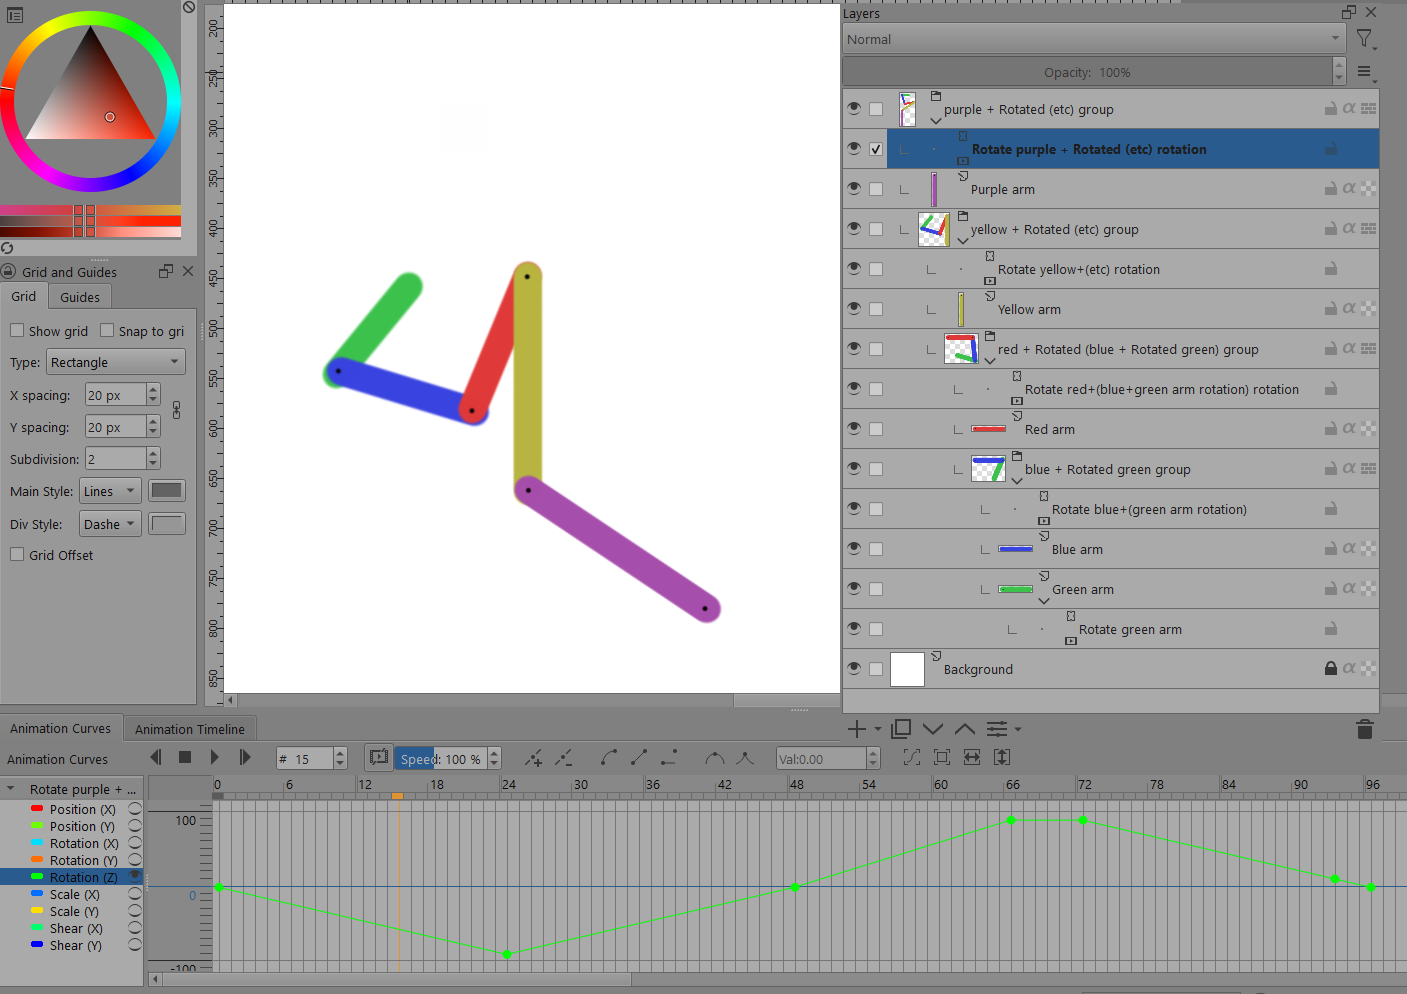
Here is the .kra file: 5-arm rotations.kra (134 kB download).
At the bottom, I was lazy and didn’t put the green ‘arm’ in its own group to maintain consistency of structure. Doing that would make it easier to add an additional arm to the end of the green arm.
The names of the layers and groups could be better thought out too.
Starting with the green arm and the blue arm, I extended the structure upwards to add more arms then got tired after a total of five arms.
-
Important Notes:
If you insist on using the Transfrom tool to modify Animation Curve parameters then you must use the 5.3.0-prealpha because 5.2.2 has a bug where using the Transform tool alters the value of the previous keyframe. -
When you first make the Transform Mask, add a keyframe at frame-0 then use the Transform tool on the arm and drag the pivot point to the linkage point. Then make a tiny rotation and press Return. (It’s ok to do this in version 5.2.2.)
That will set the pivot point. You can then set the rotation to zero by typing the value in the Animation Curves docker.
After that, you can go around the transform masks adjusting curves and making the entire assembly do cool moves.
There are unanswered questions related to this and I haven’t investigated them. That’s another reason why I haven’t made a proper tutorial subject for it.
I have made a fairly simple and extensible structure that works so please pick it up and run with it ![]()