When I create a document with a number of objects and I click on the Wrap around mode button, Krita multiplies the objects. So far so good. But when I want to consolidate the new image, it goes wrong. When I do merge visible in a new layer, I do see the multiplication, but when I save that, I only have my home screen.
What am I doing wrong?
Thanks in advance.
Did you already check out these tutorials? →


Michelist
I don’t know what you mean by home screen but I get the feeling you got the wrong idea about wrap around mode and what it’s good for. It’s not really there to duplicate anything it is just a visual aid to create seamless patterns and textures. It doesn’t really make the image larger and repeating it, it just virtually shows duplicates of the very same canvas so you can better make the pattern, it does not really duplicate the canvas so when you save it just saves the canvas you started with (what is visible when you turn it off). Imagine it like putting a mirror to a real life canvas, the image in the mirror will not become part of your actual image, it’s just a virtual extension.
@ Michelist
Before I asked my question on the forum I watched these videos. I checked the online Krita manual also, but they didn’t answer my question.
@ Takiro
‘It’s just a visual aid to make a pattern…’ Indeed, I thought I could make a new layer with new pattern right away… In my opinion it’s a bit pity that you can’t make a new layer with it right away though.
Thanks for your answers!
Have a nice evening! ![]()
Save it as a PNG file, then go to Settings → Manage Resources, click on the Import Resources button and find that PNG file. Then import as a Pattern. Then you can either use a Fill Tool to fill a shape with the pattern, or make a rectangle filled with that pattern, or use a Fill Layer with that pattern.
@ Tiar
Thanks for your reply and I tried to do what you wrote, but that doesn’t change anything for me. Also a PNG_file as pattern just gives me my initial layer, not what I see when I click the wrap around button. Once I get out of wrap around mode, I see my initial layer…
Thanks for your replies anyway!
Can you share screenshots? Would be easier for us to help you.
This sounds like your new file you use the pattern on has the exact same dimensions like your pattern tile itself so it simply fits 1:1 (or you try to use it in the very same file you created the pattern in, which is not what Tiar meant). To really see the pattern as a repeating pattern you either have to scale it down in the pattern chooser or have a larger canvas you apply it to (or both).
For example when your pattern was created on a 100 x 100 canvas, this just represents one single tile of the pattern. When you put it on another canvas that is also 100 x 100 px in size, this will simply fit exactly one time. Either your pattern has to be scaled down or you need a bigger canvas so you actually can have more tiles.
Hello,
I describe exactly what I do.
- I create a new file of 500X500. I save the file.
- I place in that file a number of objects at random. I set the image to 100%. I save.
- I click on the warp around mode. I see the multiplication of the objects. The file is still 100%. Beautiful!
- Now I want to capture that image, but no matter what I do: I always get the image without the application of the warp around mode. As soon as I click on the warp around mode button, everything disappears. If I stay in the warp around mode and make a new layer from visible I only see my original file without the application of the warp around mode.
So, my question is simple: how can I capture the image that I see with the warp around mode clicked in either the same file or a new file?
Make a screenshot from it? ![]() Possibly in canvas only mode, so you can get a bigger picture.
Possibly in canvas only mode, so you can get a bigger picture.
Michelist
The Wrap Around mode is not there to create the image you want; it only creates the conditions for it. In other words, this mode is intended to create a tile that, when duplicated and repeated on the sides of an image, produces the image you want.
Michelist
As Tiar already mentioned what you do with a wrap around mode is to help create a seamless tile for a pattern. You have to actually use the tile on a canvas that is bigger than the tile (otherwise there is no room to wrap stuff around).
Here is a quick guide I just made, hope you will understand.
Creating a singe Tile
First I start with a empty canvas, just a background layer and a transparent layer I will paint the pattern on.
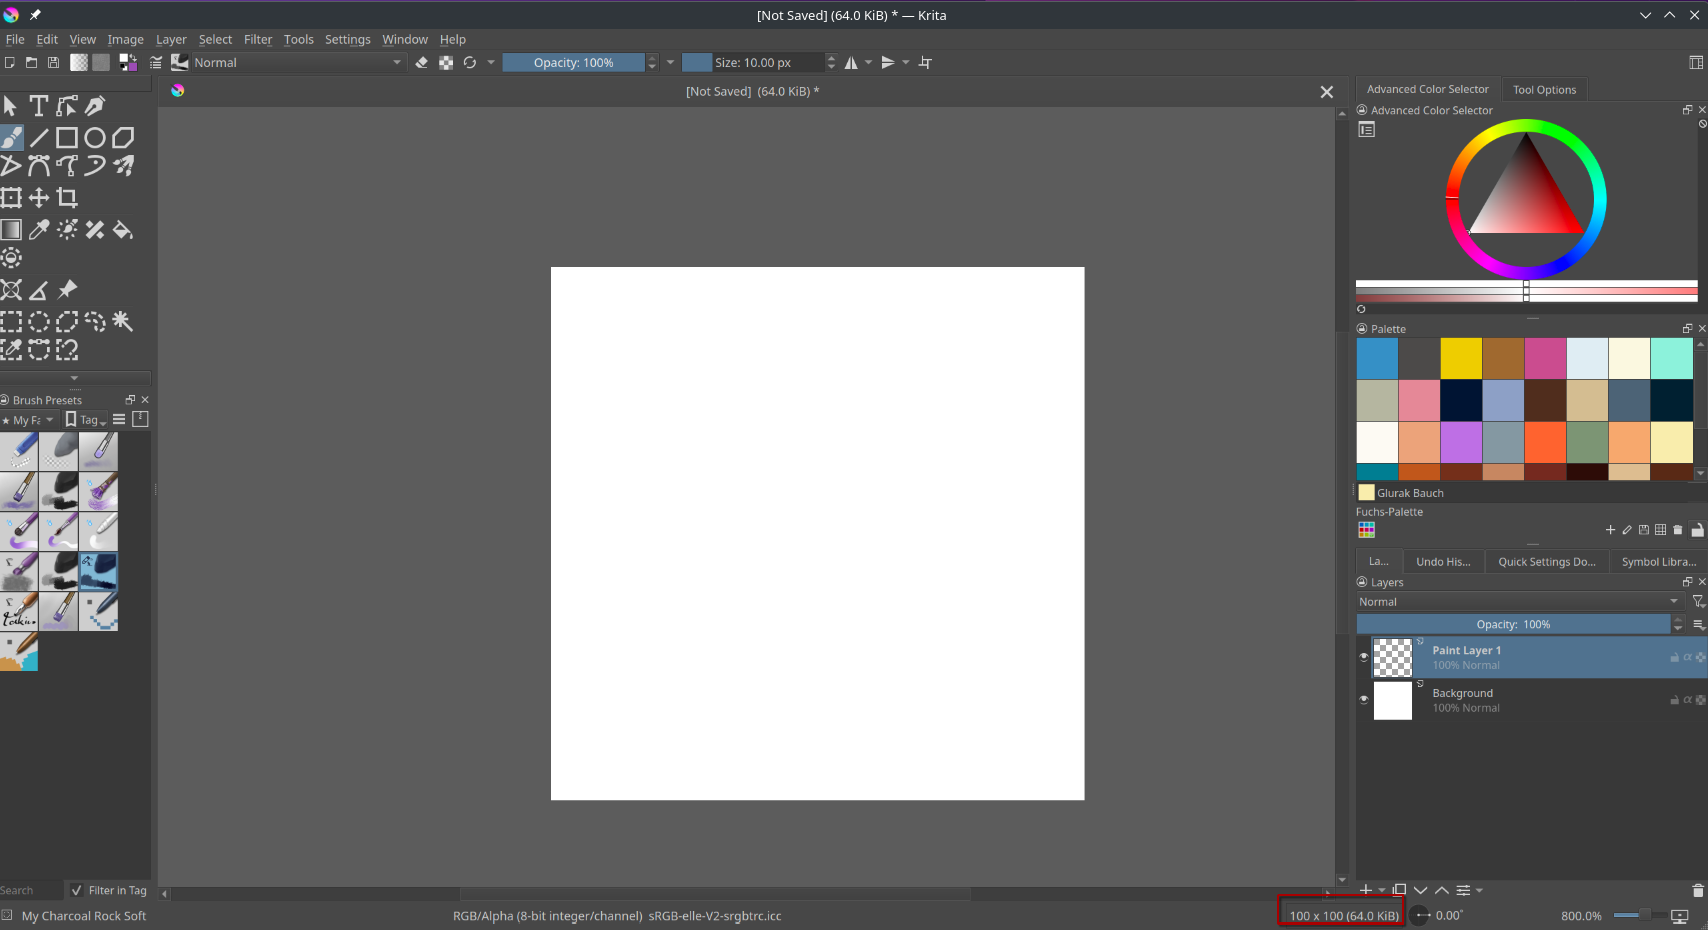
Notice at the bottom it is only 100 x 100 pixels large, which is quite small you may think but remember we are just making one single tile of a repeating pattern.
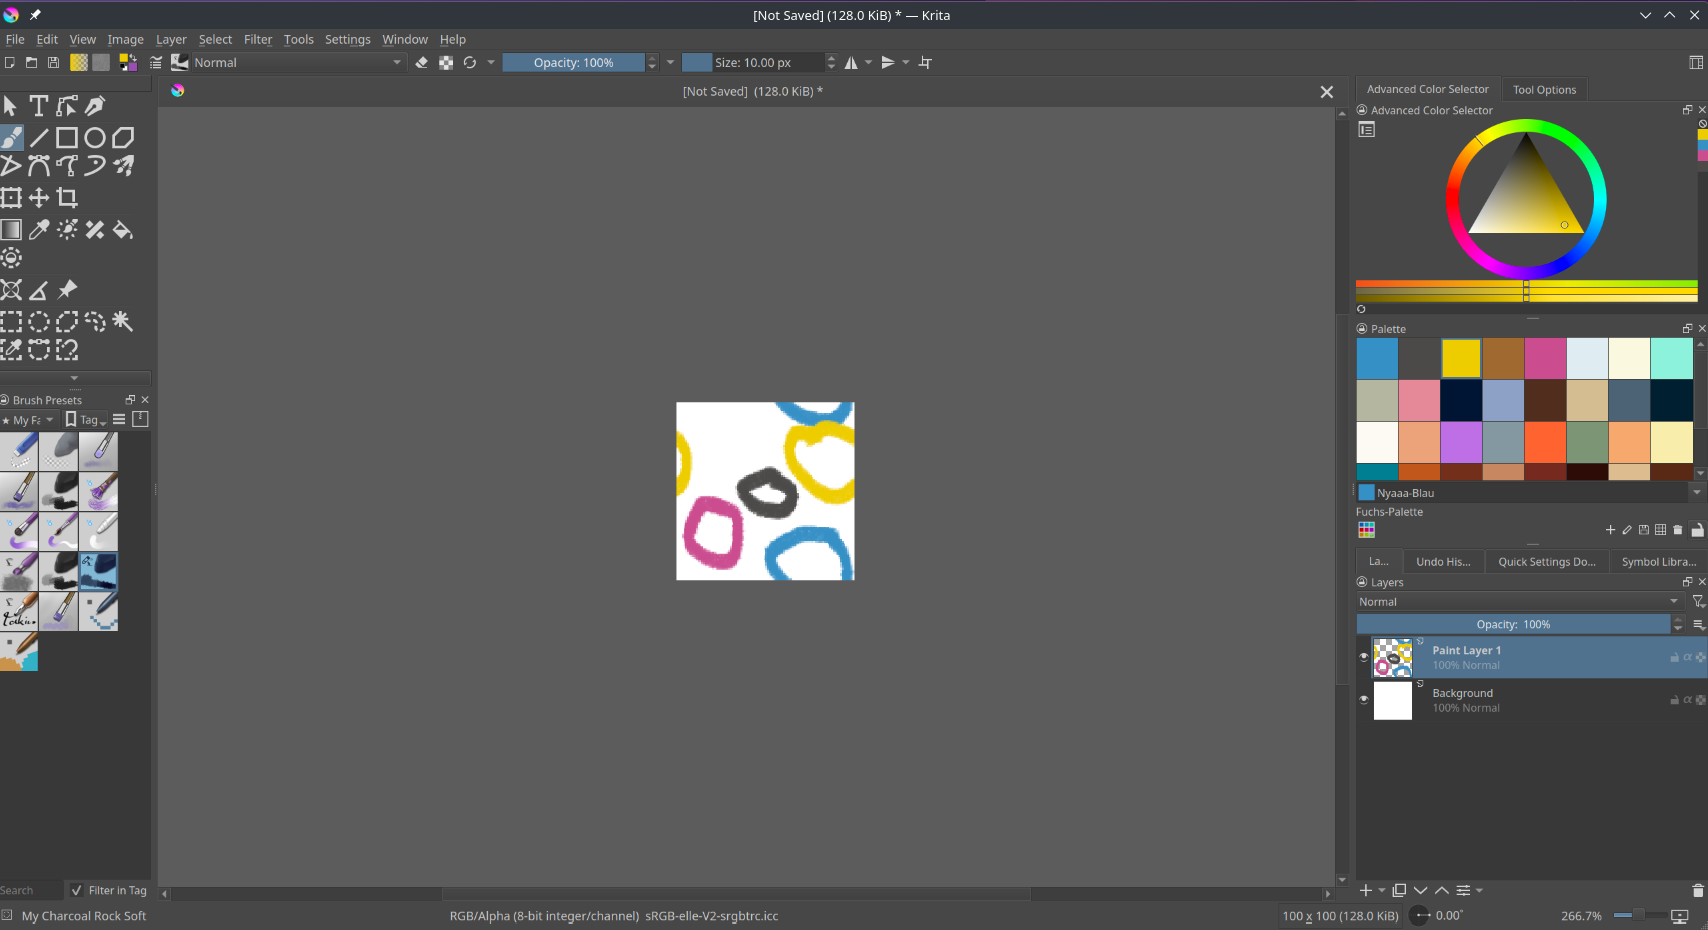
Now I start with my pattern, I have wrap around mode off for now.
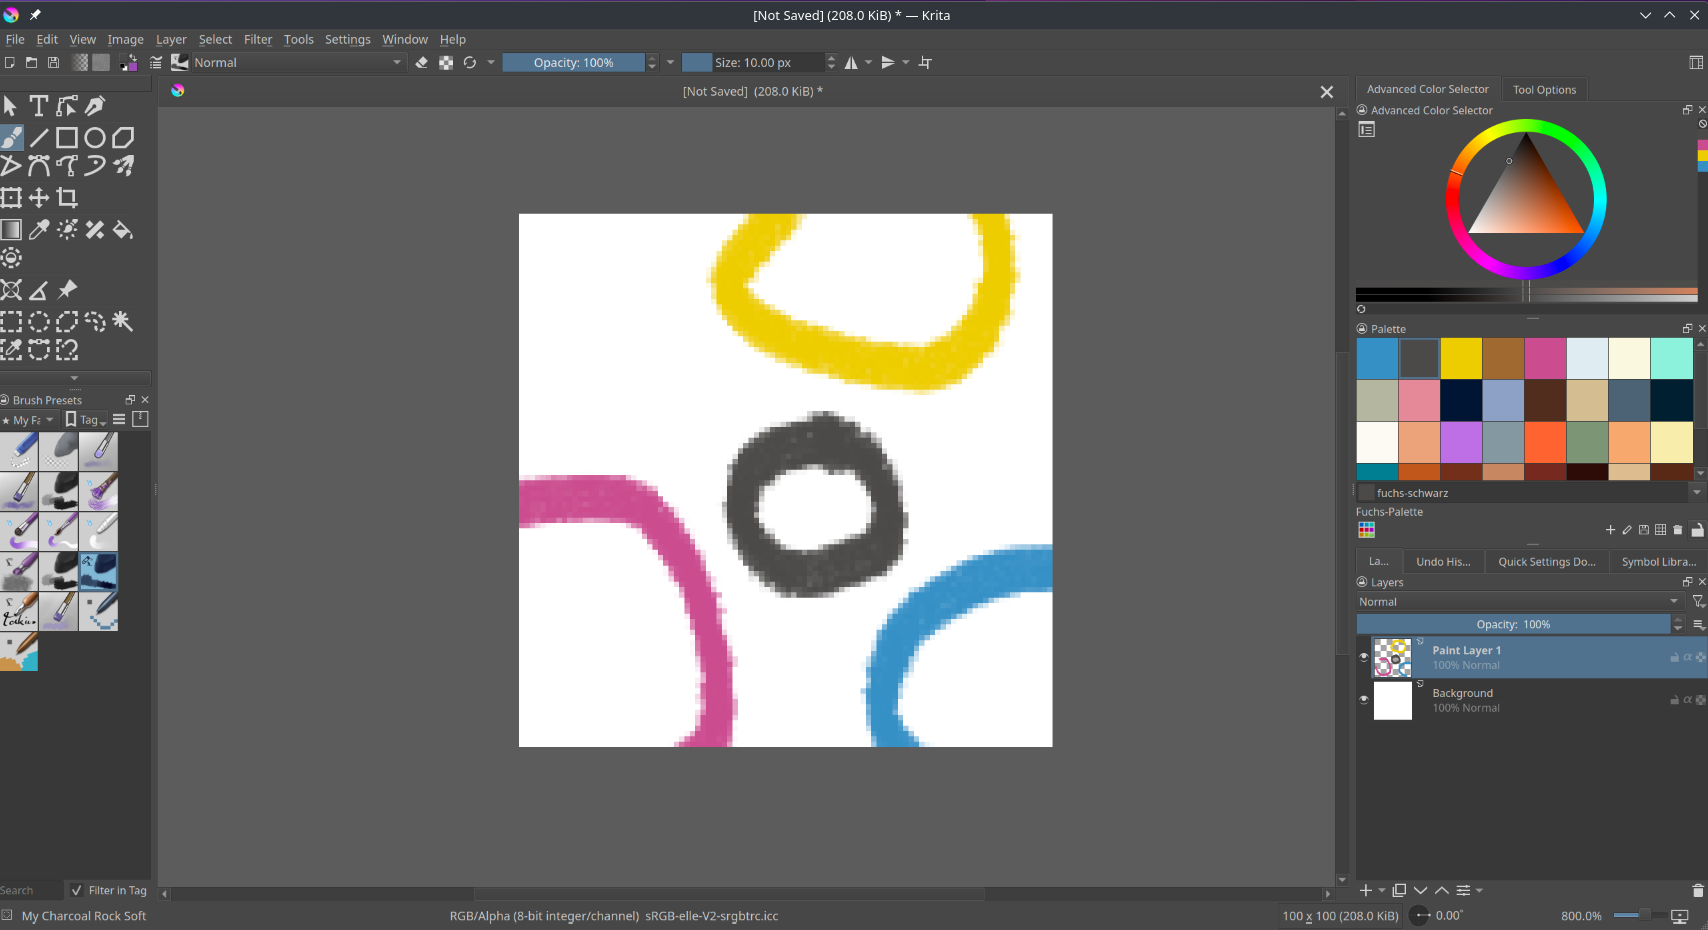
This is basically what I want, lets see how it looks when wrapped.
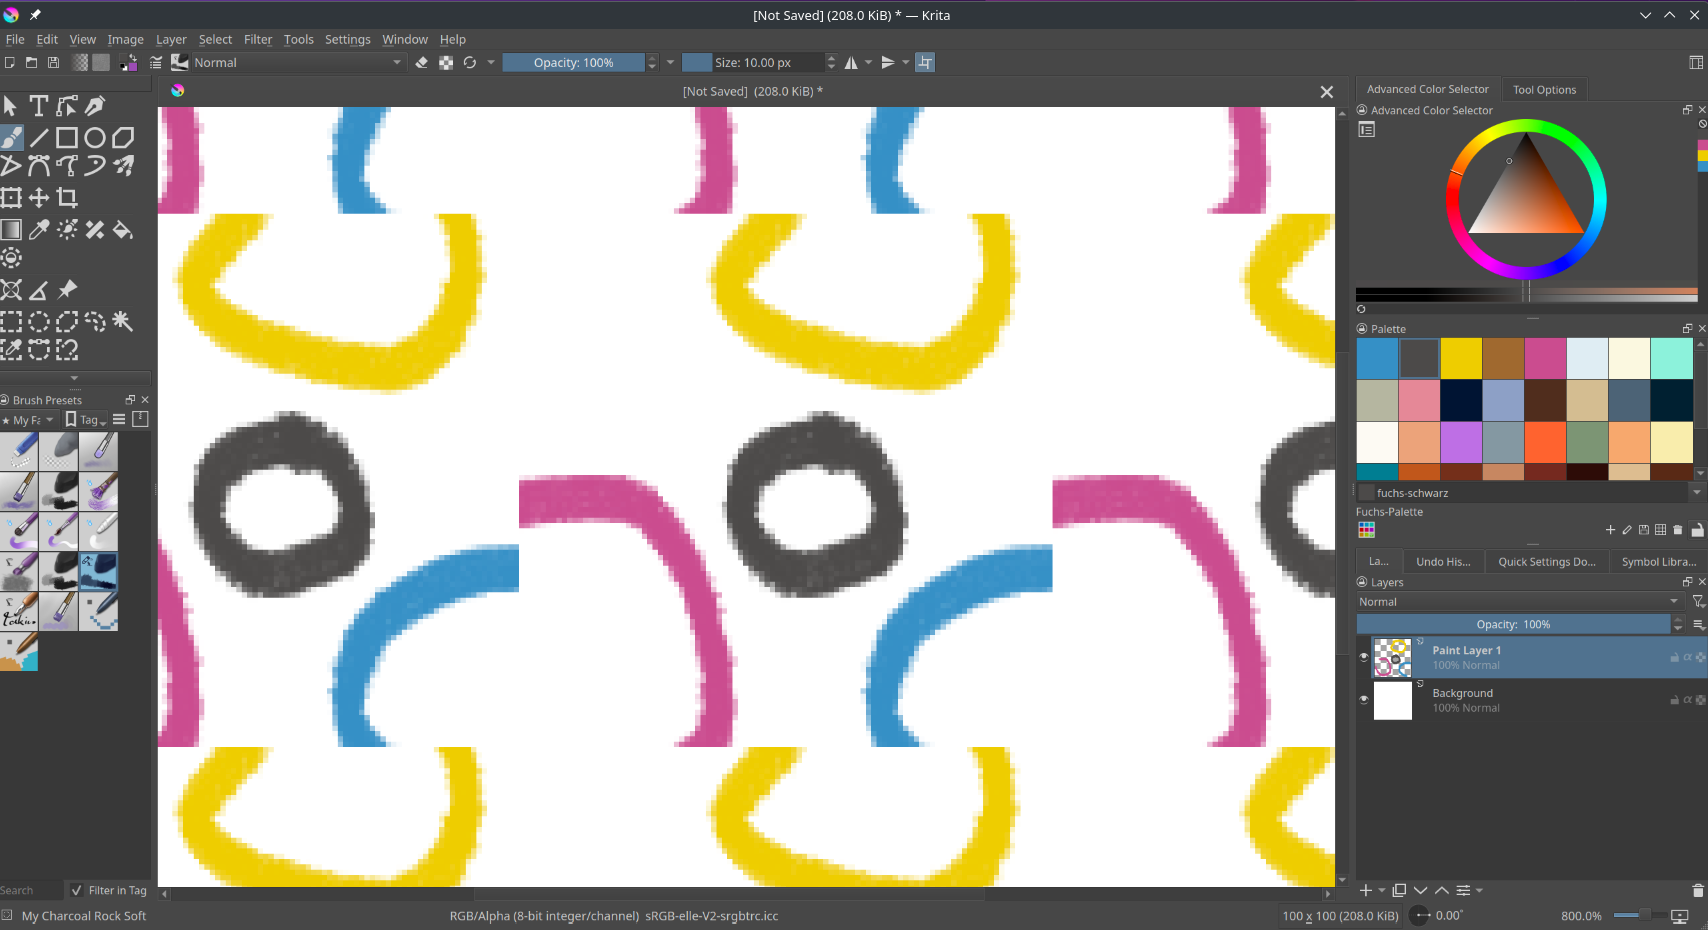
Uh that’s not very seamless isn’t it? That’s what you get from eyeballing and it’s where wrap around mode comes in handy.
I deleted some of the lines and redrew them with wrap around mode enabled.
That’s more like it. See how in the bottom it says that the document is still just 100 x 100 pixels? Yes, we are still only editing the one tile we started with. Wrap around mode only gives us a preview, a visual aid to help us create tiles.

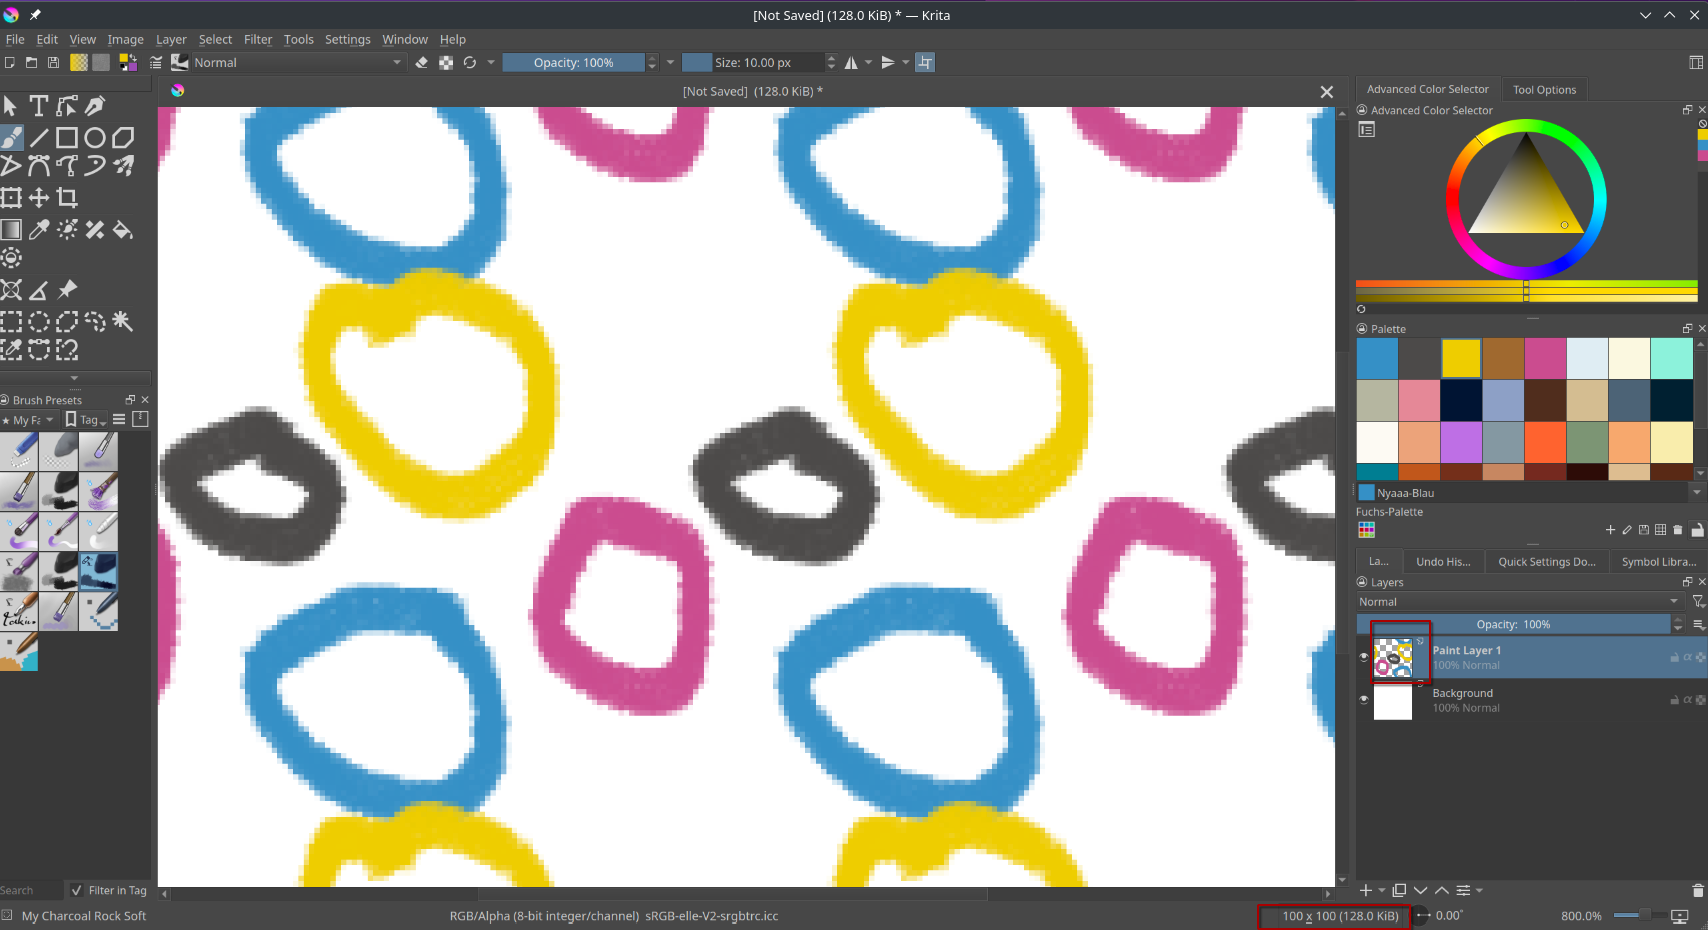
Yeah I think I’m pretty satisfied with it, this is how it looks when zoomed out a bit.
This is how it looks when wrap around mode is turned off again, that is our tile. It’s small and doesn’t wrap, but it’s everything we need.
Save the Tile for later
Now we actually want to use the tile for something (a pattern of course). For this we first save the tile we just made as a file. I simply named it pattern tile.png you can name it how you want but remember where you saved it, for later. I recommend exporting it in PNG format in any case.
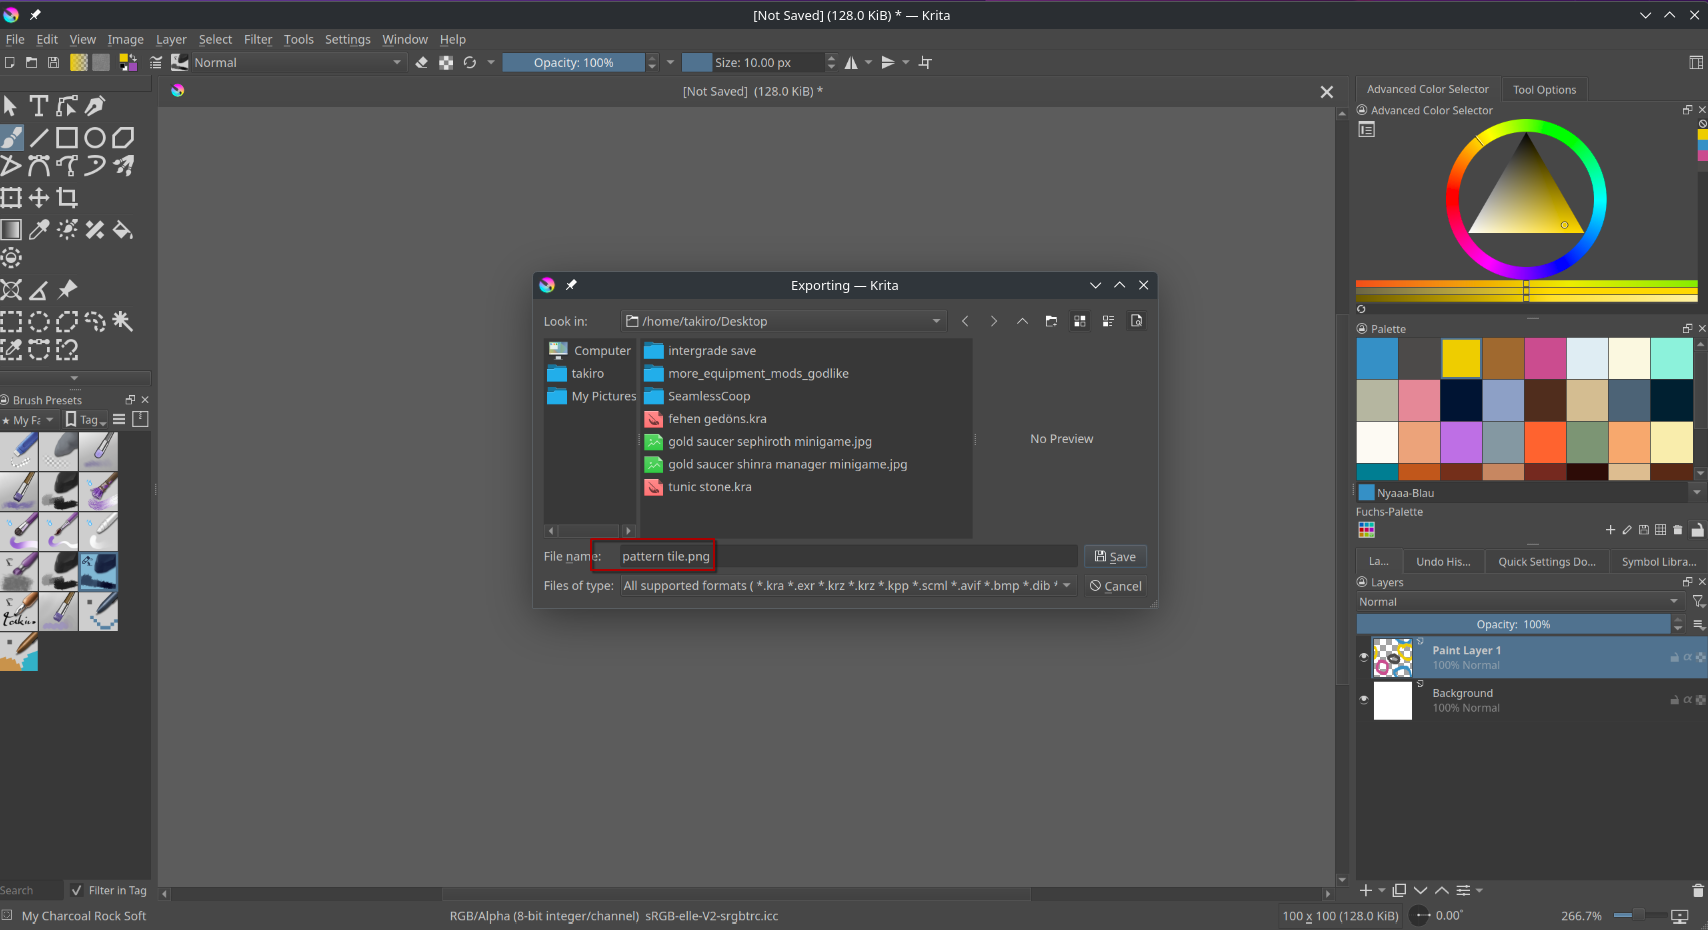
I saved it to my desktop, where it will be easy to find.
Using the Tile to create a Pattern
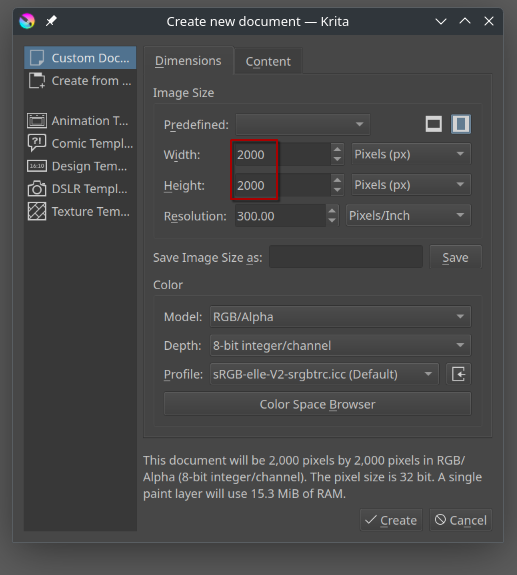
Now, create a new file. It’s important that is bigger than the single tile we just created. I made the new file 2000 x 2000 pixels large, this means it should fit our tile 400 times, giving it a nice pattern.
Importing the Tile
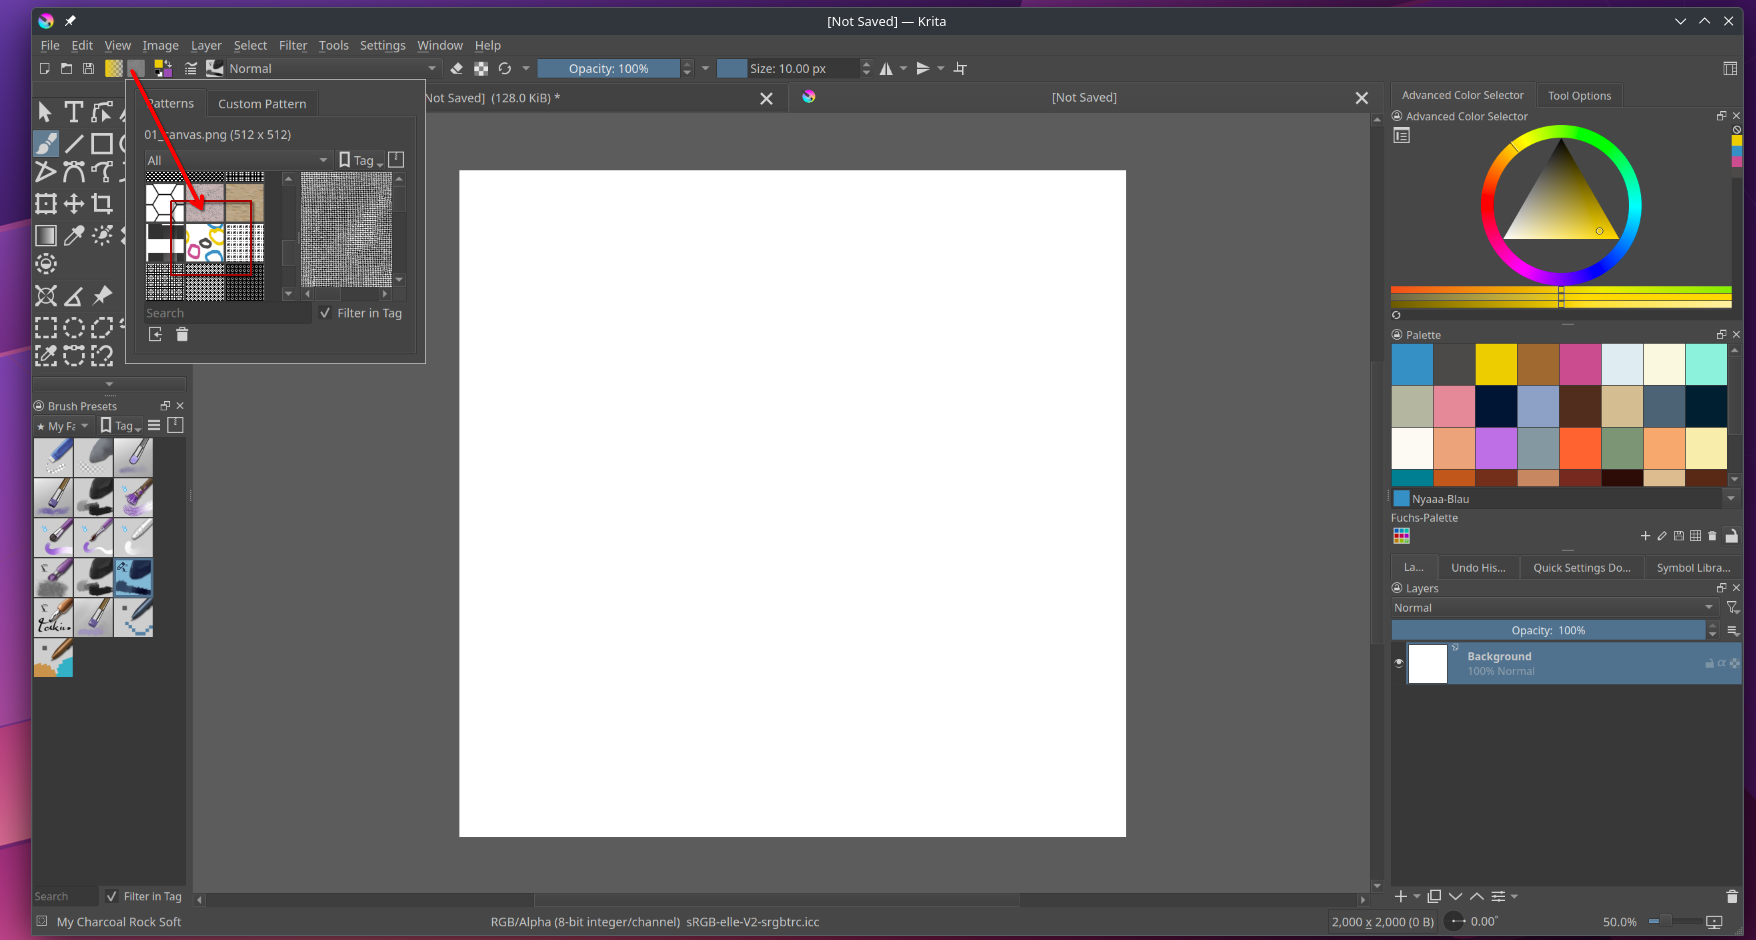
With the new File open, we need to tell Krita to import our tile so we can use it. This is done with the button next to the gradient and foreground color button. Press it, it opens a pattern popup.
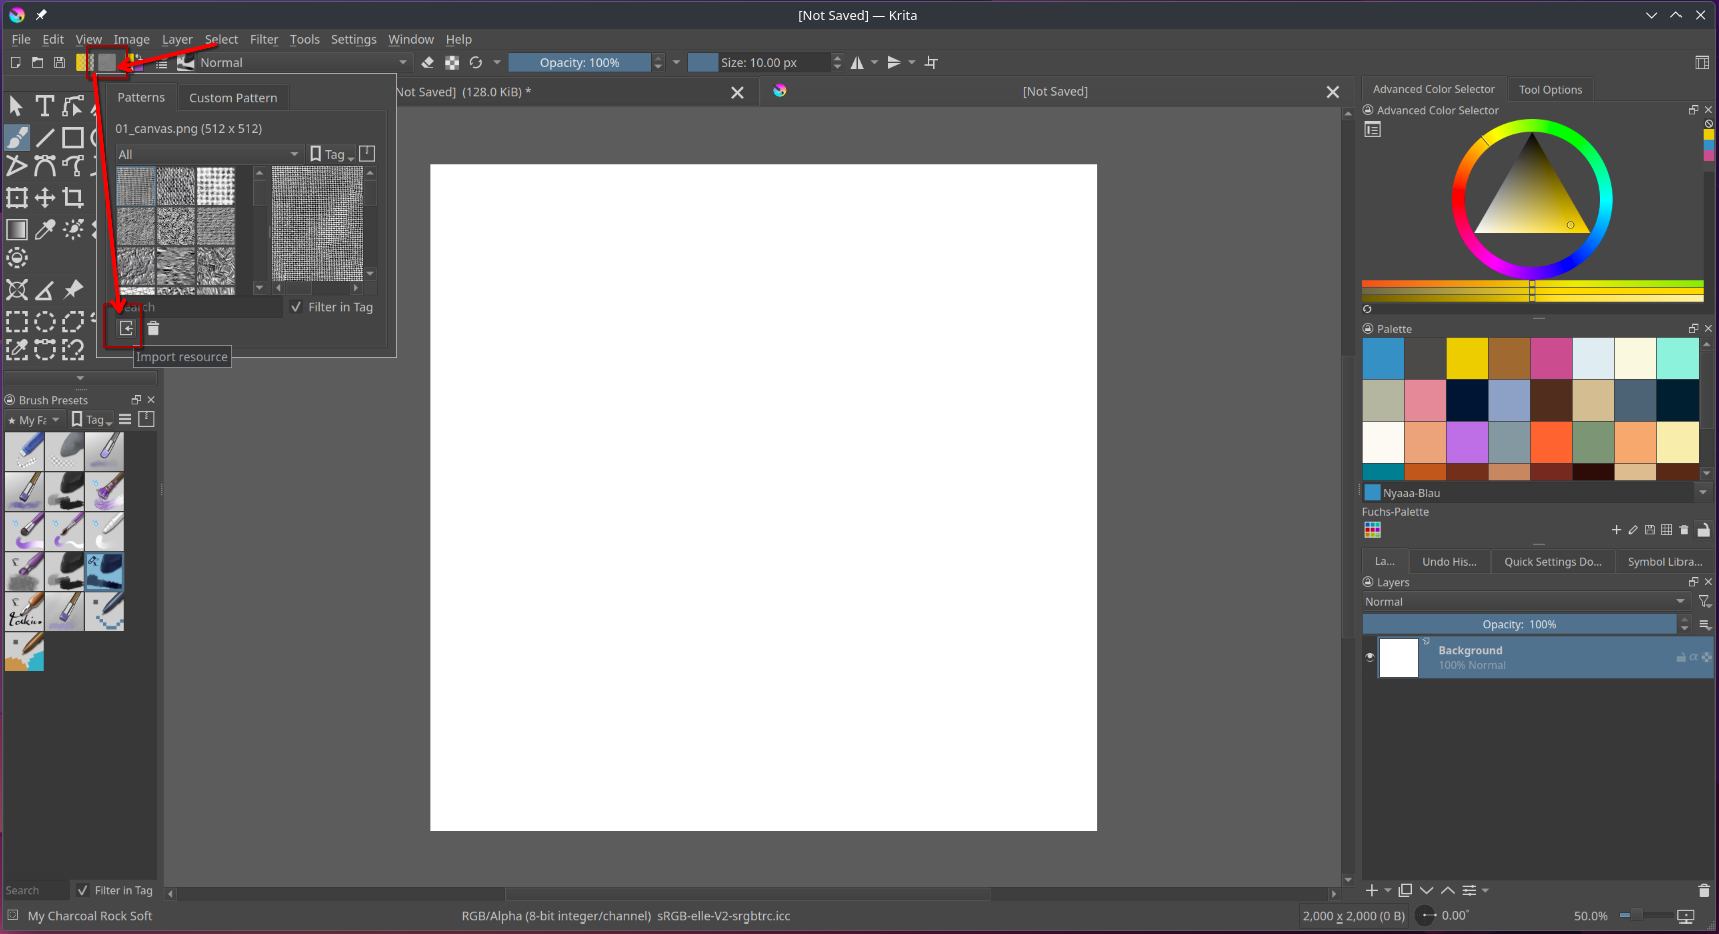
In the pattern popup press the little button that looks like a door or something. This let’s you import a file for a pattern. And what file do we want? Correct, the tile we created in the prevous file, the pattern tile.png in my case.
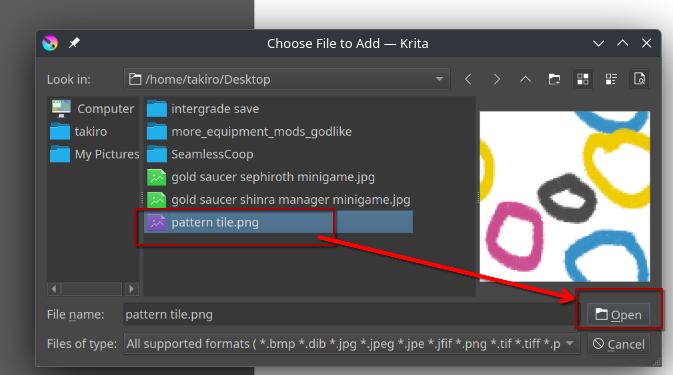
Select it from the file browser and press open. After that it should be selectable as a pattern, from the very same popup we used before.
Using the Tile for a Pattern
Now to actually use it. Patterns can be used in many locations, I only show two of them for this example.
First as part of a fill layer. A fill layer is a special kind of layer that is very efficient and uses less memory even with big canvases. It’s basically made for patterns.
You can add a fill layer from the layers docker by pressing the plus button and selecting fill layer from the drop down.
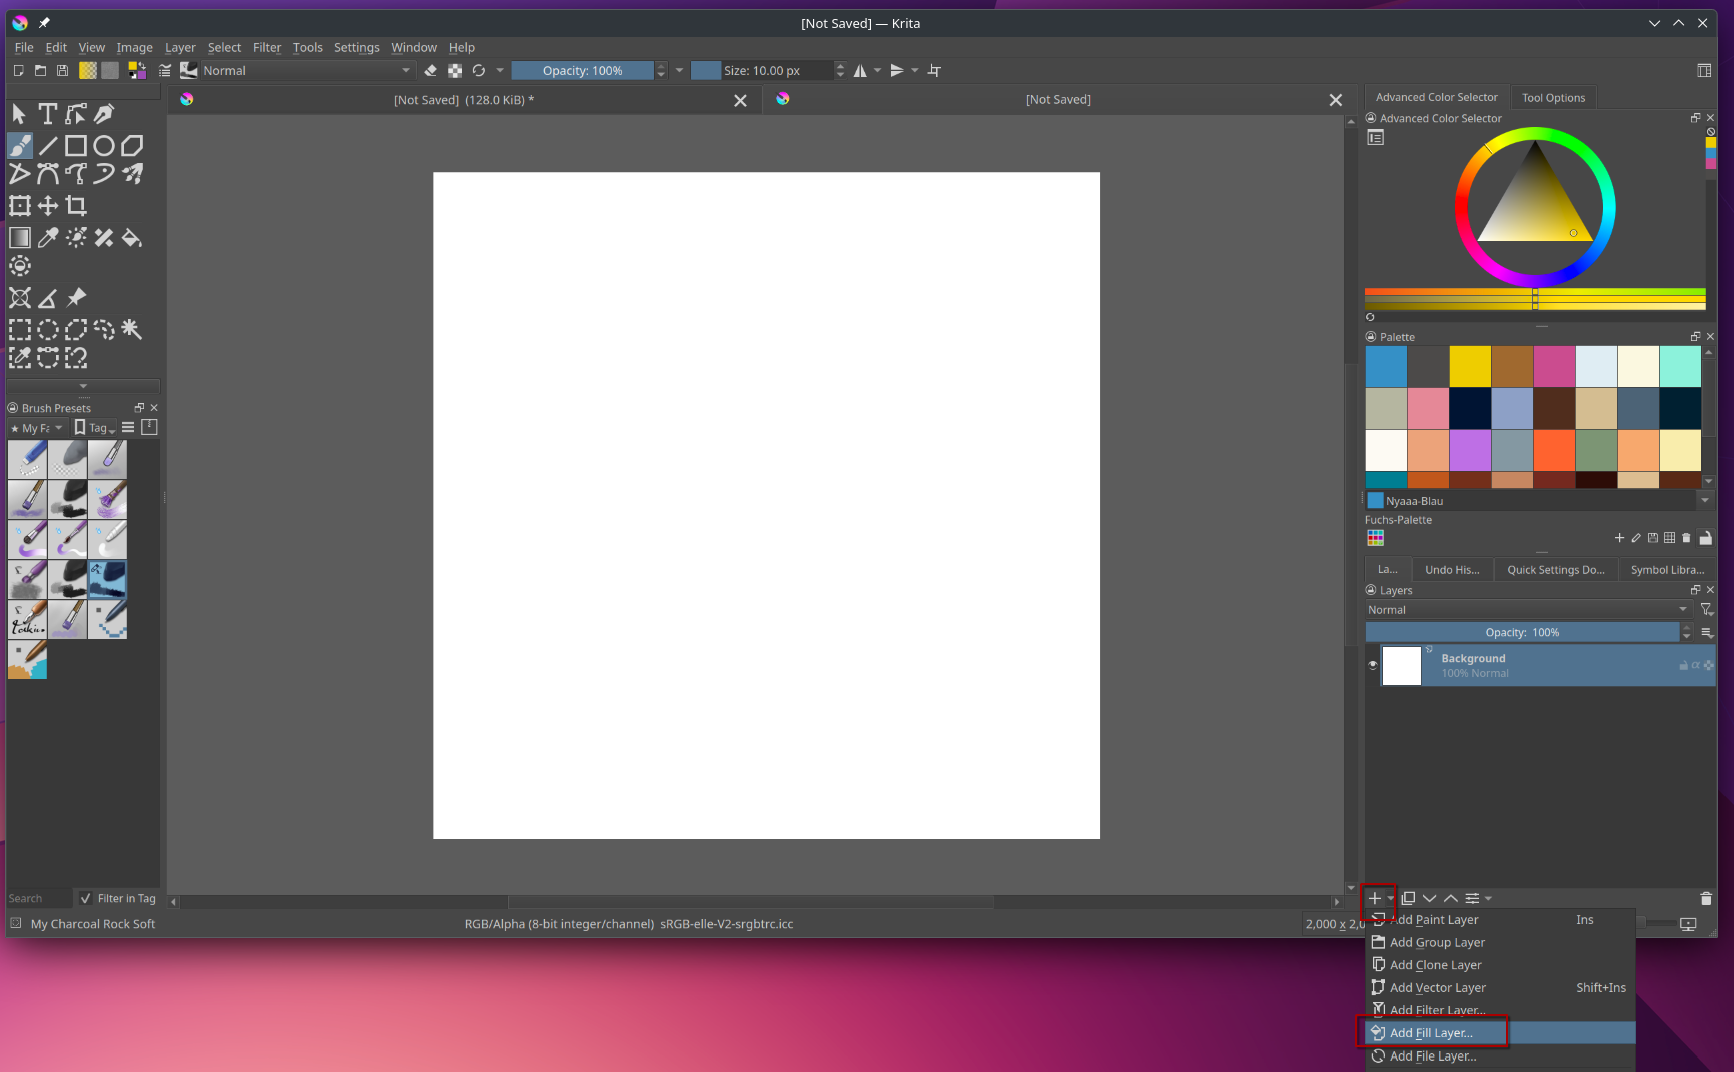
I marked it in red.
When pressed a popup will appear to ask you what you want it filled with. It is probably set to color by default (and if you have multiple monitors, for me it popped out on the wrong one so have a look out for that in case you cant find it)
Since we want a pattern choose pattern in the sidebar and then select the pattern we just added from the resources.
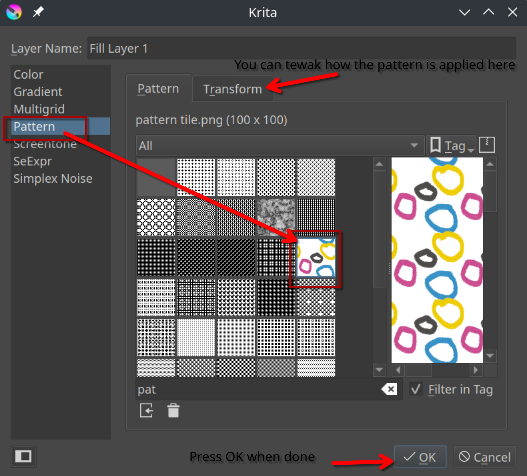
You can already see in the preview window how it’s wraping already. In the Transform you can tweak settings like scale (making the pattern bigger or smaller), rotation or offset. When you’re satisfied with the result, press OK.
Now the canvas should look somewhat like this:
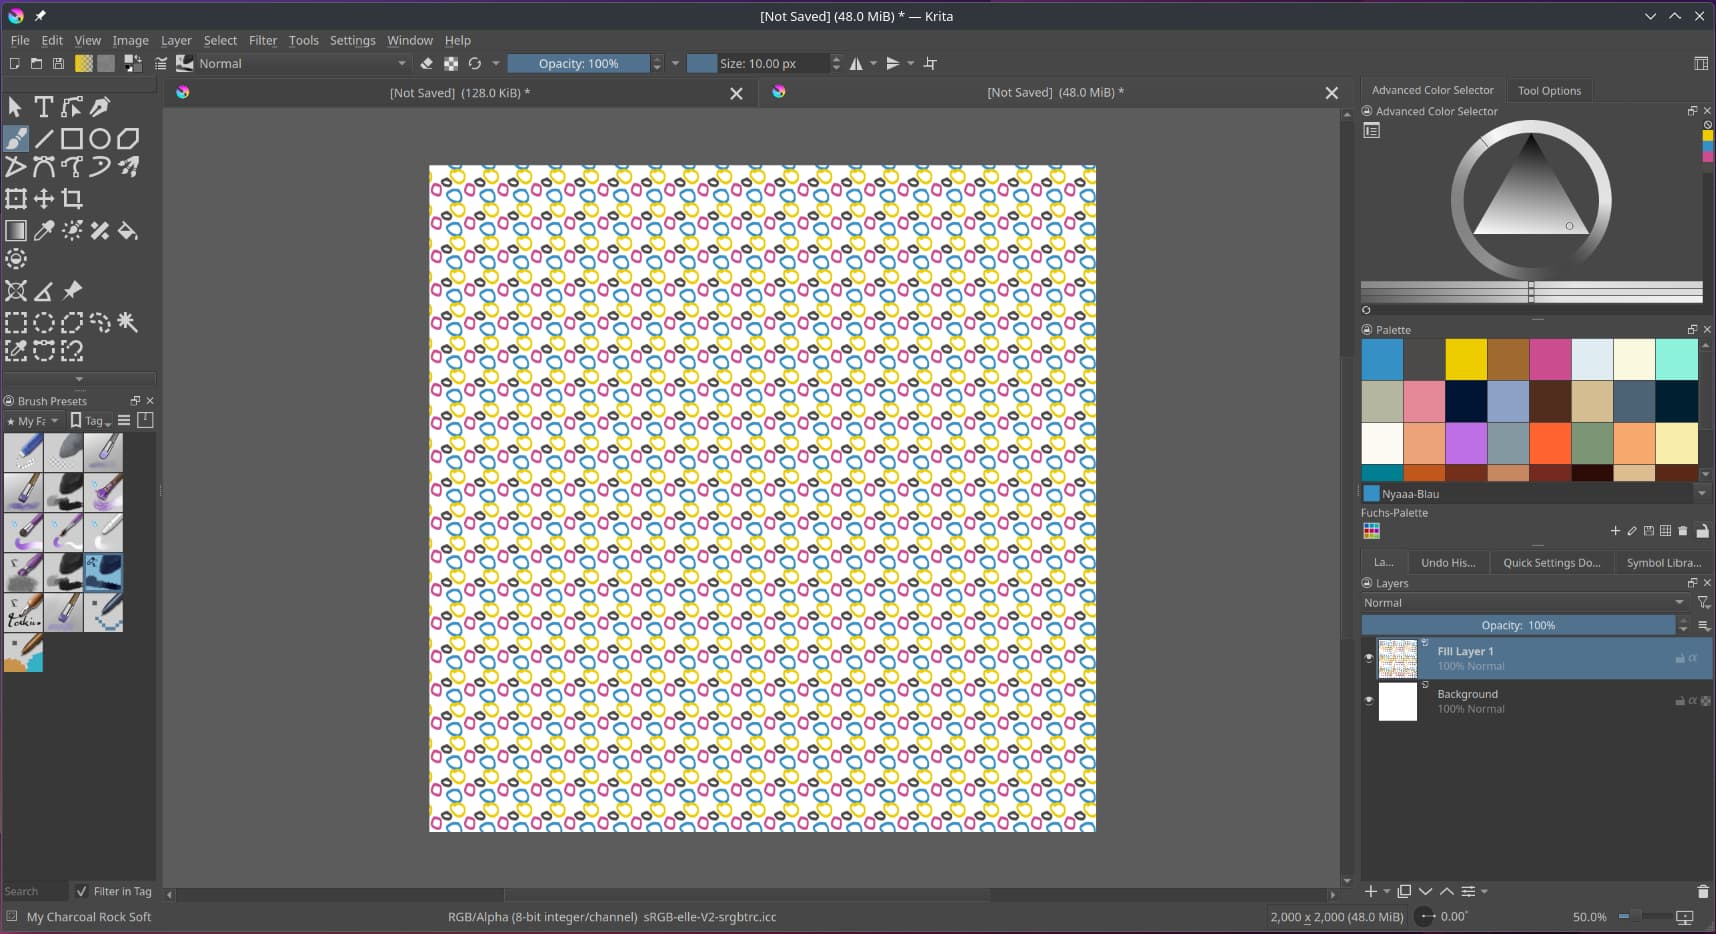
Now that’s more like it. You now can use your pattern in every project you want to. You can not only use it for fill layers but also for brushes or as fill for shapes. For this select the pattern from the pattern chooser and then select pattern as an option in the shape tool’s tool options.
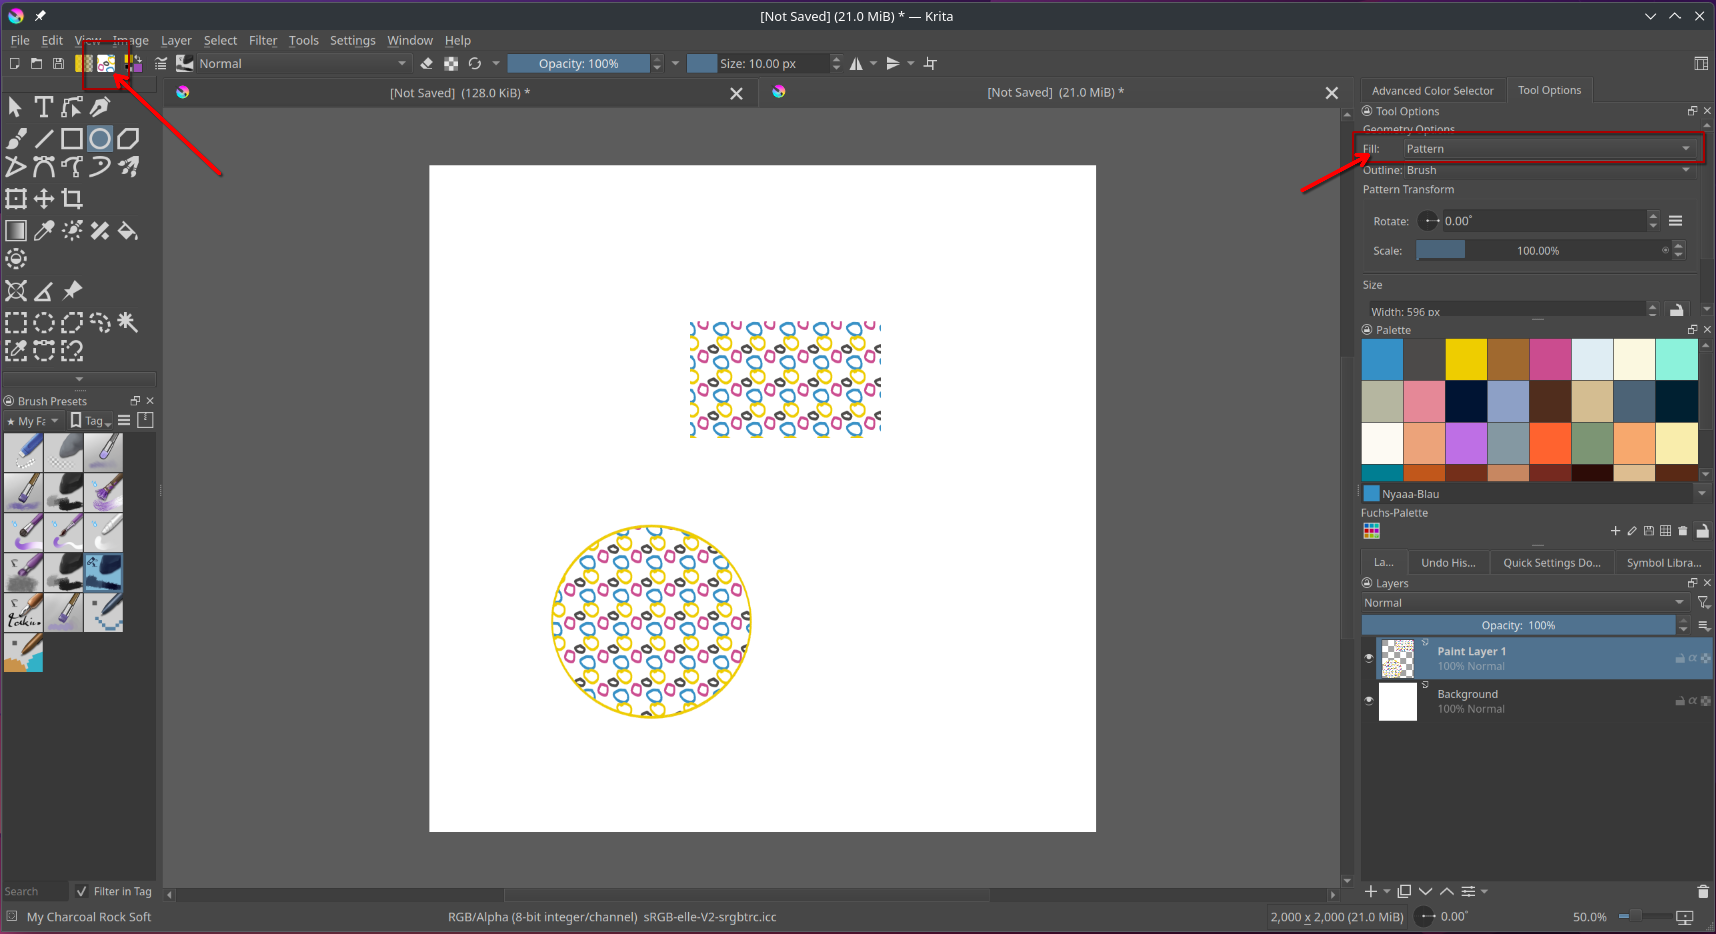
And when you save/export it (I exported so don’t mind the “unsaved file”)
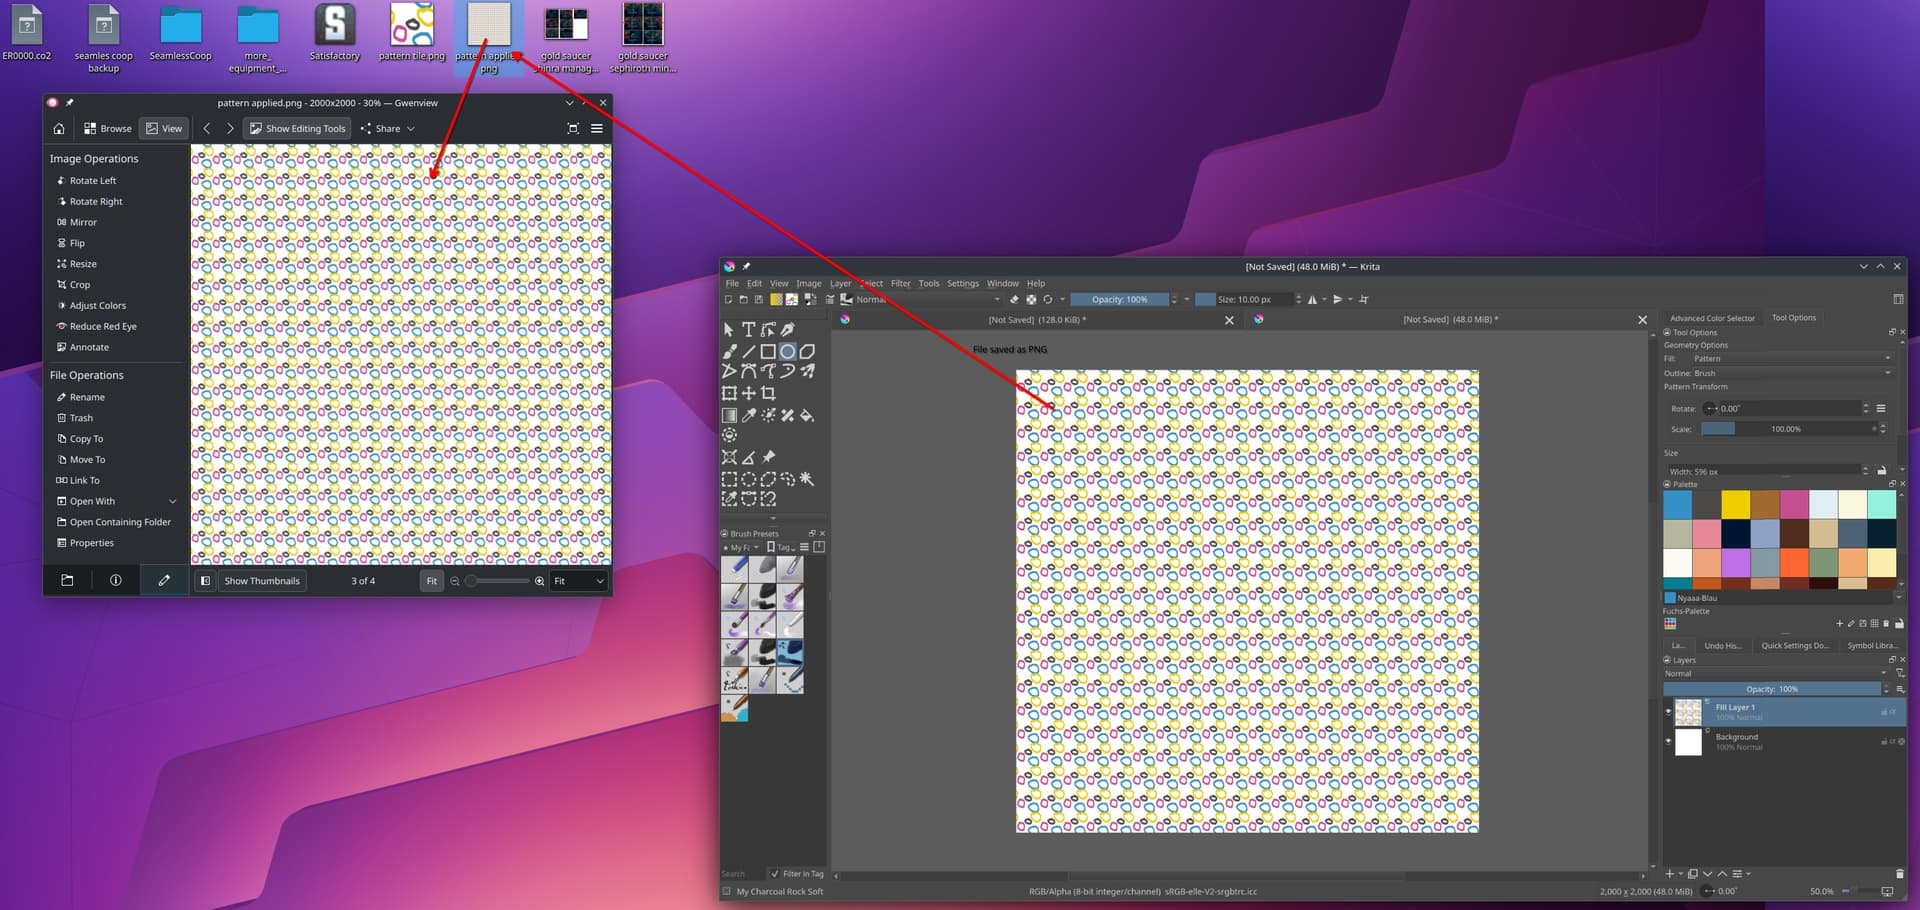

Voila! That’s how you use wrap around mode to create a tile that can be used for a pattern.
@tiar unfortunately a bug currently prevents the use of patterns as a fill in vector shapes on vector layers, it only works on raster layers in the current version.
Wow, thank you very much for the very detailed explanation and… now I understand! ![]()
But I thank you all for your comments and especially the attention and time you have wanted to spend on my question.
Have a nice weekend everyone! ![]()
Remember to mark the post that solved your issue as the solution. This will mark the entire topic as resolved and embed the solution at the top for everyone to easily see.
@ Sooz
I thought I did that already but thanks anyway. ![]()