Most people when they want to transform something they use just the transform tool. Usually they take the layer or a selection, activate the tool with ctrl + t or by clicking the button, then they configure their transformation and than apply it.
What this does in detail is that it takes all the pixels from the original layer, “moves” them to their new position and then basically replaces the old layer with the result. When you then later use the transform tool again it has no knowledge of the previous transformation that’s why the bounding box appears to be reset but actually it’s just the bounding box of the new layer that was created as a result of the previous transformation instead of the bounding box of the previous object. This is, like you mentioned pretty bad when you later want to adjust or edit the transformation but there is a way around it and it’s pretty cool actually.
Instead of just using the transform tool on a raster layer (paint layer) first do the following.
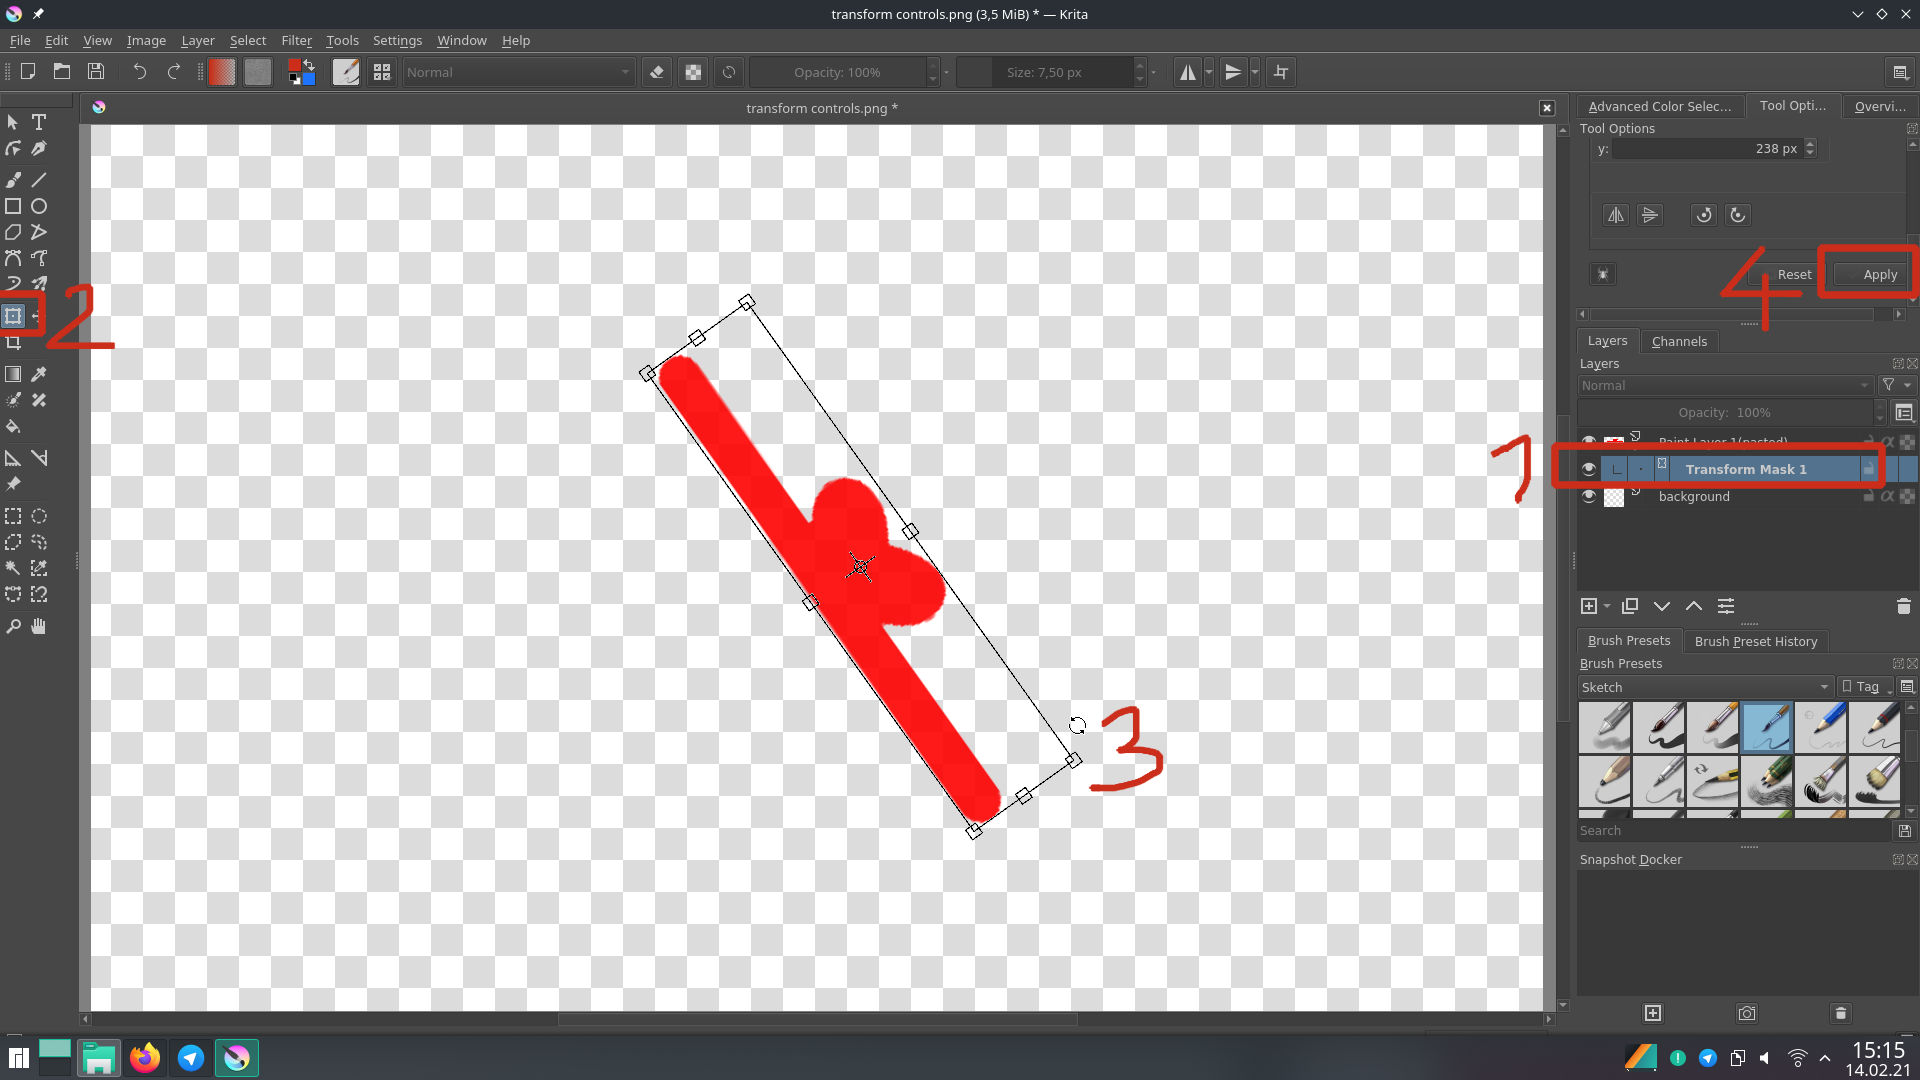
Select the layer you want to transform, then add a Transform Mask

Then select the newly created transform mask, and activate the Transform Tool. Now make your transformation like you usually do, like rotation or whatever you like, apply changes when you are done.
Now comes the real magic. When you do your transformation on a transform mask your original will not be lost. You can still see it in the layer stack in it’s original orientation. In fact you can change the visibility of the mask and you will see the original again. This is nice when you later find yourself in a situation where you have to make changes to the original but cant apply the transformation again. Simply turn off the mask for a moment, make your change, turn mask on once again. Even when you need to adjust the rotation later, the program will remember the bounding box, even after saving and opening the document later.
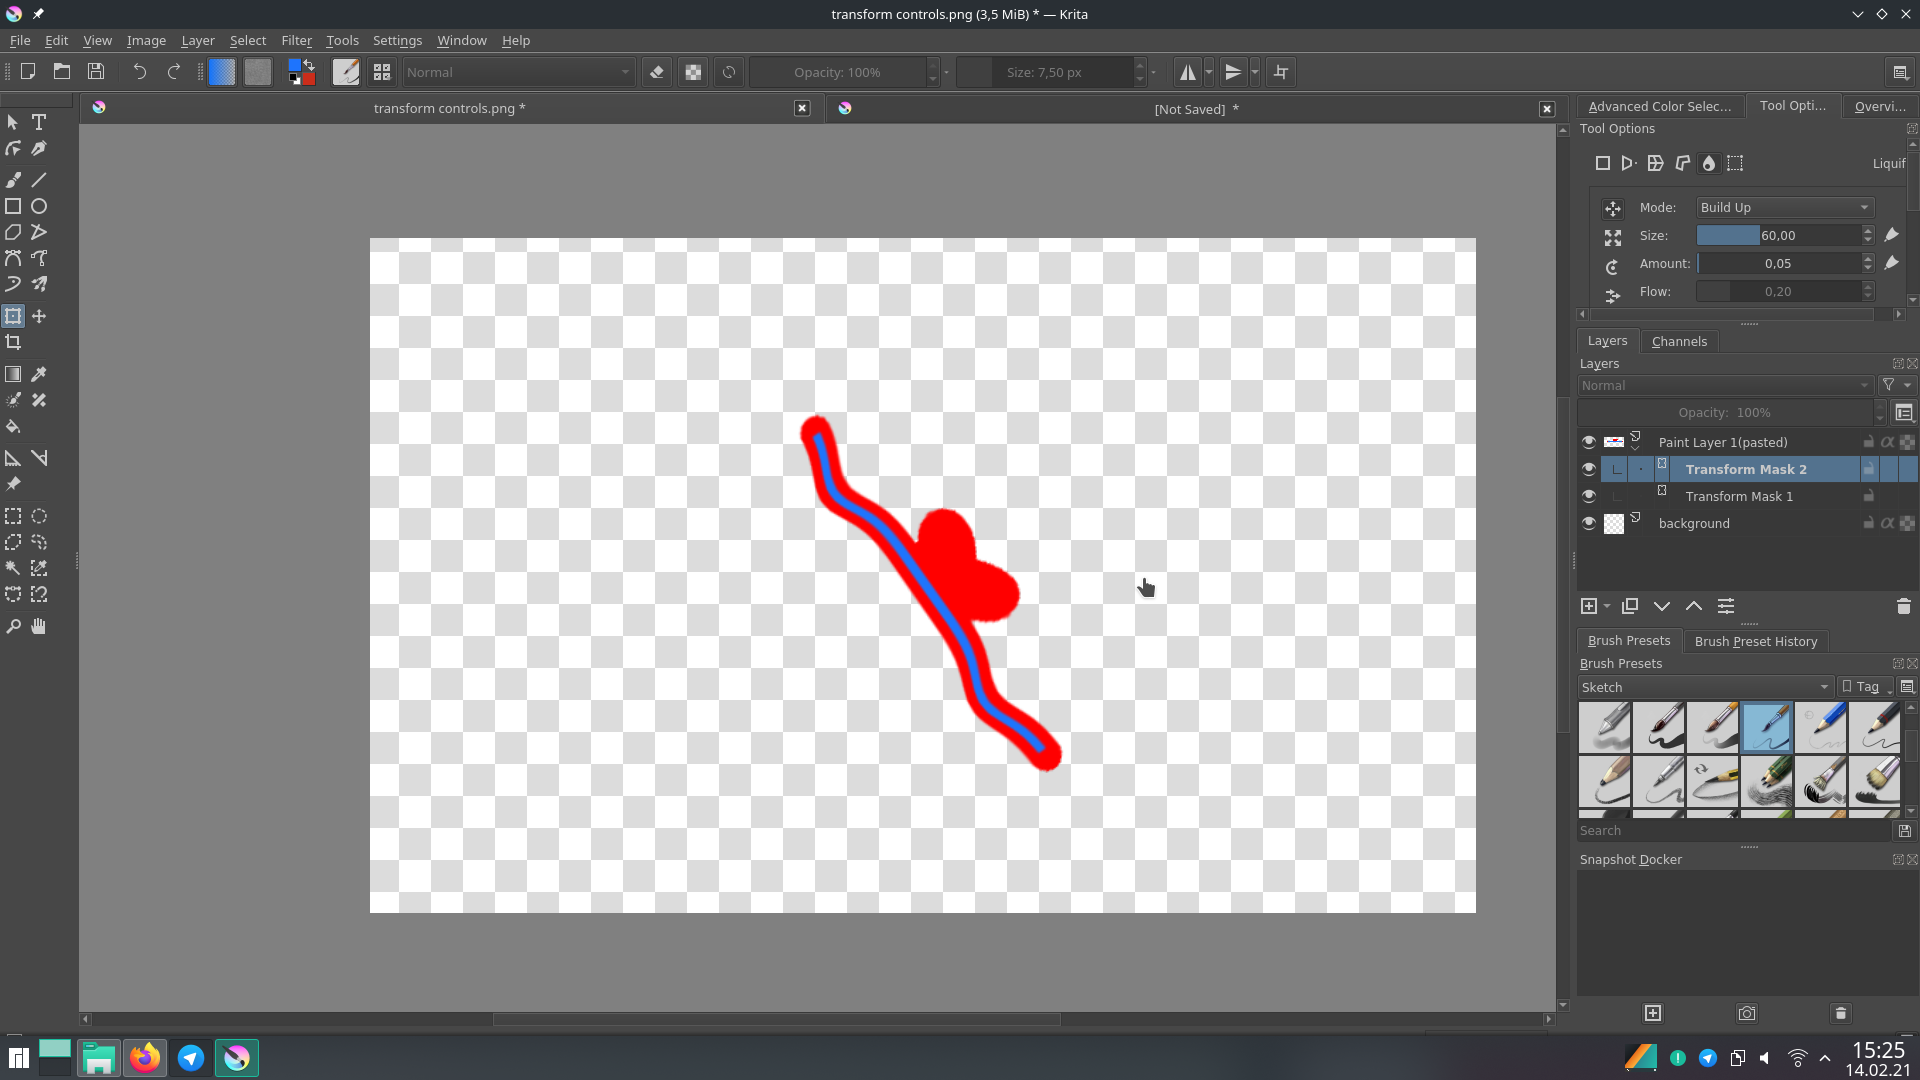
You can even stack multiple transform masks on top of each other, when you not only have to rotate but want to liquify too (or something else).
Here is an example. I first turned off the transform mask with the rotation so I can add a blue line. Then I turned the mask back on and added a second transform mask on top where I used the liquify transformation.
However it should be noted that having a lot of transformation masks, especially stacked upon each other can be bad for the programs performance. It can sometimes take a while until everything is computed. I did this on my weak laptop and when I turn the mask with the liquify transformation off and on, it takes a few seconds until it’s visible again.