Is it possible to rotate the free transform "handle box" without actually warping the contents

I’m not quite sure how to accurately explain what I’m trying to do, but here we go.
Suppose that I have a rectangular shape that I want to squish or stretch, or warp to perspective. It’s a very easy thing to do to a high degree of accuracy by simply selecting the whole thing and using the free transform tool.
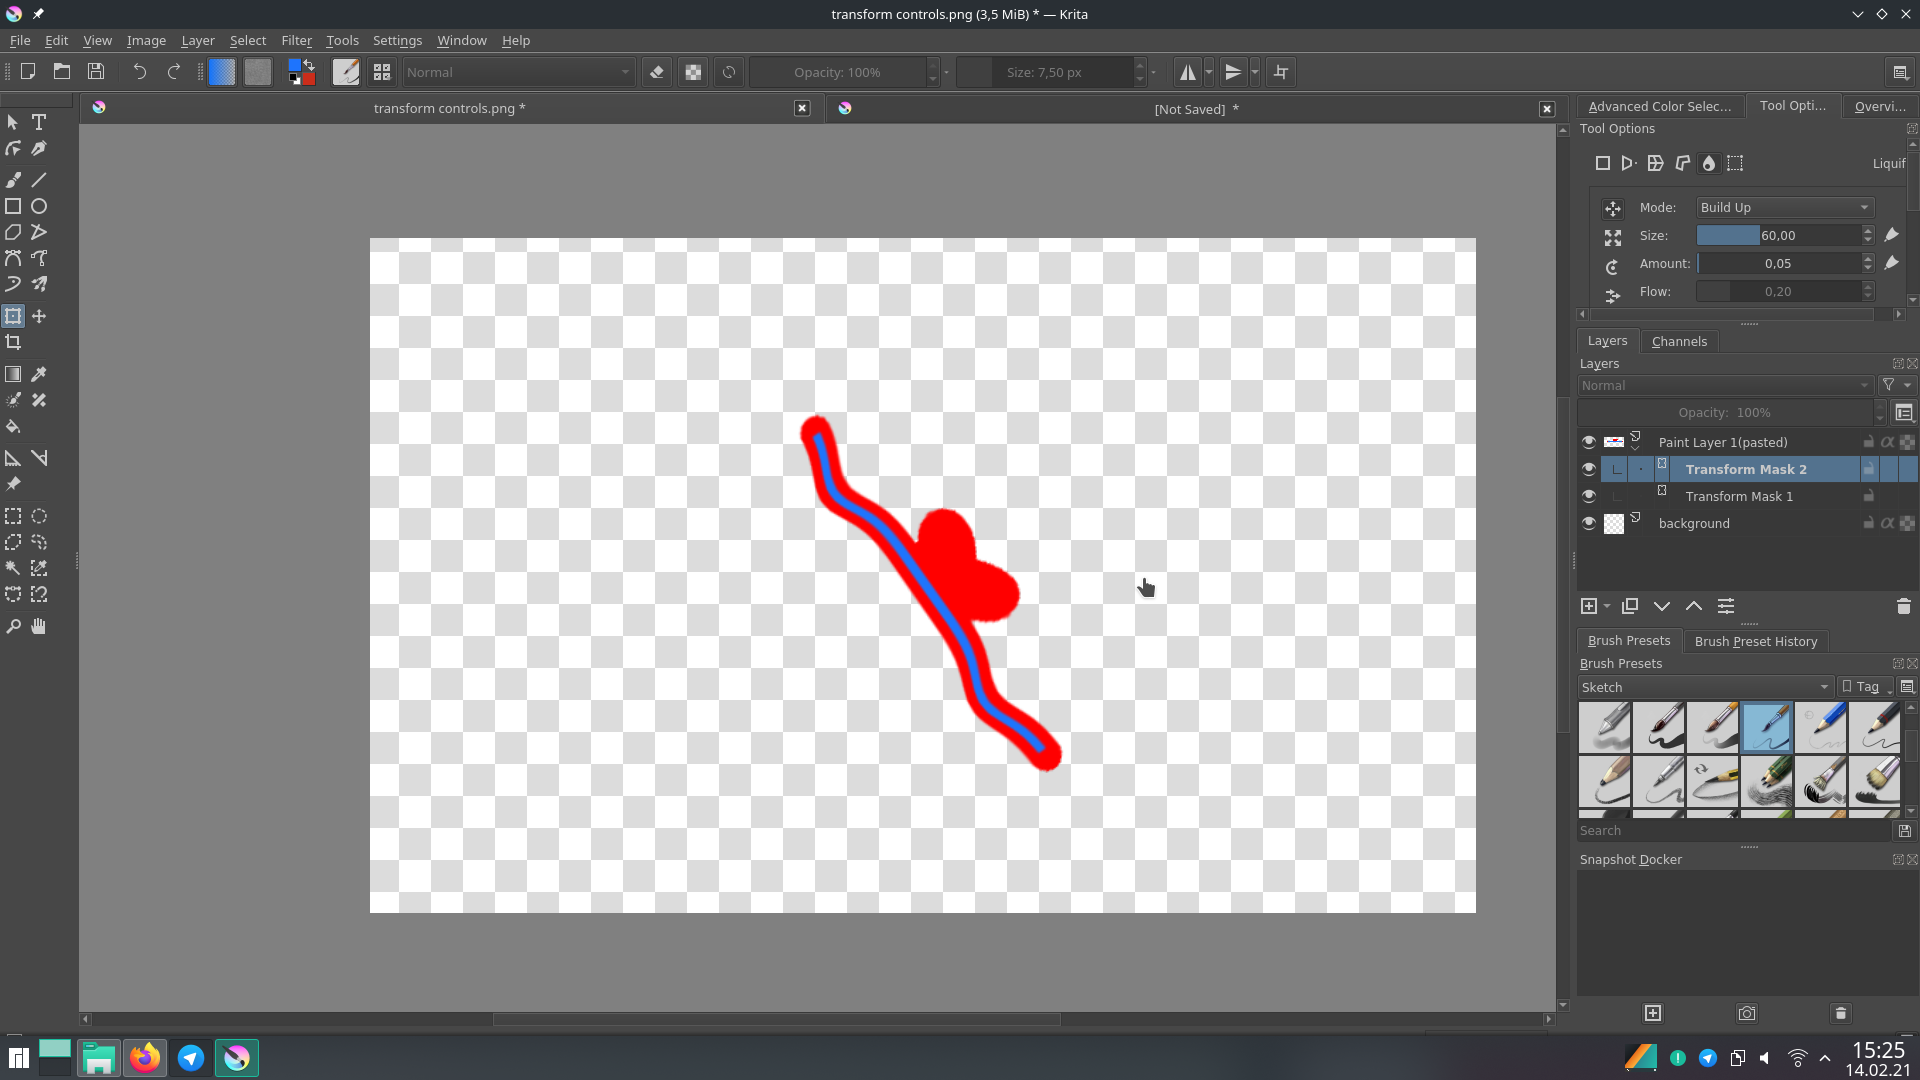
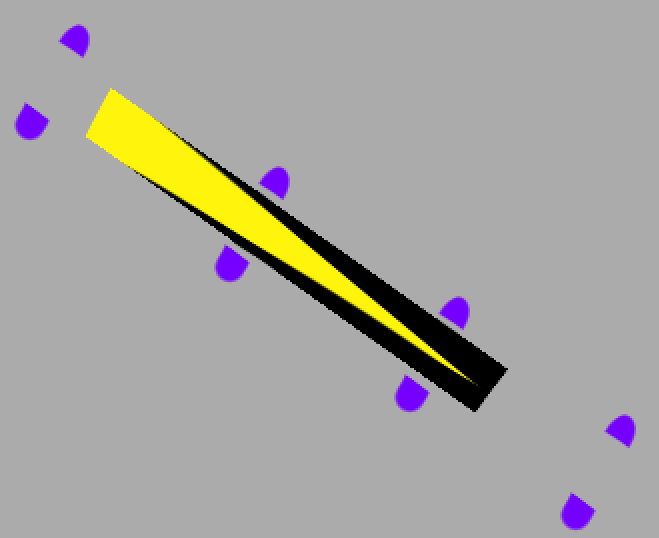
However, a problem arises if my shape is already rotated at an angle to begin with. The free transform box is, by default, oriented upright in respect to the page. I can still perform my transformations by stretching and then skewing the box, or my perferming several warps to first get the object upright, then stretching it, then putting it back at an angle, or by creating my own box with the Cage function - but all of those options are much more difficult and require much more care and precision on my part (and some of them create much more warp artifacting).
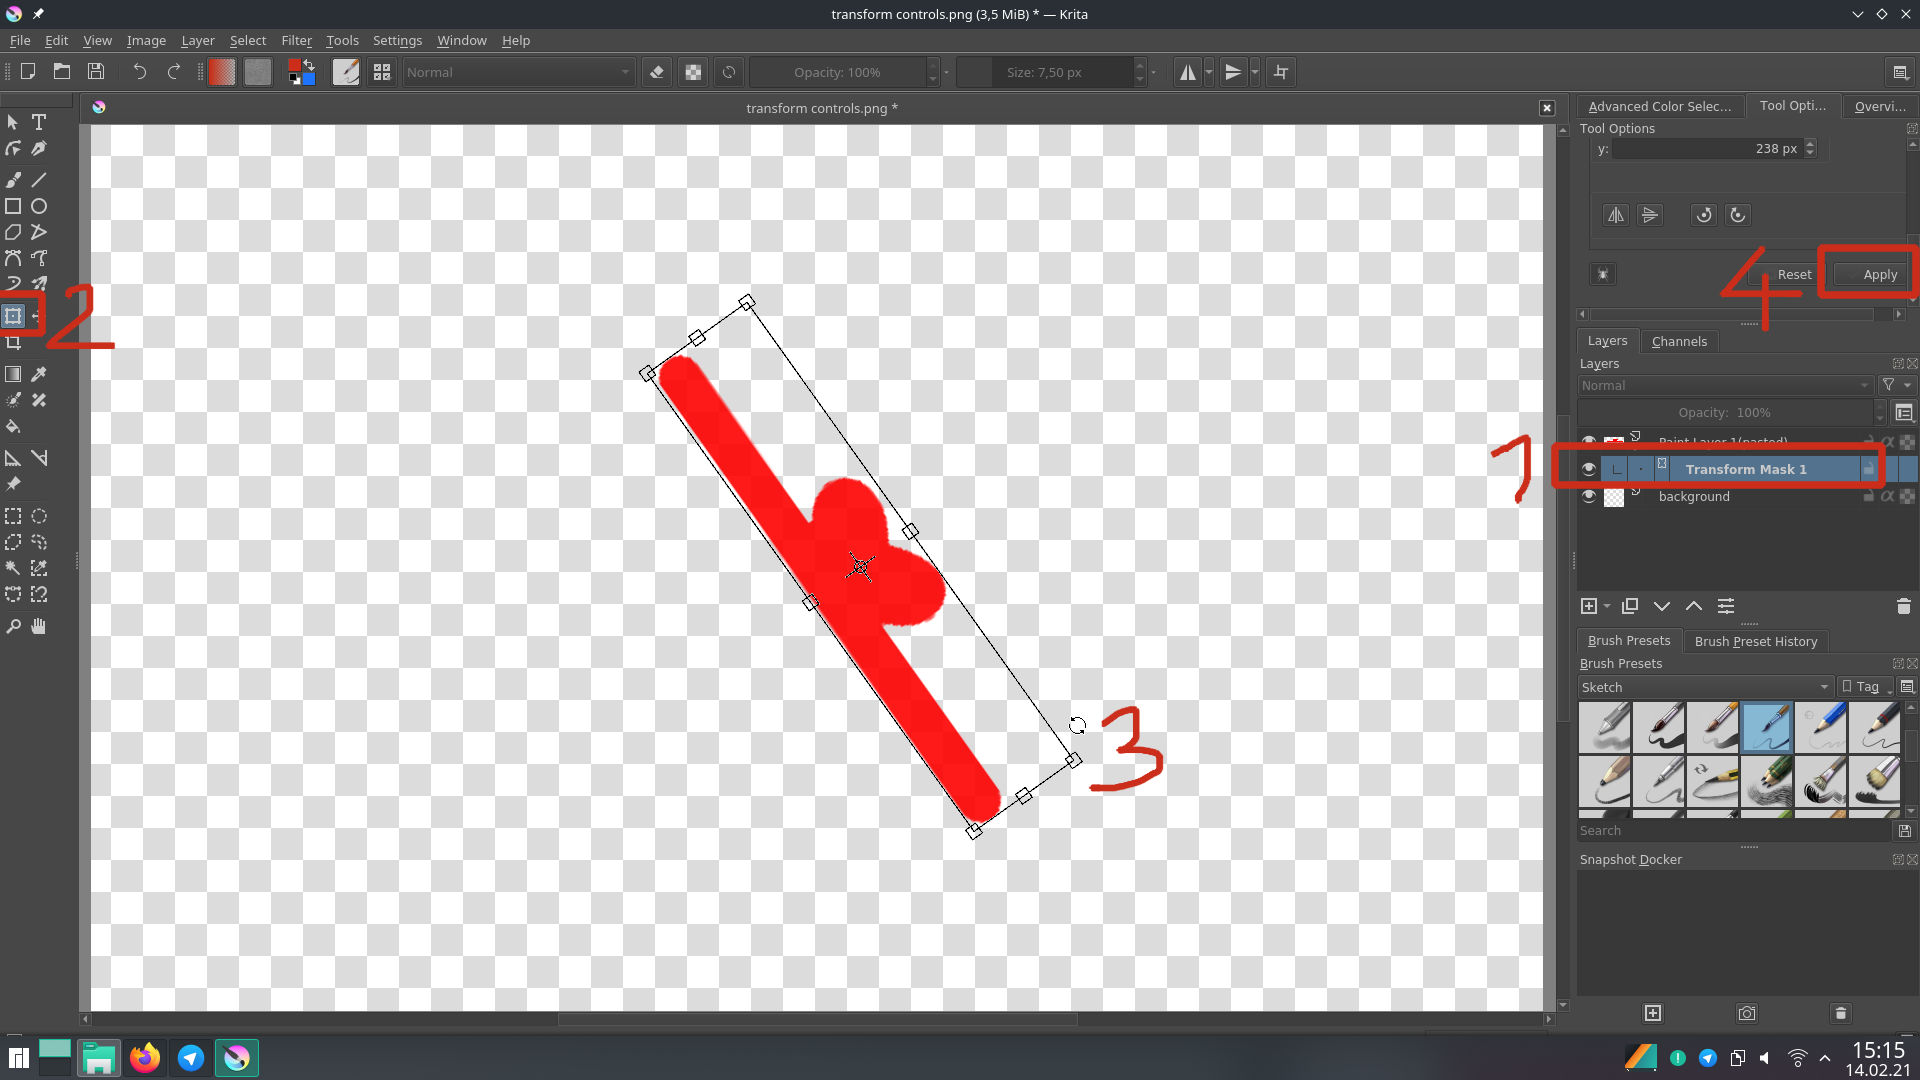
What I feel would be a pretty simple, easy and intuitive thing to do is to select an upright rectangle, then rotate the “handle box” to envelop my shape without actually changing the contents, and then performing my desired transformations.
Is such a thing possible in krita? Maybe by holding some modifier key? And, if not, would that be a viable potential future feature, or is that unfeasible with how transformations are handled?

Note that I’m not talking about just transforming the selection area. That is very easily doable, but has no effect on the shape of the “handle box”. Every time I re-use the Transform tool, the box will always be fixed upright.

Note two, is there an actual name for this interface element? I keep calling it a “handle box”, because I can’t figure out if it has a proper name, but it is something distinct from the selection area, or the selection contents, or a selection cage. For the record, in case my explanation isn’t particularly clear, I mean the rectangle with eight squares and a target in the middle of it specifically.

1 Like

Not sure but I think a transformation mask is none destructive, try this istead.

The transform tool does not know that something was already transformed and therefore always starts from the beginning as it was just a new thing to transform.

I’m pretty sure I’m going to misunderstand something here, but if I recall corectly, the box is as big as your selection, so you can get a smaller one by either tracing a smaller selection or by going in the selection menu and using the ‘select opaque’ option.

If what you want to do is have a box that matches the angle of your figure, I don’t think that’s possible. To the program, it’s just a bunch of pixels, unless they’re very primitive shapes like lines and waves or something. Then they could theoretically be identified, but it’d be limited to those simple shapes.

I’ve had problems in the past where something like this problem would arise, such as wanting to make a 45 degree angle line longer vertically, but the bounding box would only allow me to stretch itself upward.
To that, I rotated the thing another 45 degrees to make it possible to only stretch it vertically, and then rotated it again to the position it was before. As far as i know, that’s as good as it gets. The modes (bicubic, lanczos, etc) are important when doing this as they each rearrange the pixels differently.
Best of luck to whatever you’re trying to do though!

It’s called the ‘content bounding box’ or ‘bounding box’ and it encloses the full left-right and top-bottom content of the image being transformed.
The Move tool has a similar bounding box but with no control handles.

That’s what I want to achieve, but I’m not expecting the program to recognize the orientation of my shape by itself.
Instead, I just wish I was able to rotate the box at will, without the changes I make to it being applied to my pixels.
The way I imagine it working would be: I create an arbitrary selection on a layer. I go to the Free Transform tool. I hold down ALT (or some other modifier key) and rotate the bounding box, stretch it, change its perspective, etc - and all of the actions I performed are only applied to the box itself, and to the selection area, but NOT to the content of the image. Then I let go of ALT, and start doing further transformations on the altered bounding box - and everything from here on is applied to the image as usual.

Yeah, that’s one of the solutions I’ve been employing, but it results in twice or thrice the amount of interpolation distortion. If I start out with a crisp, sharp line, one transformation isn’t gonna do that much damage, but more than that is gonna leave it completely blurry.

1 Like

As mentioned earlier this can be done when using a transformation mask instead of the transformation tool.

Would you mind explaining step by step what you mean?

Most people when they want to transform something they use just the transform tool. Usually they take the layer or a selection, activate the tool with ctrl + t or by clicking the button, then they configure their transformation and than apply it.

What this does in detail is that it takes all the pixels from the original layer, “moves” them to their new position and then basically replaces the old layer with the result. When you then later use the transform tool again it has no knowledge of the previous transformation that’s why the bounding box appears to be reset but actually it’s just the bounding box of the new layer that was created as a result of the previous transformation instead of the bounding box of the previous object. This is, like you mentioned pretty bad when you later want to adjust or edit the transformation but there is a way around it and it’s pretty cool actually.

Instead of just using the transform tool on a raster layer (paint layer) first do the following.
Select the layer you want to transform, then add a Transform Mask

Then select the newly created transform mask, and activate the Transform Tool. Now make your transformation like you usually do, like rotation or whatever you like, apply changes when you are done.

Now comes the real magic. When you do your transformation on a transform mask your original will not be lost. You can still see it in the layer stack in it’s original orientation. In fact you can change the visibility of the mask and you will see the original again. This is nice when you later find yourself in a situation where you have to make changes to the original but cant apply the transformation again. Simply turn off the mask for a moment, make your change, turn mask on once again. Even when you need to adjust the rotation later, the program will remember the bounding box, even after saving and opening the document later.

You can even stack multiple transform masks on top of each other, when you not only have to rotate but want to liquify too (or something else).

Here is an example. I first turned off the transform mask with the rotation so I can add a blue line. Then I turned the mask back on and added a second transform mask on top where I used the liquify transformation.

However it should be noted that having a lot of transformation masks, especially stacked upon each other can be bad for the programs performance. It can sometimes take a while until everything is computed. I did this on my weak laptop and when I turn the mask with the liquify transformation off and on, it takes a few seconds until it’s visible again.

Okay, I understand the principles and the use of a transform layer, but I don’t think it really solves my problem.
Suppose I have this picture


it’s the original image, as it manifested from the primordial ooze, and no un-rotated versions of it exist.
What I need to do is stretch the orange/black belt to extend past all the gaps, while keeping the edges as sharp as possible.

Whether I use the transform tool on the paint layer, or on a transform mask - the bounding box is always gonna be rectangular. I don’t have the option to conveniently use the bounding box handles to stretch it at any angle.


And as you point out, if I rotate it to an upright state using the transformation mask - it will actually remember the original ill-fitted bounding box.
In the end, what I have to do is to create two transform masks - one to rotate it to an upright position, then a second one to stretch it and rotate it back to the original angle - but despite the original image technically being preserved, the final version still suffers twice the transformation blur. In effect, it’s no different from performing those transformations on the paint layer. There is just the benefit of being able to undo the change at any point.

In order to get the best possible end quality, what I have to do is perform just one transformation (on the paint layer, or on the transformation mask, it doesn’t really matter) and get it to the right shape using both stretching and skewing, maintaining the proper proportions of the bounding rhomboid. However, that transformation is difficult and requires a ton of precision on my part.

I actually went and compared all the different methods of diagonal stretching to illustrate how much transformation blur accumulates when you have to rotate your lines back-and-forth for the stretching.


(I suggest full screening the image)
I understand that the difference is probably negligible to most, but when editing low-resolution graphics, it’s the difference between night and day.

I guess by now I have to accept that in the current version of Krita, no easy and convenient way to perform my “ideal” transformation exists, but I’m just explaining it because I don’t see thy the ability to rotate the bounding box handles couldn’t be a feature in the future.

Yes because the layer itself is rectangular and the transform tool is not aware of the content other than where some color is.

In your case you would need to first do an actual transformation on a paint layer and rotate it to a neutral angle so the bounding box fits the object after that you can use the transform mask.

You will always have a loss in quality when making a rotation transform due to the fact hat pixels are square in a square grid (speaking of document pixels). It is possible to mitigate some of the effects by choosing the rendering algorithm i.e to nearest neighbor perhaps. But it is never going to be precise. You can easily do the math yourself and you will notice that you would end with floating point coordinates where just no pixel is or pixels would need to overlap.

Vector shapes are the only way around this, they can be tranformed like crazy without any loss in quality because they don’t get converted to pixels until the very end or when you convert them to a raster layer.
In a situation like yours, I would probably recreate the shape as a vector object.

Adjusting the bounding box is not possible and I know of no program that can do it but it would make for a nice feature request, I think. Telling the program the actual rotation of content is just useful since it can’t guess it on it’s own. Maybe open a feature request for this.

This topic was automatically closed 15 days after the last reply. New replies are no longer allowed.