@Deevad Thank you sir! Learnt quite a lot of krita tricks from your videos . Found the dual monitor trick while checking the krita manual page for the updated version of features showcased on your older videos.
@YRH Thank you . My head actually around the lamp height if I sit straight, so I have to lean back a bit so my eyes are on the monitors level.
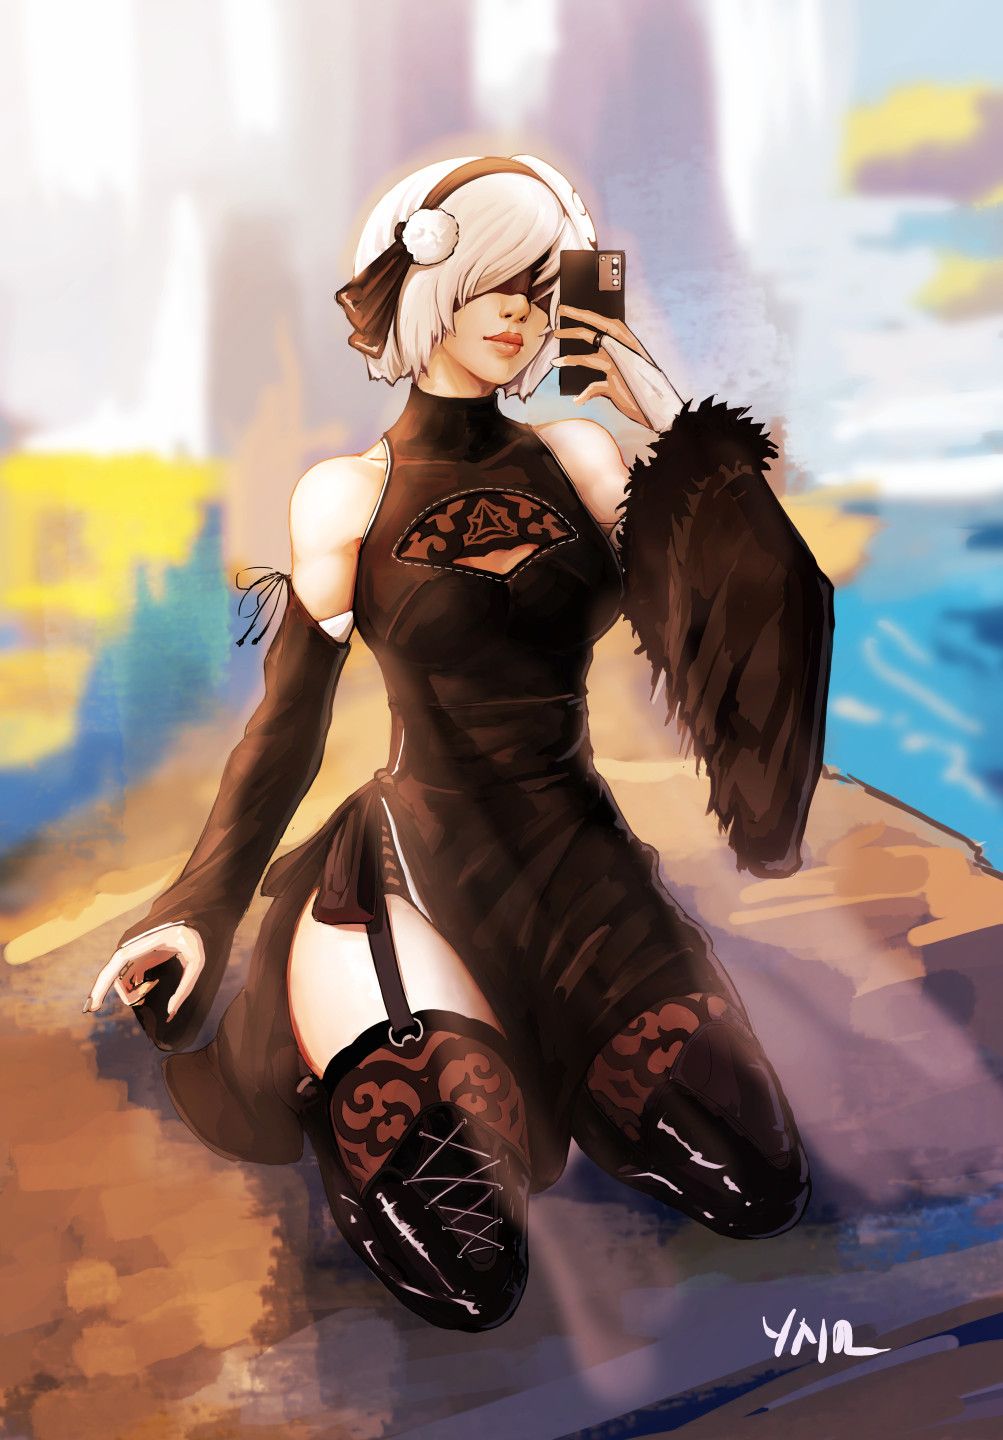
@Michelist Thank you. Although for 2B I just mixed a bunch of design from the game concept and some other artist fanarts. I am hoping I could figure out what makes their design interesting if I try redrawing parts of them in my own way.
Sequence for the process. I know mr Ross went from the back to front approach, I might have more leeway since I can do it in digital layers.
Layer management. Because I need to separate between layered effects and the actual objects. My best clue is from mr Guweiz explanation to separate object and its local color, then separate each light sources effect for the objects, then shadows and the ambient occlusion, then reflected light which can be many if the objects are in close proximity.
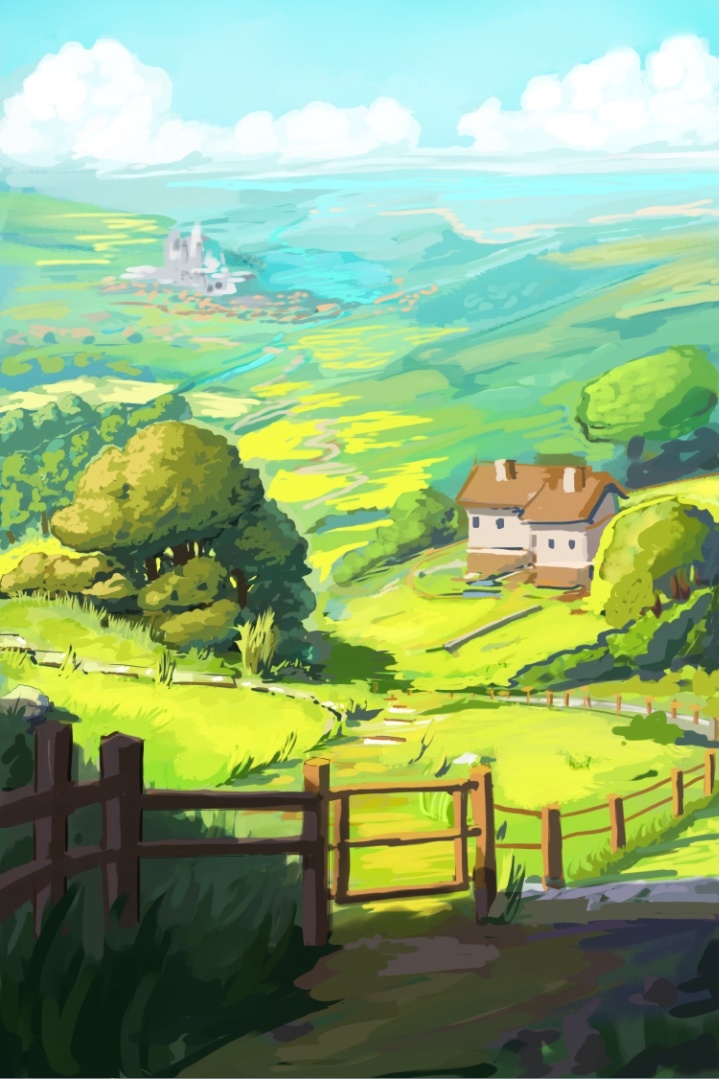
Clean up. Based on Proko explanation only midground need full detail. Foreground will be a simplified flatter shape that is on the darker value, background is the opposite because the diffuse effect of the atmosphere. Color tied to time of the day but also try to emphasize more on its saturation, well at least on the focal points part. Also pull shadow more towards dull color instead directly towards the ambient color.
I can see the big problem is layer management. I have bad habit of flattening layers. I can’t make the excuse about resource saving now that I have upgraded computer, but I always draw in the wrong layer if there’s too many layers .
@dragonscales locking the layer does helps, but it gets annoying when I see something I wanna do quick fix to and instead got confused because my brush won’t work. Either the layer was locked or I clicked on the group row instead the actually layer I want to do quick fix.
My current solution for quick fix process is to just immediately create new layer on the very top, do the fix, see if I like it, and if I do like it then I move the quick fix layer above the layer that has the unfixed part and flatten those 2 layers together.
Anyway continuing the previous test on tackling some of my current work task.
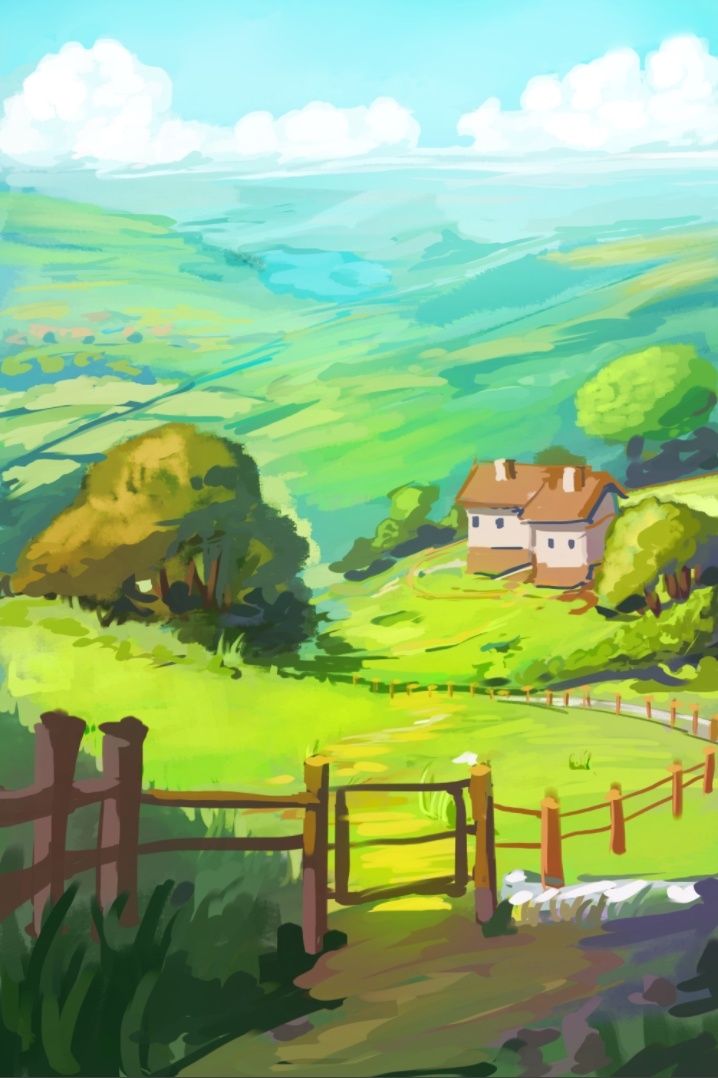
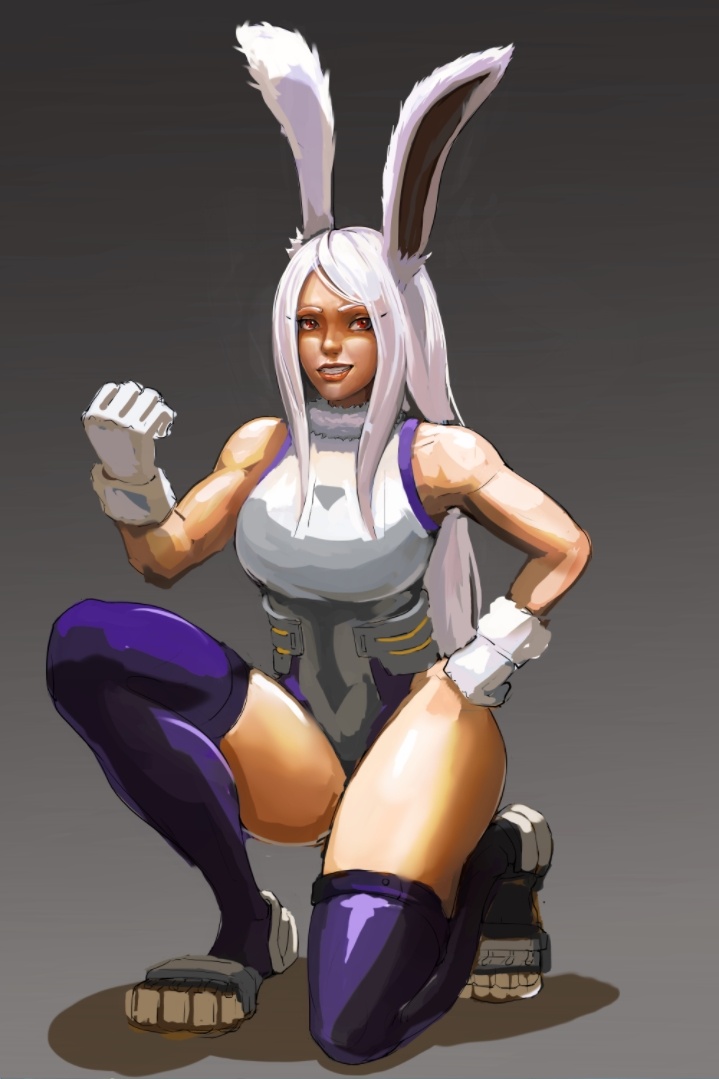
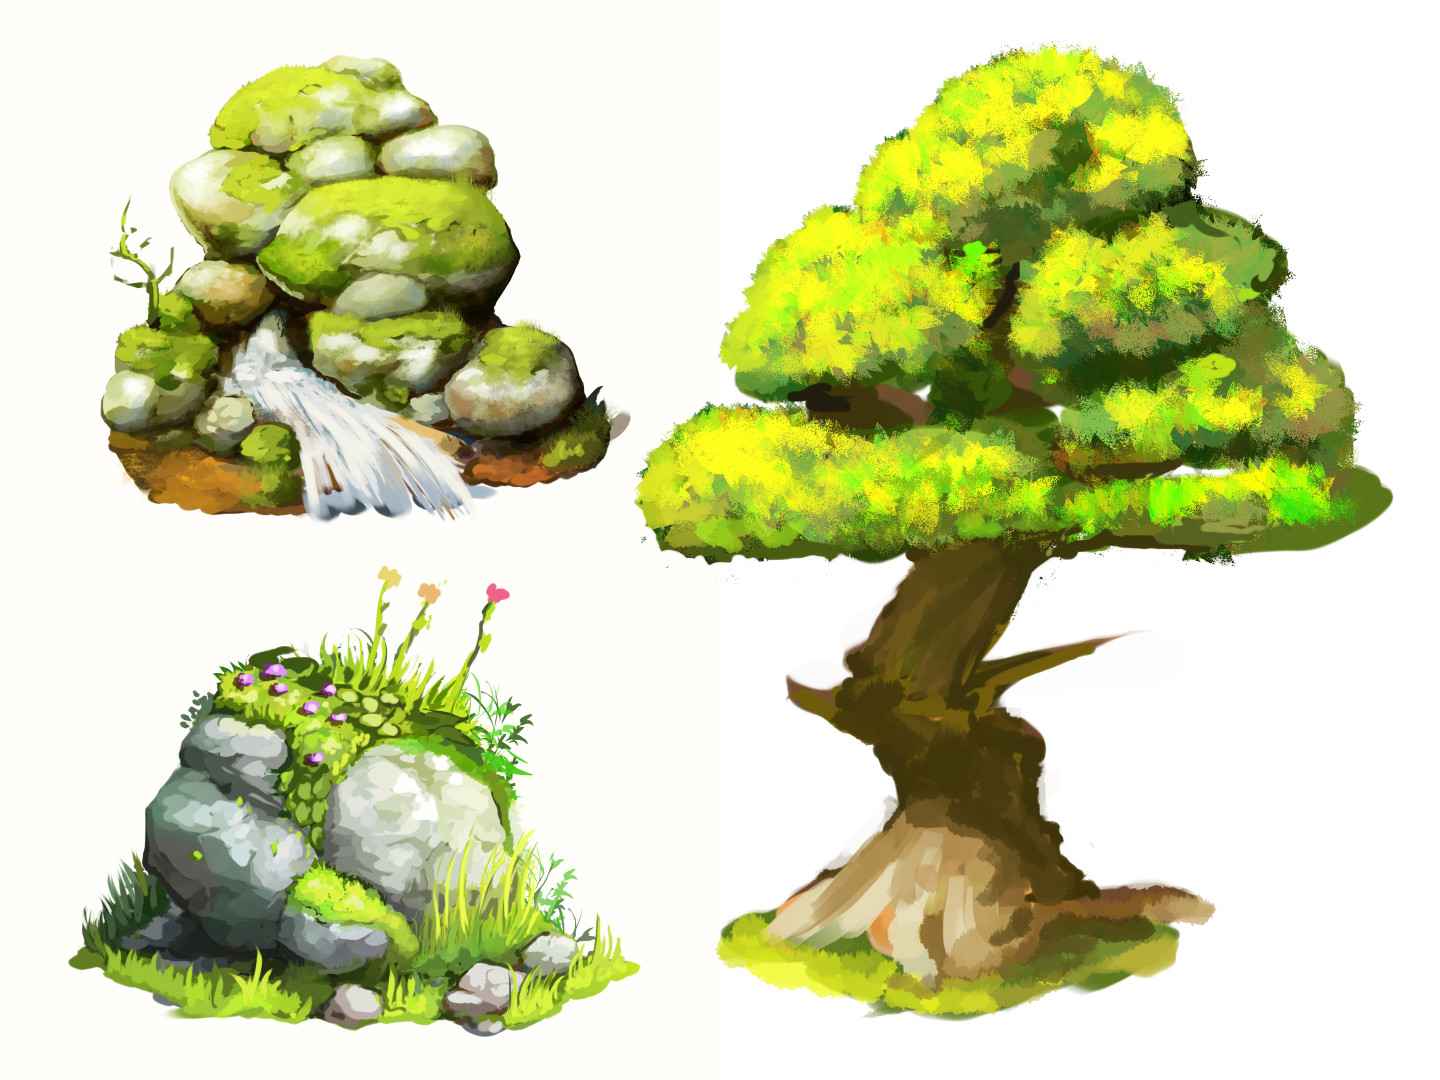
I need to draw detailed Tree, rock, and bush next. Oh and at least clean up half of Miruko’s body. Detailing practice.
Btw brush size matters when drawing landscape as in can’t use the same brush size for close and distant object. At least that’s what I think the silver lining of some of the timelapse I watch. So I think the other artist have their textured brush size option ticked. Maybe… idk, all use stacking brush textures to build a quick landscape, most said to just “feel” the right texture for the certain surface. “Feels” means do multiple test i guess.
It might be better if I try searching some of those step by step how to draw certain material/objects pictures on internet. I think I can read the value and have some idea on the composition for the overall illustration, but making a detailed object for something that I don’t have the exact ref of is still a problem.
Edit: don’t mind the weird sentences when I write my notes, my mind jumps a lot, even when I draw. I can’t do some basic digital drawing techniques because of this.
I also like the workflow with creating a new layer, painting, erasing, then merging down into the intended layer. The only problem is with blend modes and opacity (if I remember correctly), because they get changed after merging. And the layer getting renamed is annoying (although maybe now there’s an option to disable it).
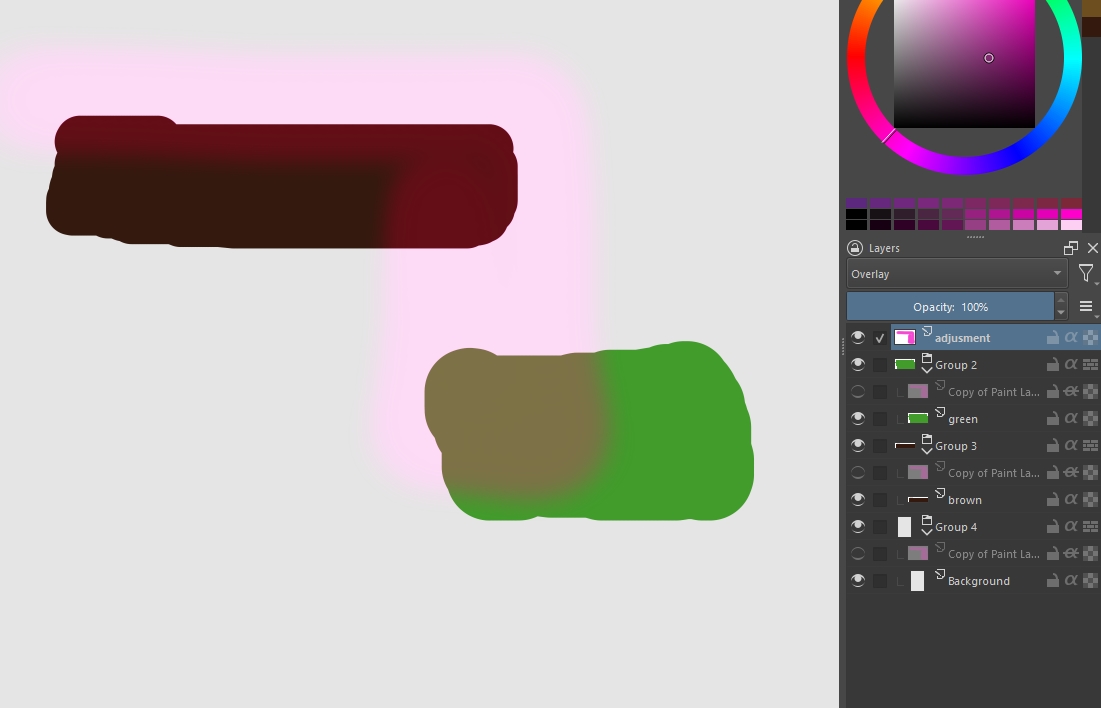
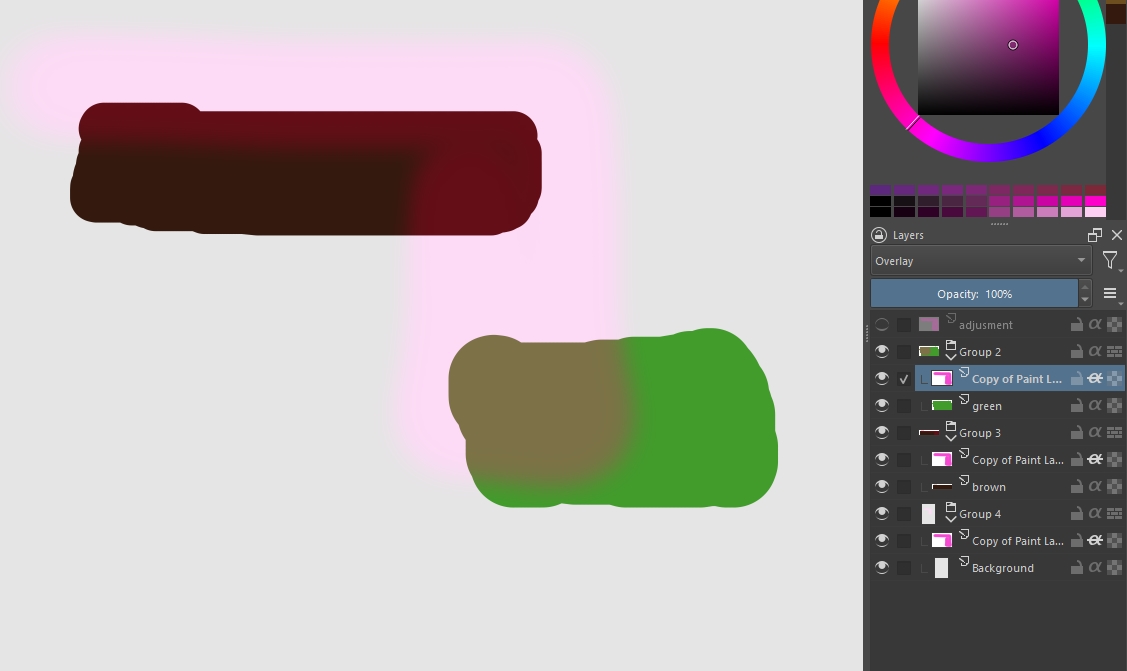
I do have solution for filter layer adjustment that affect multiple layers below it. This looks silly but it works. So basically you make adjustment with filter layer at the very top, say it affect 3 layers including the background. You duplicate the adjustment layer in the amount of affected layers, move them into each affected layer group, turn on the inherit alpha mode then flatten it to the original layer in that group each time.
But only works with project that has few layers, and I make it a habit to not do global fix with filters unless it is some kind of color correction type (finishing phase).
Yeah I’ve done that too on my last project, and figured I should carefully choose the best moment to cut up my rough background into “depth slices” to start working on the details. It’s pretty tedious to make color adjustments to the whole background when it has a dozen layers…
I also noticed that Krita offers an option to convert filter layers to filter masks, but it’s pretty useless because it doesn’t take over the filter settings…
I have also been there several times (color adjustment on a foreground/middle/background split as a layer). I sometimes wish filters could work on groups (applying the adjustement to all children in it) a bit like the transform tool. Or via multiple selected layers.
Edges are very important. I prefer to use hard edges textured brush in a new layer, and make a swipe with blend brush or soft eraser to the newly drawn texture to make it blend better with existing texture in other layer. I flatten them all in the end.
Occasionally need to lock the texture alpha so an arbitrary brush swipe with lighter or darker value can be done to create illusion of volume to a flat texture.
Mask the base/bottom of texture with other texture, which is the stacking part that is kinda hard to guess which one goes in front and which one in the back.
Do something what I call “Texture intrude and extrude”. Basically hard edged texture that push into the area of other texture, another way to create illusion of volume.
The only thing missing is for users to come up with the idea of voting for this function. Somehow we have to show the developers that this is a highly desirable function…
… why else would they start implementing it if nobody wants it anyway?
@freyalupen Hmm not sure I truly understand what the OP wants on that thread, but I think the person want to use the HSV slider menu on a layer group. A bit different from my adjustment filter problem, since mine is manual with filter layer and not using the filter tab menu. Also only done with brush to small parts of the illustration.
@Michelist Yes the problem is not very common I think, since this is quite specific process that is considered destructive method for adjustment. I know from several of my friend who also draw in the past, I am the only one that is really stingy with how many layer being used and keep flattening my adjustment layers.
.mp4, it’s just the upload percentage don’t move at all. But I don’t have good internet especially the upload speed so I doubt it is the site problem (Typical problem in SEA region I think). The picture I upload is 336 KB and it took me about 1 minute to upload . It is also slow when uploading to youtube, so most likely the problem is on my end.
These 4 seem like really useful tips, but I can’t quite follow them all. Is there any chance you can do an example f each, r circle where each is used in a picture? I’m sure I and others would really benefit from what you have learned.
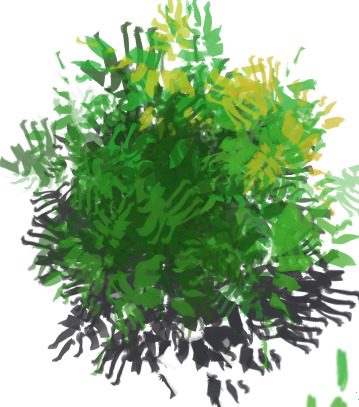
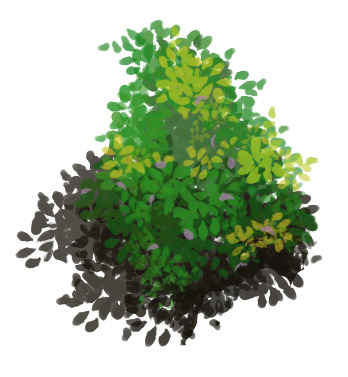
@MangooSalade tried to make something that is easier to explain but the result not the best.
Use ref and take your time during practice. Trying to draw natural object with limited visual memory make it look not good, like what I did here is not the best.
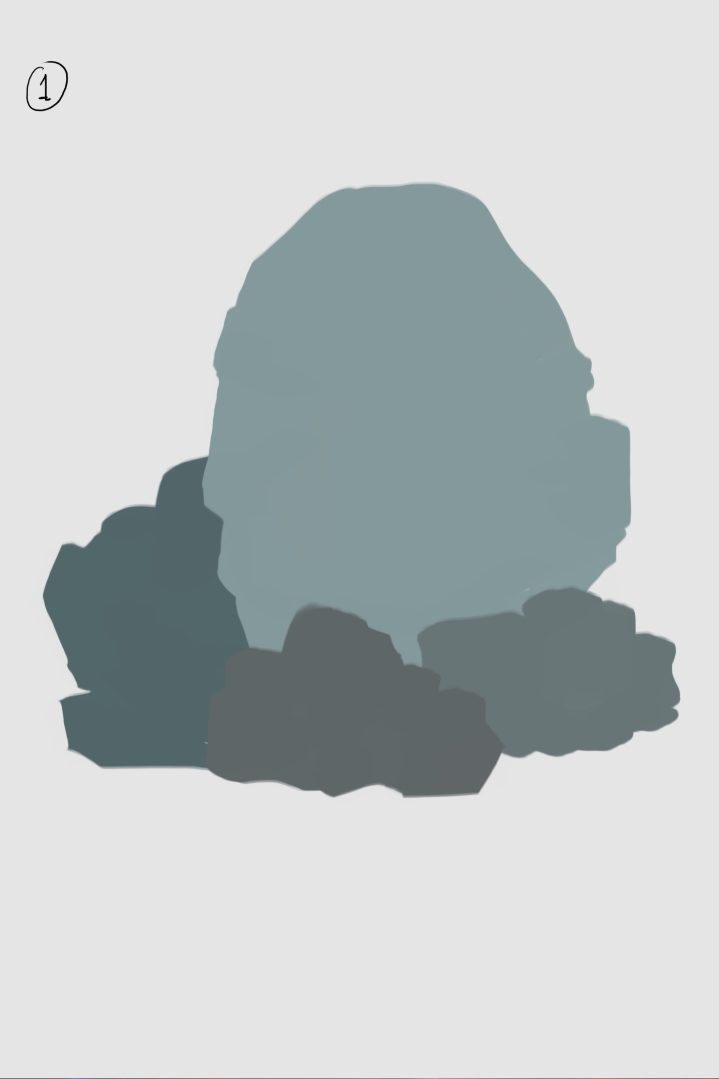
Why I think brush edges important is because it determined the process used for the illustration. For example in the Flat color blocking/Silhoutte technique, Hard edge brush is used at the start. This is often used by environment artist (based on my observation of their timelapses and demo video). They use it to determine the shape of the object first and also to create perimeter/outline for that object. More importantly knowing the right edges/border of a plane surface is crucial in blending when shading a shape.
Because you already establish the silhouette/outer border of the object, you can just lock the layer alpha and draw the base separation of the light and dark part in said object.
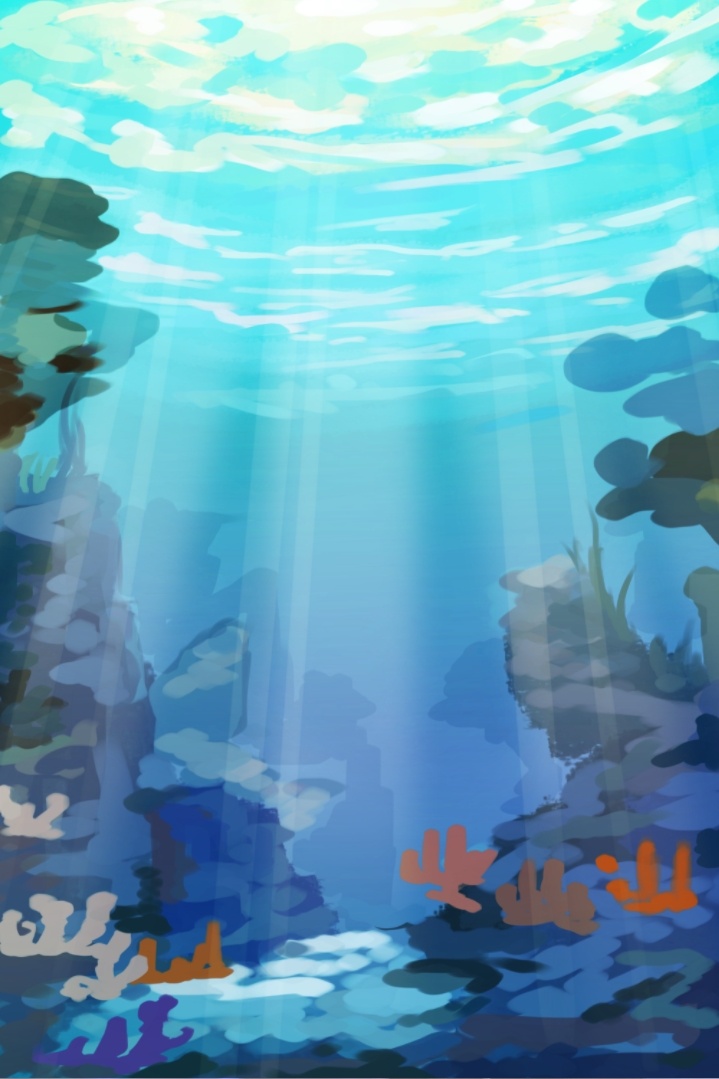
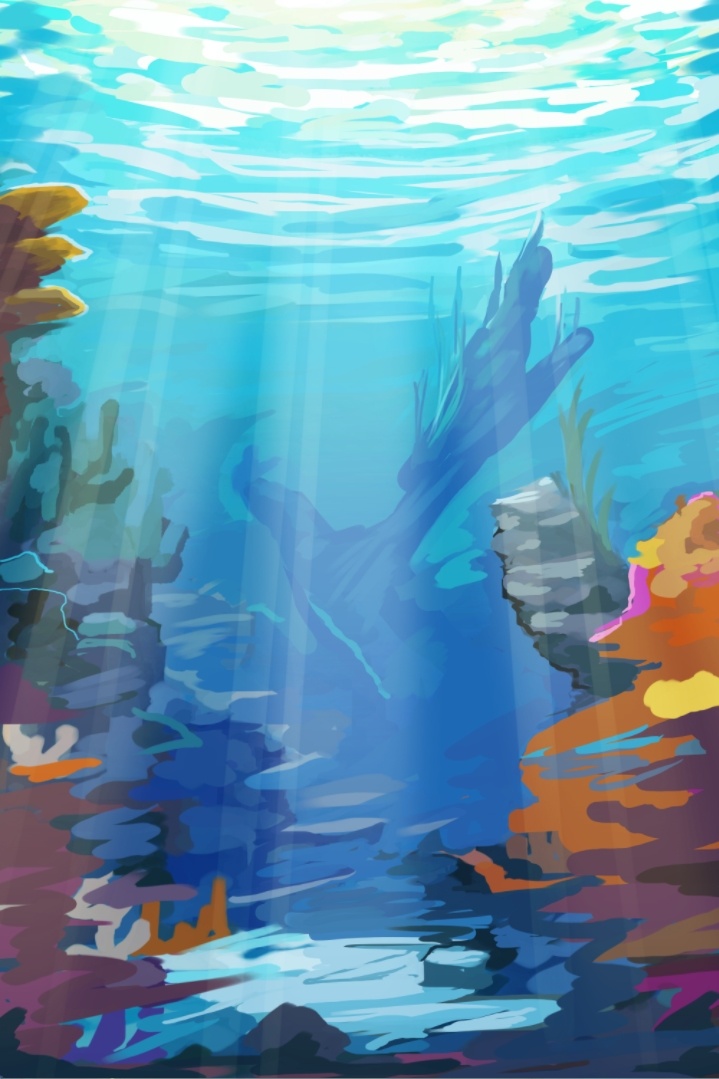
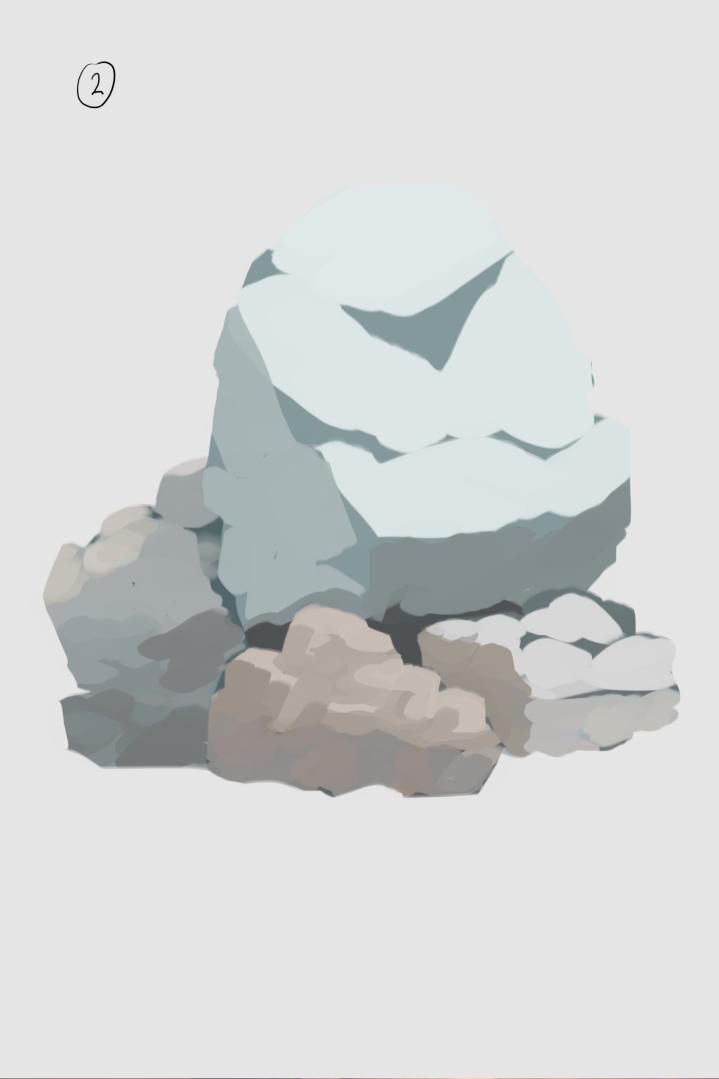
The picture below don’t really represent why it is needed to stack texture, but imagine having a long grass texture and a short grass texture. The short grass is used to mask the long grass non existent root area because the long grass brush don’t include its bottom part. How do I say this… basically to create organic look when there is 2 or more object surface meet sometimes you have to obscure it by having 1 texture in front of the other.
For the picture below where the 2 object meet are between the rock and the ground, I have to draw the right shadow to make the rock looks properly seated. but you can also mask the bottom of the rock with grass but then you have to think about the right way to make the ground and the grass blend well.
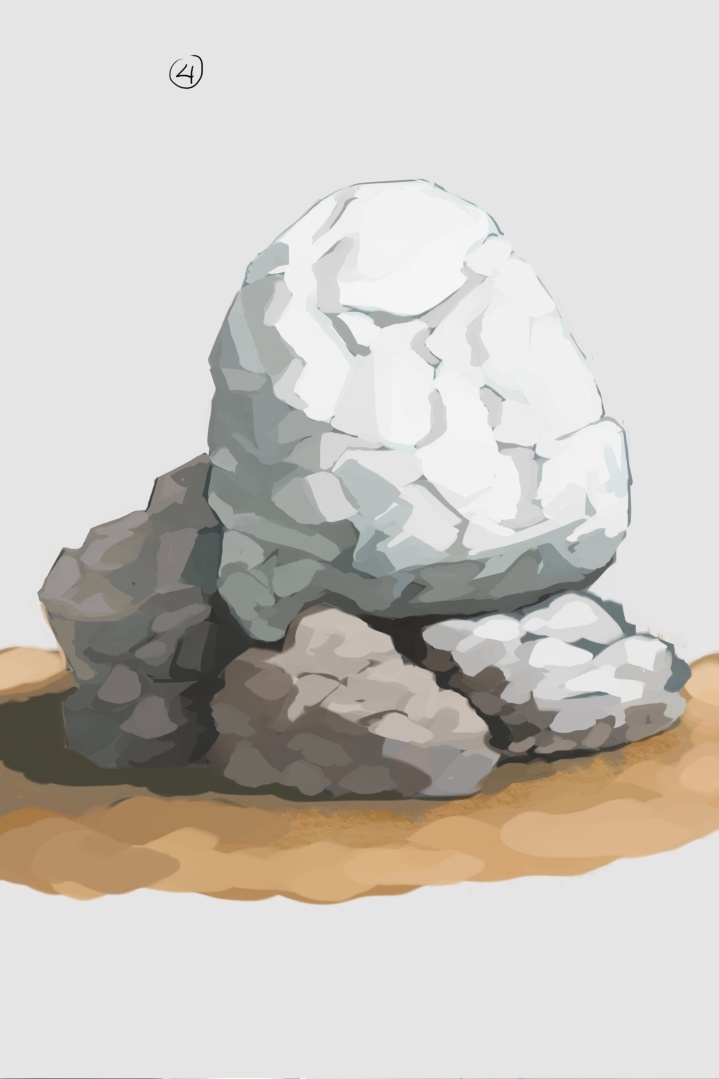
The intruding and extruding texture, is a way to blend texture shape in organic object better. Since the crack in a rock is somewhat random or leaves in bushes don’t have fix pattern (There’s slight variation), you can first just create simple flat shapes with variety of values according to the light source placement, but then use the value in one shape to intrude into other shape and create that more organic looking surface texture.
I can’t really explain it in better way. But I am sure there’s someone out there that create a video demo for drawing texture for something like rock or bushes that touch on this matter. Breaking monotone pattern.
Last tips if you are like me that maybe don’t have much money left after spending on the day to day stuff. If you tried to learn something specific from other artists, try to gather multiple articles, timelapses, demo, explanations etc that touch on the same/similar subject. 100% there will be pattern/silver lining, at least in the concept, mindset/way of thinking/way to problem solve, techniques, process steps, etc. You will get at least one of those and even if It is rarely be specific info or rarely answer your question immediately but at the very least the info you get will give you some hint what to search next.
Lots of effort and time spent unfortunately, but that’s the trade off when you don’t have enough resource.
Usually when there is enough question that pile up and I know what the answer in general but need a better explanation or more in depth knowledge I try to find a book. Starting with the free old/ancient books lol. Even if you have to buy, I think buying books is better since there’s arguably more content and more importantly the info packed in a more coherent manner.
Sorry if my sentence is hard to understand and long, I am not a native English speaker. I tried to answer several stuff that people post here and some from my dm.