In response to this topic by @Kevin62 :
How to change font color in scanned document (Lemon video?)
I’ve made a fairly simple .kra file that lets you add text colouring, highlighting and annotations to a scanned image of a document.
The overall structure looks like this:
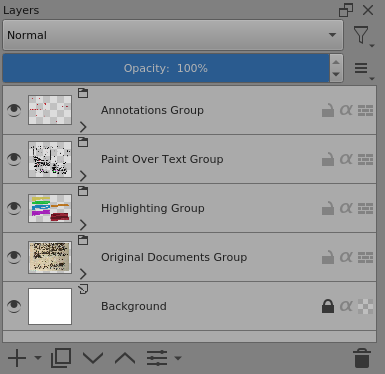
As made, it has layers for two original documents that you can turn on/off as needed.
I’ve only included one scanned original document with annotations etc.
Obviously, you could extend that by adding more layers and grouping layers to give different options for different original documents.
Then you could use the compositions docker to create different arrangements and presentations as required.
It’s 1200 x 1000 pixels but you can Scale it if you want to use larger (or smaller) original scanned images.
I’ll just give an overview of the basics in this topic.
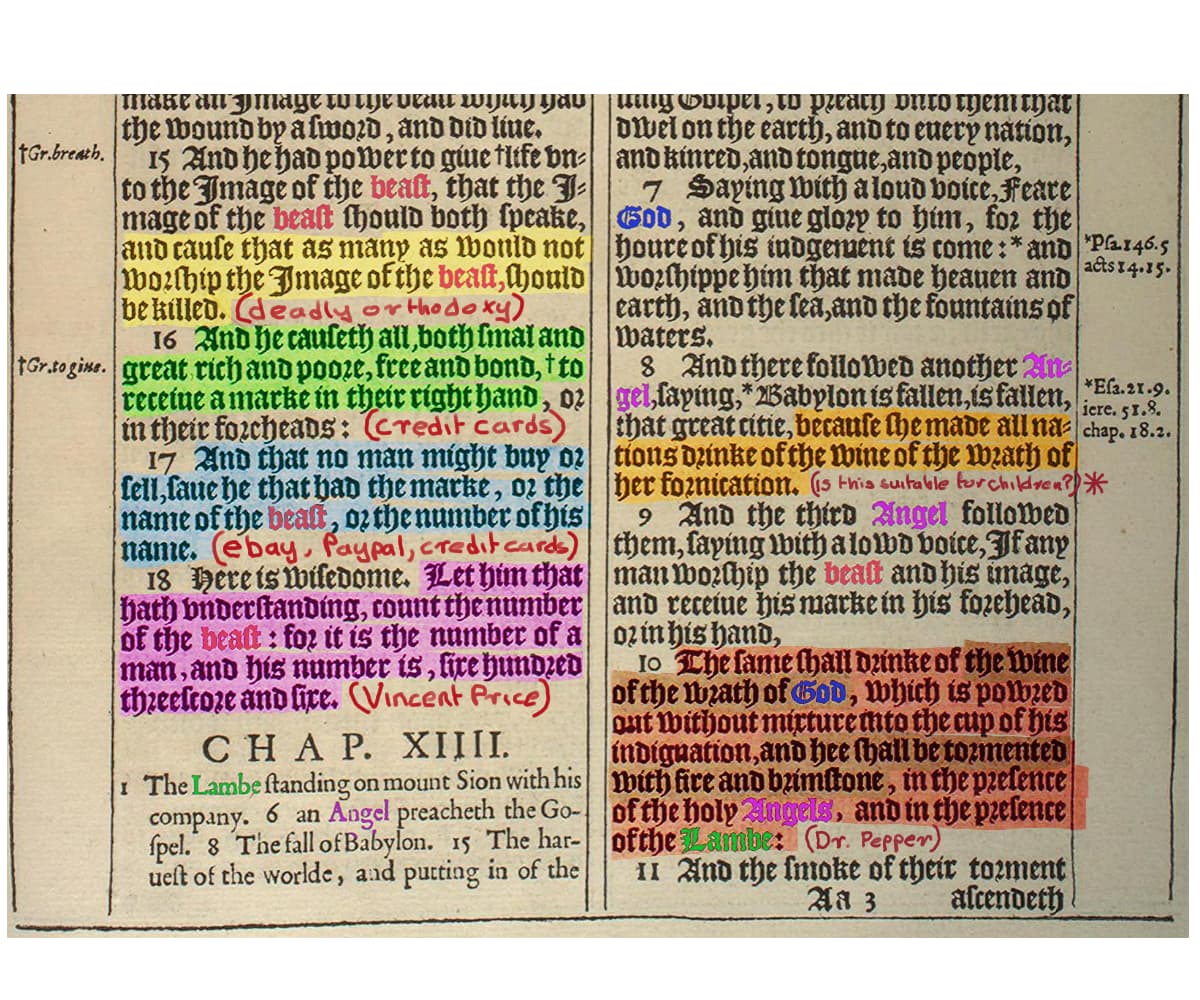
Here is an example result of my own annotations etc:
Here is the link to download the example .kra file:
Scanned Document Annotations.kra
You can put your own original document layers, highlighting layers, paint over layers and annotation layers in there instead of mine. (It wouldn’t be any use if you couldn’t.)
Now to explain the structure and how it works:
General Statement:
If you’re not familiar with this sort of thing then please read all the way to the end and be careful. I’ve made something that works, is adjustable, scaleable and flexible.
If you break it then that will be your problem.
All processing is done on the assumption that scanned document images will be fairly dark text on a fairly pale background and that’s all it’s really suitable for.
Background:
You could make it pale yellow or whatever to give a nice match to the paper of an original document image.
Original Documents Group:
This simply contains a collection of scanned document images on different layers.
They should be reasonably good quality to give good results.
Turn on the visibility of the document image layer you want and turn off all other layers.
Highlighting Group:
This contains an image layer corresponding to each original document to make broad coloured ‘highlighting’ strokes over the original text. You can add more layers if you like.
It works by using Overlay layer blending mode for the group with group opacity at 100%.
You could set the group opacity lower to give a more subtle effect.
You could use different highlighting layers with different opacities to give various depths of effect. It’s up to you. Use of bright/light colours gives good results.
Annotations Group:
This is a simple one. It has paint layers that are seen over everything.
It’s intended for ‘margin notes’ and things like that. Whatever you put in here covers the original document image and everything else.
Paint Over Text Group:
This is the complicated one:
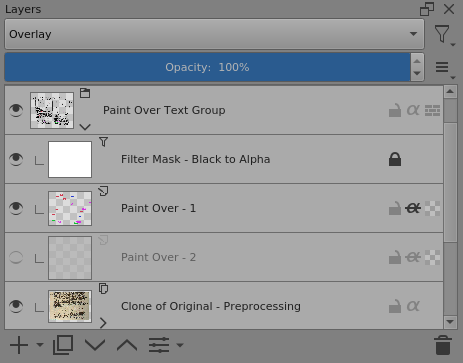
At the bottom is a clone of the original documents group and so it will be whatever original document is visible.
That clone is used for preprocessing to create an image that is pure/solid black text on a transparent background.
The preprocessing is done with filter masks which are explained lower in this topic.
That black text on a transparent background is used for alpha inheritance of the Paint Over layers.
So, the paint on the paint over layers will only bee seen if there is black text under it.
Hence, you can only paint on the text area with no worries about paint spilling onto the background of the original image.
The Black to Alpha filter mask on the group is used to remove any black text that hasn’t been painted over. That way, you can see the original text and enjoy its aesthetic qualities.
If you want dull solid black text, you can turn that filter mask off.
Preprocessing:
Here are the four filter masks used to produce a ‘reasonable quality’ black text on transparent background image for the paint over layers and their inherited alpha.
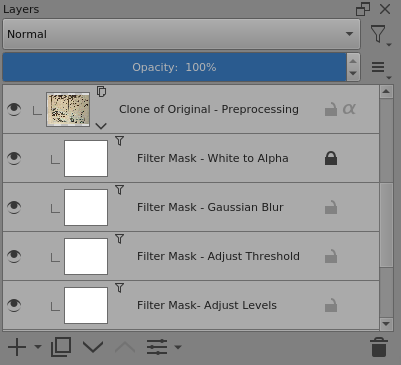
Ideally, you’d adjust them once for a particular batch of scanned images.
For images from different sources with different contrast, brightness and general quality then you may need to make adjustments for every different original image.
Try it and find out.
For initial adjustment, use this arrangement:

On the Adjust Levels filter mask, do right-click → Properties then adjust the control window sliders to give a technically good image of distinct dark text on a pale background. This is not about aesthetics, it’s about technical quality.
Then turn on the Adjust Threshold filter mask and use its control window to adjust the slider to give a technically good black on white image of the text.
The edges will be pixelly.
Then do the same for the Gaussian Blur filter mask and adjust to give nice edge antialiasing but not too much spread.
The White to Alpha filter mask should then be turned on and does not need adjusting.
It has one simple job to do and it does it.
You can see how this arrangement works by turning on the layers in the example file as shown here:

That’s how the entire Paint Over Group works.
The best way of learning how to use it is to make a copy of it then do your own paint overs and highlighting and annotating in it.
Then Import your own scanned document images into the Original Documents group and make your own highlighting and paint over and annotating layers in the functional groups.