I am wanting to highlight certain letters and words in scanned documents from the 1600s. I would like to be able to retain the background as it is, and it would be nice to do multiple selections at the same time. It would also be great if the color gradations in the fill matched the imperfections in the original, but that’s not necessary.
I’m totally new to working with imaging programs. The reason I’m using Krita is that I saw a video of separating the yellow of a lemon inside and changing it to a different color using the G’mic filter. It was the Extract Foreground in the Contours sub-menu. That’s about all I remember from the video.
I can’t find that video now! and it took a while to get a version of Krita that recognized the G’mic plug-in and I can’t find the video anywhere in my browser history. Took a day to figure out how to find the appimage and get it working.
I know that this is possible, I see other people have done it…
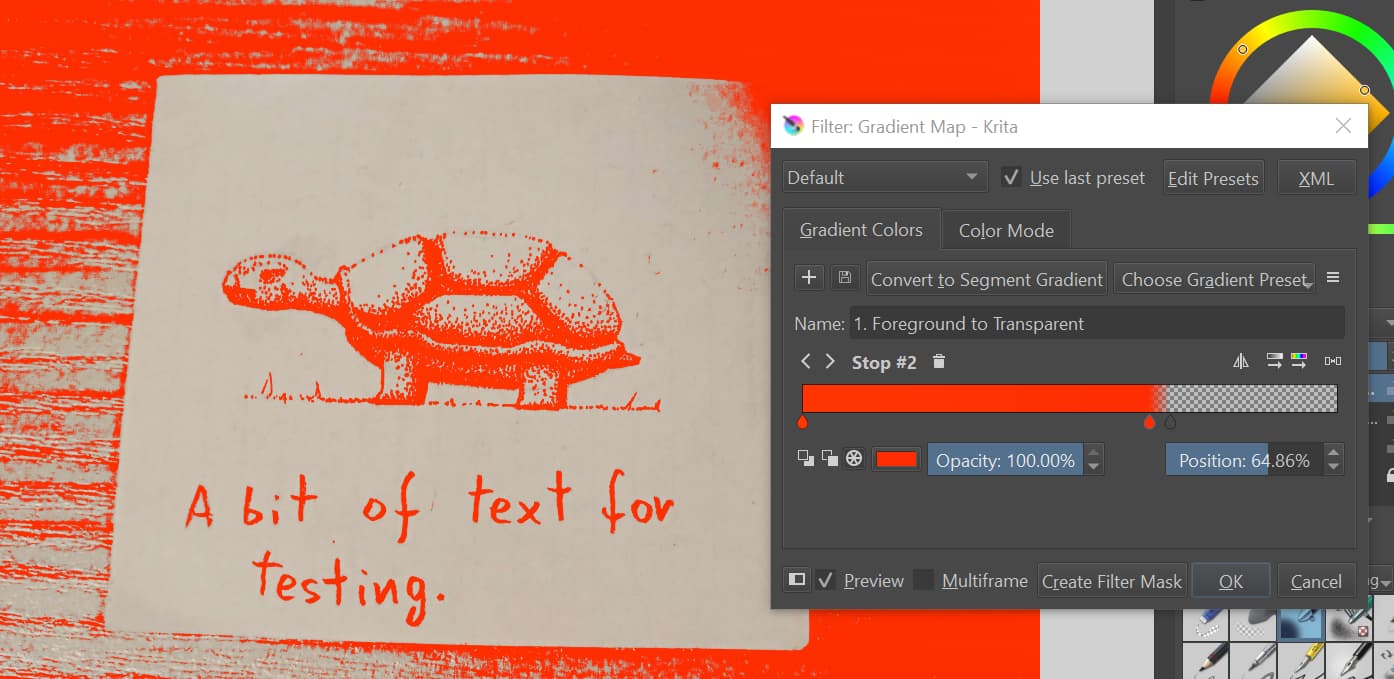
I made a duplicate of the layer it’s on and put it above it. The I used Filter→map→gradient map on that duplicate. I’ve set it like this (it may require some fine tuning so you get the right results for your picture):
Gradient map allows you to create a gradient and replace the colors of your image with the colors from that gradient based on how dark they are. The left side of that bar shows what dark colors will turn into, and the right side shows what will happen with the bright ones. In this case I made everything that’s darker than a certain value red and the rest transparent by using three points for the gradient (two red and one transparent. You can add a new point by clicking on the bar) so everything darker than a certain value turned red and the rest is transparent (and shows the layer underneath which is an unchanged photo).
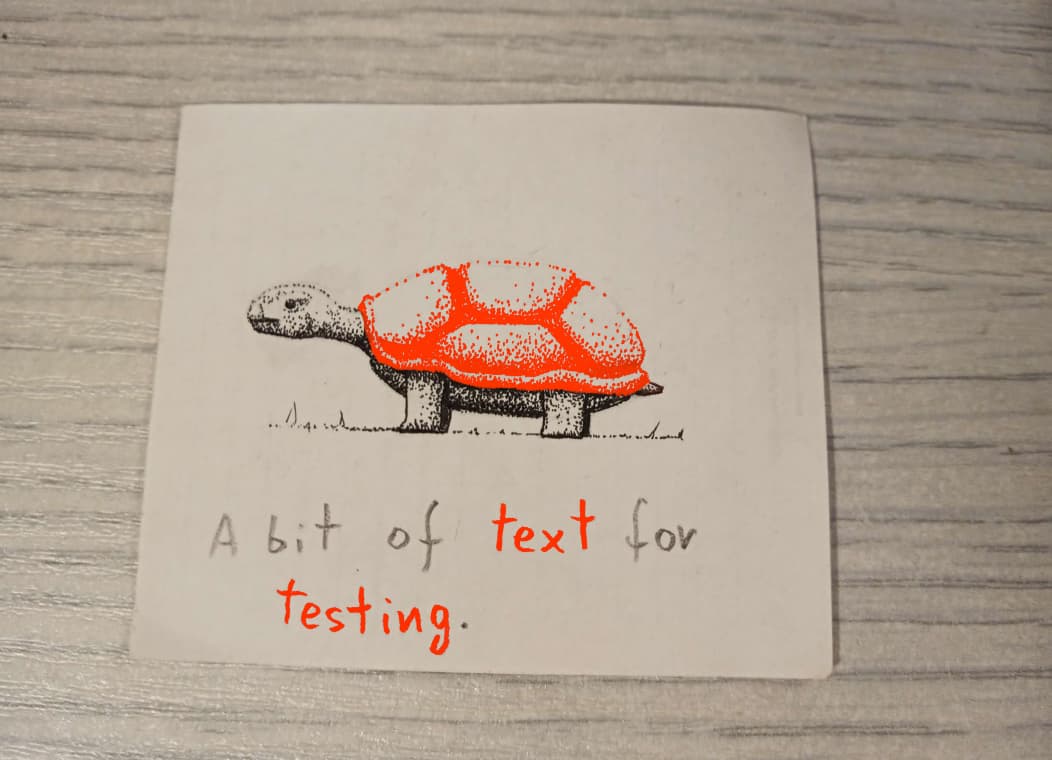
After that you can either erase the parts of that layer you don’t want to have their colors changed or do it in a more complex, but also more comfortable in my opinion way by adding a transparency mask (arrow near the + for creating a new layer → add transparency mask) for the colored layer, clicking on that mask, repainting it black (for a transparency layer - black means transparent, white means visible. It modifies how the layer it’s attached to is seen), then painting with white in the places that you want to have colored. The results (I also colored the turtle’s shell):
‘Recent’ versions of krita have the GMIC filter built in.
Which version of krita are you using and where did you get it from?
It would be useful if you could post a screenshot of selected close up extracts from the images you’re working with.
That would give an idea of where you’re starting from.
As well as the method described by @KNap above, you can do selection by colour and then apply a Hue shift filter to the selection.
The ‘best’ method depends on where you’re starting from and where you want to go.
Got the appimage directly from the Krita site. It did have GMIC integrated with it, but it took me a while. I’m using MX Linux and their version of Krita did not have the plugin and it took a while to figure out what to do. I see that it’s a common problem. I’m getting some RAM to add to my computer… That might help somewhat. Ha!
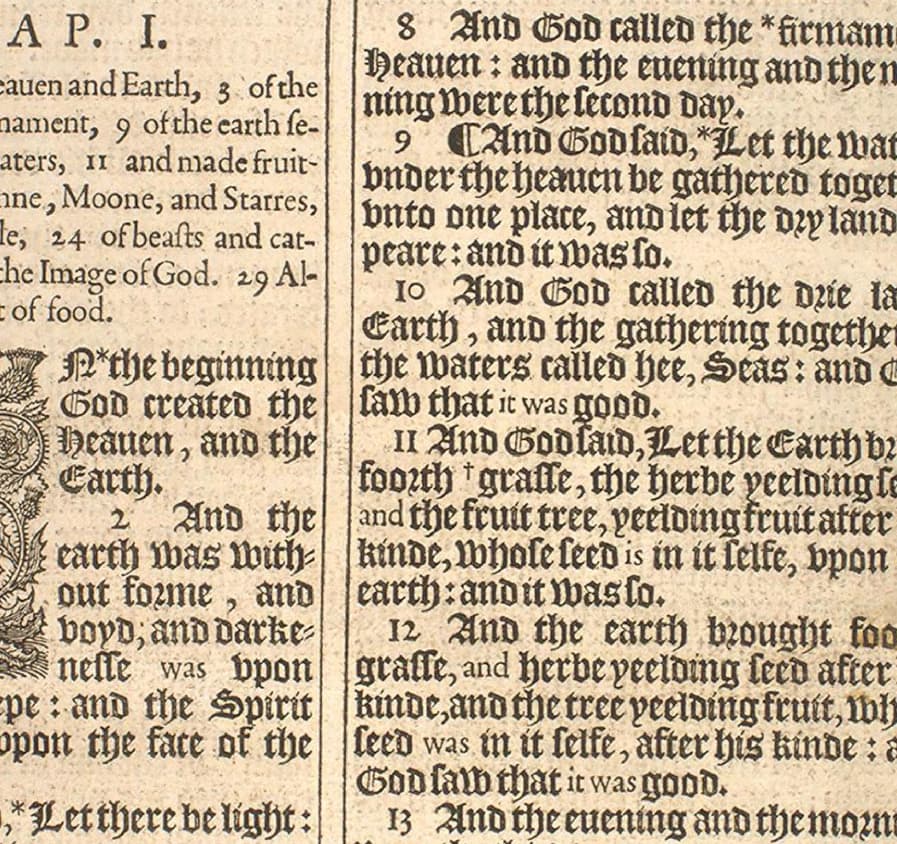
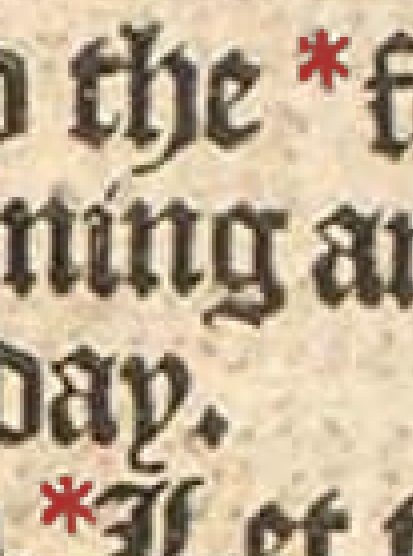
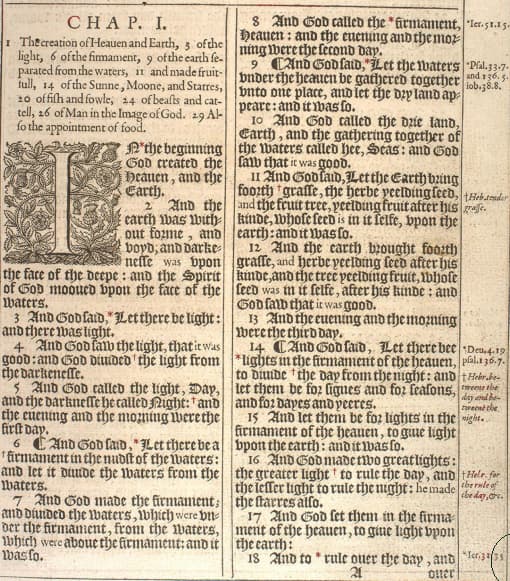
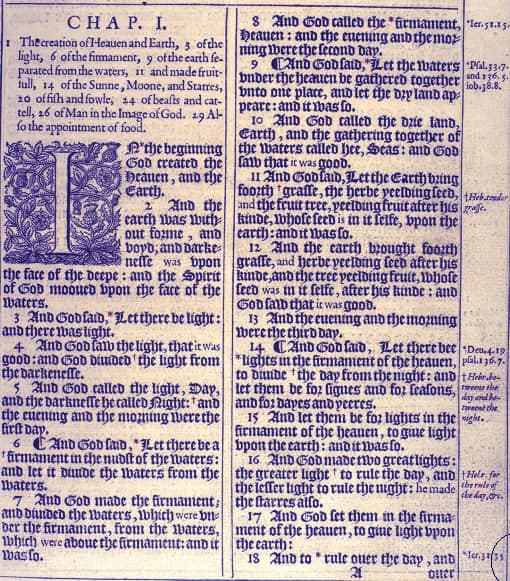
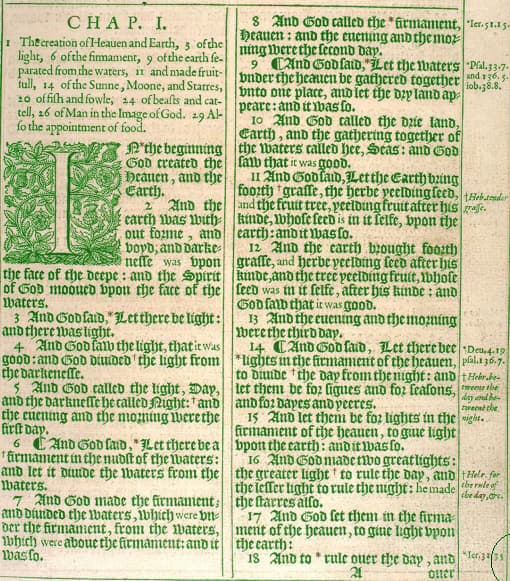
The place I want to start is to turn the asterisks in verse 1, in the bottom left corner, verses 8 and 9; and the dagger in 11. It would be nice to know how to select them all and work on them as a batch. Would that involve putting them on a separate layer?
Then I need to highlight some words using an assortment of colors for various words in various places. For example, the word divide before the dagger.
That’s the best I can explain it for now. I definitely want to try and keep the background intact.
Linux distribution repositories sometimes have incomplete or badly built versions.
It’s the way it is and you should always use the appimage from the official download site. That one is built by the krita developers themselves.
If you have 4 GB of RAM on a Linux system and are not running any other applications, you’ll have about 3 GB of RAM left for the krita appimage and its image storage.
The RAM meter on the status bar tells you how much RAM an image is using.
The default RAM allocation is 50% of total RAM which would be 2 GB in your case.
After that it starts swapping to its own cache file. You can do a lot with 2GB if you’re doing simple image manipulation work.
Boosting your RAM to 8GB would be a good thing to do though.
Did you scan the document yourself?
If so, I suggest scanning it again with a higher resolution to give you a better chance of doing clean work on it.
I’ve had a little play session on it using the Contiguous Selection Tool and I had to make ad hoc adjustments to the Threshold value with lots of finger dancing to switch between selection actions:
It’s tricky, especially the separation from the background. It may be better to process the background out of it so you don’t have to deal with it every time you decide to process another word. Then you could put the processed content over the original.
Either way, it’s the edges of the letters as they blend/transition into the background that will give difficulty.
It’s doable but tedious and prone to error.
I’d say my method should work pretty well for that even if it’s a bit complex. You can make more colors by simply making more duplicates of the original image and using gradient maps of different colors on them.
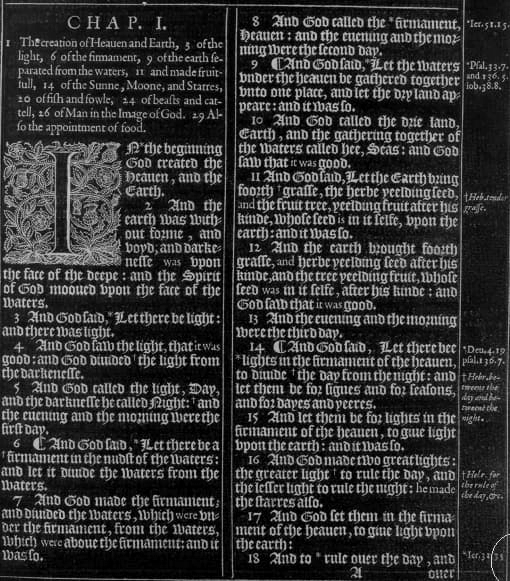
Another method is to remove the background using a Threshold filter then Colour to Alpha. Then use the slightly blurred resulting image under a paint layer with alpha inheritance on it.
Put all that over the original. Then you can paint/erase any colour you like over the letters:
It took me a while, but I got it done. The red, at least. It took me a while to figure out the brush. How to change the brush size. Where the pop-up palette was. Simple things…
Thanks for the screenshot of the settings for the red color. That was a lifesaver.
Now I have to figure some other things out, but I can find them easy enough in the manual, I hope.
I like your method. I did separate layers for each color, but I can’t figure out how to show them all at the same time. I can show the red, and I can show the pink, but I can’t show them both at the same time.
I realize now that I could paint in multiple colors on one background, but I would like to be able to switch off colors or groups of colors. Have a way to show red; red and green; green and pink; red, green and pink.
I know it must be possible, and probably very simple once you know what to do.
Also, what number did you choose on the threshold, if you remember?
Another question, is it possible to somehow make a macro to do the threshold and then the color to alpha? I think I will be doing this process many, many times.
I just haven’t read up the topic completely, I’m busy at the moment, but usually you do this with different layers for each individual color. Then, you can show and hide the individual layers by activating/deactivating the eye symbol at the beginning of each layer via clicking on it.
If this doesn’t work, or you don’t know what I mean, then please upload a screenshot of your entire Krita window, including the title bar and status bar and the layers’ docker as fully visible as possible (the dockers have handles at the top and bottom to adjust the size).
I’ve been doing some work on this as a background task and I’ve figured out how to maintain the original text that isn’t painted over.
The optimum Threshold value depends on the results of the Levels adjustment (Levels is not used in my last reply) and they both vary depending on the characteristics of the original scanned text.
If all examples of scanned text are taken from the same document that has been scanned to a high standard then the Levels/Threshold value should be the same for them all and will only need to be manually adjusted once.
Have a look at the plugin suggested by @EyeOdin above.
(I thought it was called Pigment.O ?)
That would be difficult.
I did that manually. You can use a filter mask and I do in my new development.
Yes, just use different layers as noted by @Michelist
For the simple structure I showed in my reply above, as well and Paint Layer 1 then you’d have Paint Layer 2, etc, all on top of each other and all with alpha inheritance enabled.
Then you’d turn on/off their visibility as you wanted to present them.
It’s all about layer organisation and structure.
I’ll try to get something finished and usable soon.
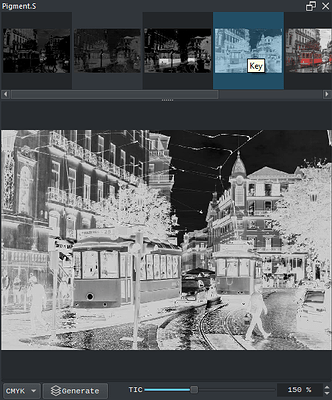
Yeah it is a bundle of dockers now .o and .s and both use the same colour management formulas but for different use cases. One is a picker and the other is image channels.
With pigment.o you can colour pick and with the selections channel adjust how much you want to select it.
But with pigment.s it works with images and you can make maskes with channels pretty easily. I would probably recommend selecting CMYK and check the key map it gives for the RGB. It should give a pretty decent mask with one click. And also you have other colour spaces with black too that you can test out with.
Color selections and channels are essentially two sides of the same coin code wise. After you have the selection you can transform it into any other map type and adjust things. Like a transparency mask or a filter mask and change colour with it.
however these images are way to small for a something digitalized and with text no less not to mention the fact it is saved in JPG format with high compression your just making your life harder if you want to edit it. Save it in a good resolution and in PNG file format for the rest. luckily Pigment.S is pixel perfect so it dodged everything but it picked up the JPG artefacts too.
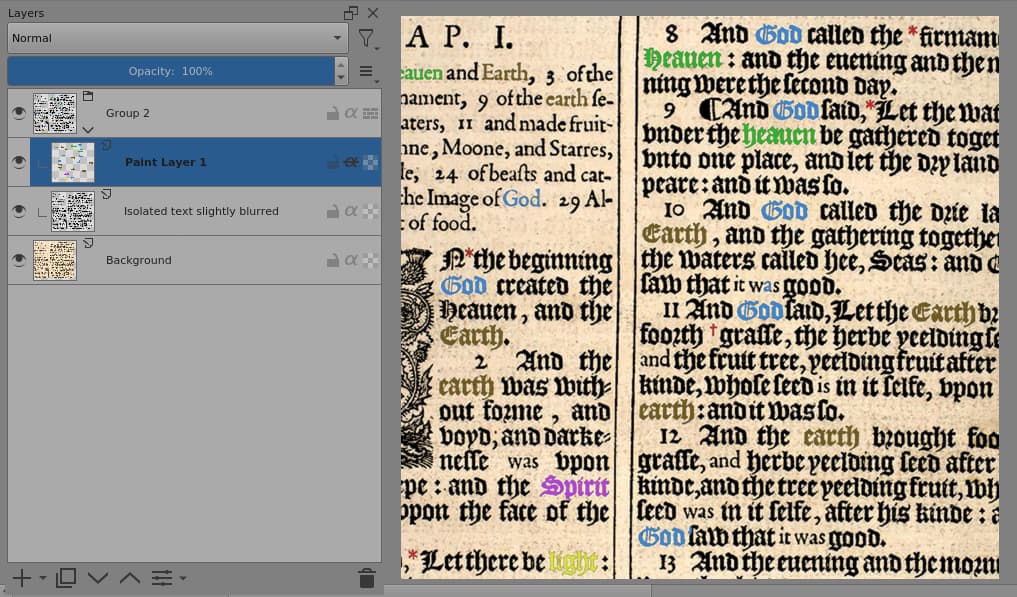
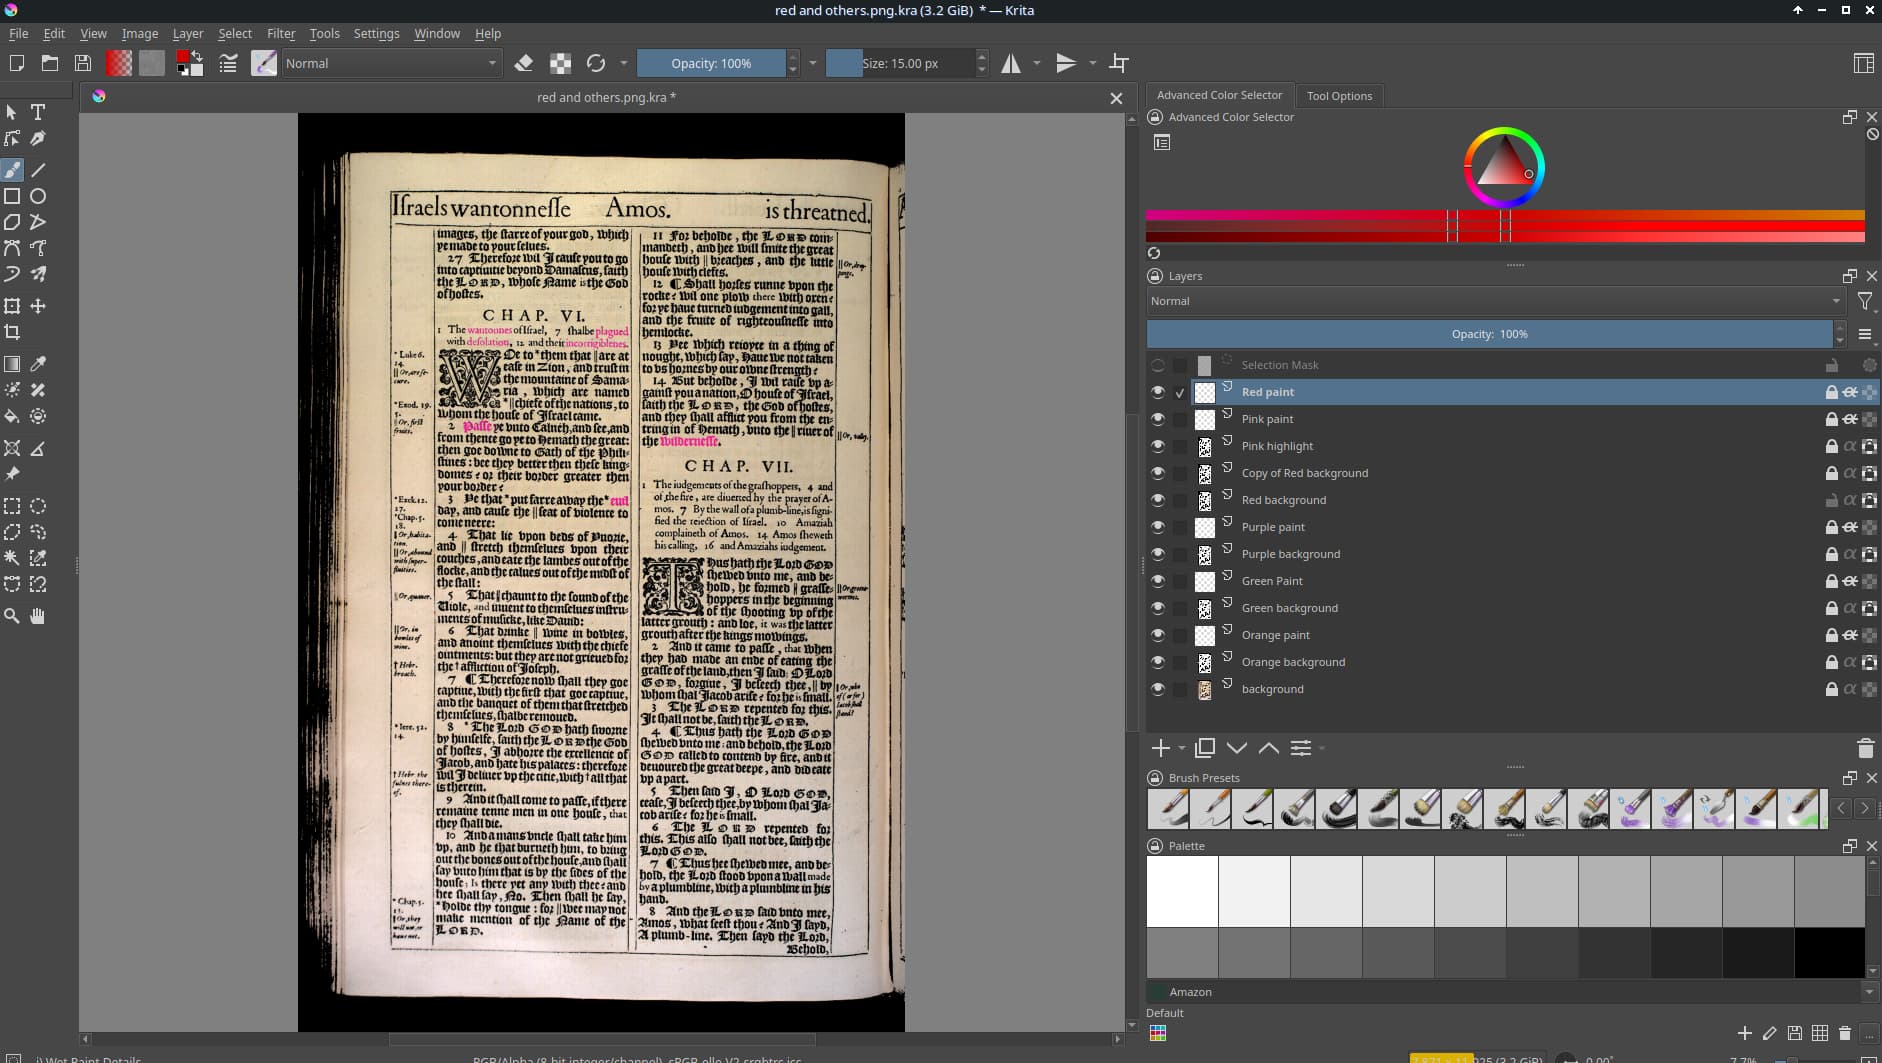
Here’s the screenshot of my progress as it is. I made the layers window large enough to show them all. I have all the colors eye symbol clicked, but the only one that is showing is the pink. If I turn the pink off, then I can see only red. Then red off, I can see purple. Purple off leads to green, green off is finally the orange. Orange off, then the original unedited version. I cannot see them all at once. I know it’s probably really easy, the top layers are blocking the lower ones, but I don’t know how to make them all visible at once.
It’s either a steep learning curve or I’m on a tricycle! The latter is the likely culprit.
One other simple thing that I can’t figure out. Once I set the threshold and convert color to alpha, how do I copy that work to use as a base for the subsequent colors–in other words, can I just do the process once and then make copies? I tried to do it, but I got confusing results.
By the way, this forum is pretty awesome. I couldn’t believe how fast I got responses.