Sorry but thats something I’m also pretty good at. Probably even better than you (xD).
Lets see what M1 says, but I do wish you are right! (And by the way, it was a great sugestion, I appreciate your idea a lot!). Is just that I’m not sure, since I tested it and sadly (or well, maybe luckily) they worked as expected.
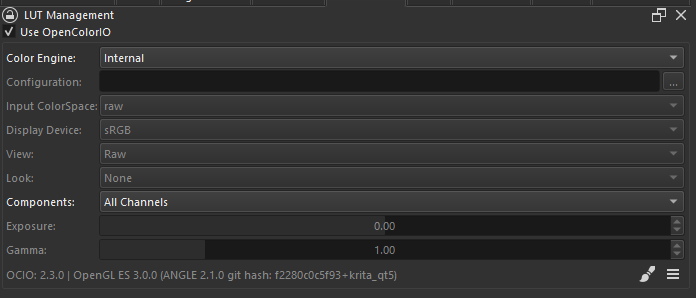
I think I finally found the issue, is because of the LUT Management being disabled. I always have it enabled, but disabling it I’m getting the same results as @_M1 .
For enabling it: Settings -> Dockers -> LUT Management, and press"Use OpenColorIO"
Even though, I’m working to solve it since it should work correctly with or without the LUT. I thought it was a minor change, a bad format for some images I use but seems a bit more complex.
For the record, turns out that yesterday I was trying to solve something that wasn’t broken
@Michelist was right here and here. It was the “Color selector uses different color space than image” (Thanks by the way, Michelist ).
I thought it could also be that, so I was kinda surprised that it was working fine for me disabling or enabling it. But it was due I had the LUT Management enabled, and that is what LUT Management does basically, apply different transforms to keep the colors you see faithfull to different profiles. So that option didn’t had any effect while is enabled.
But after disabling it, everything is working as expected. Those colors variations are expected if you enable the “Color selector uses different color space than image”:
Weird, wasn’t working for me at the time, even made a comment that I restarted the app. I closed it and everything. After your fix, doing the Color selector works now though. I guess if that was what was truly happening, sorry for throwing you in a wild goose chase.
Allows panning the document by holding space (to mimic Krita)
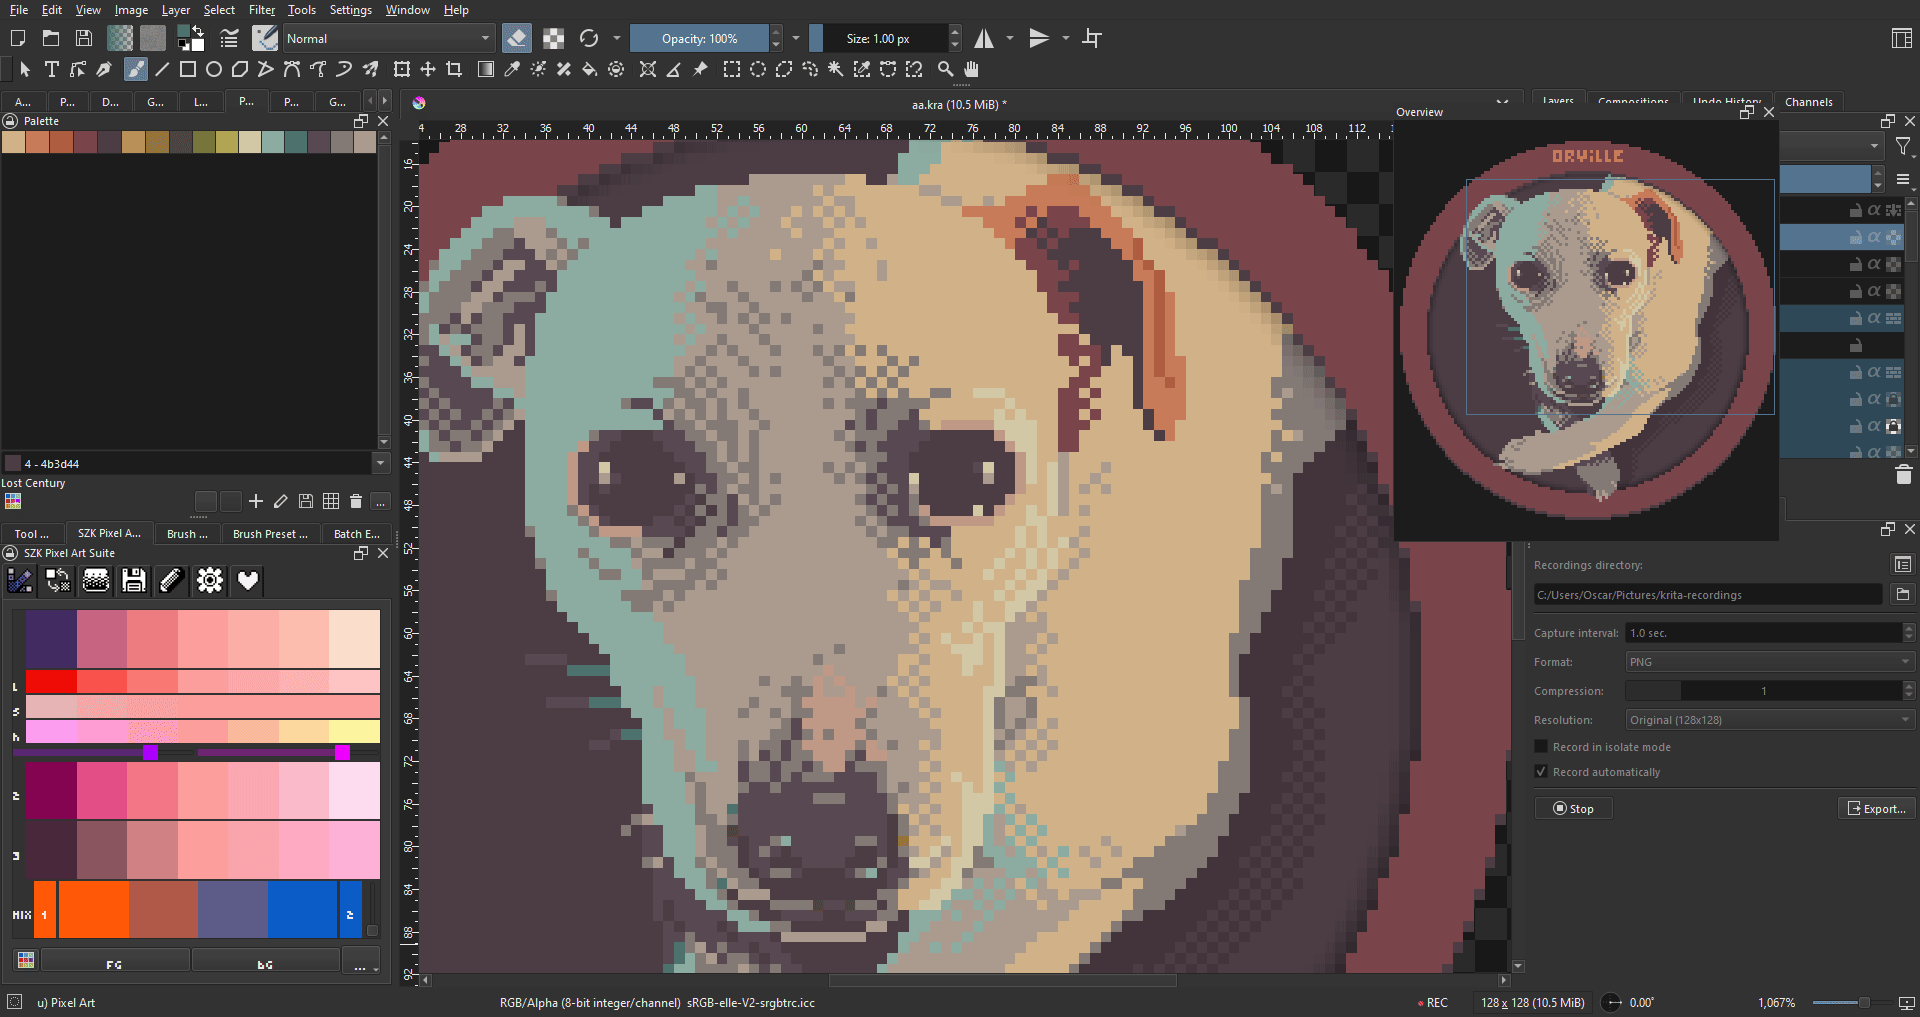
Antialiasing Brush:
Added a palette algorithm (P4 and P8 in the dropdown menu) for painting with the most similar color (using a cielab algorithm) to the all adjacent pixels.
Right click picks the opposite; the most different color in the palette to the all adjacent pixels (could be useful for generating the most contrast possible).
Basically identifies all the surrounding pixels, and uses an algorithm to paint with the color in the palette that is most similar to the adjacent pixels (without being a color that is already in an adjacent pixels).
This is great for easily adding an antialiasing effect without using colors that are not in the palette you are using.
Shading tab
Sort by ID improved:
When you added a palette (like one from Lospec), after sorting it with a different criteria, you were not able to come back to the original sorting. Now it is possible.
I personally download my palettes from lospec. I find the sorting tools great for helping me to decide which color to chose, by maybe sorting by the perceived value, etc.
But it had the problem that once you sorted the palettes, you were not able to come back to their original sort. And I missed that since usually the palettes are well organized into different hues and shades
NOTE: For this to work correctly, you should not edit the swatches ID, since is what is used to store their original position
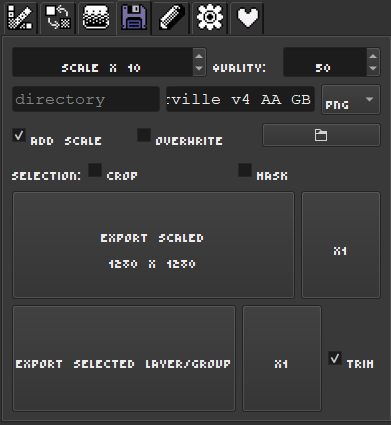
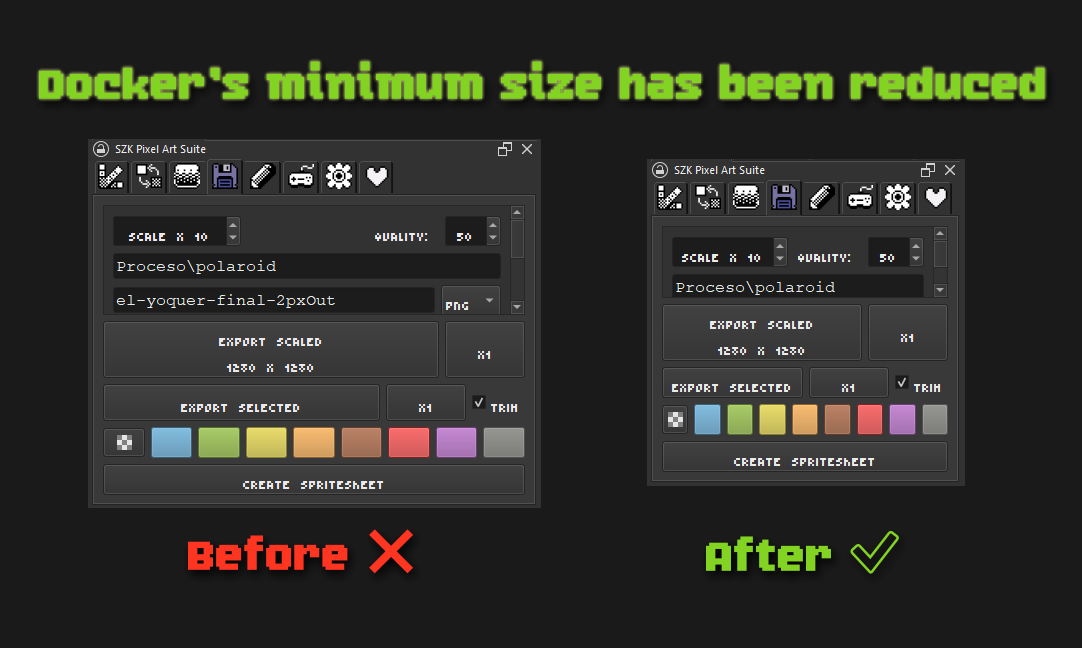
Export tab
Added more options to the export tab.
Button for exporting the document and selected layer/group on x1 scale (not only scaled)
Option for using the current selection as a mask for exporting only the selected part.
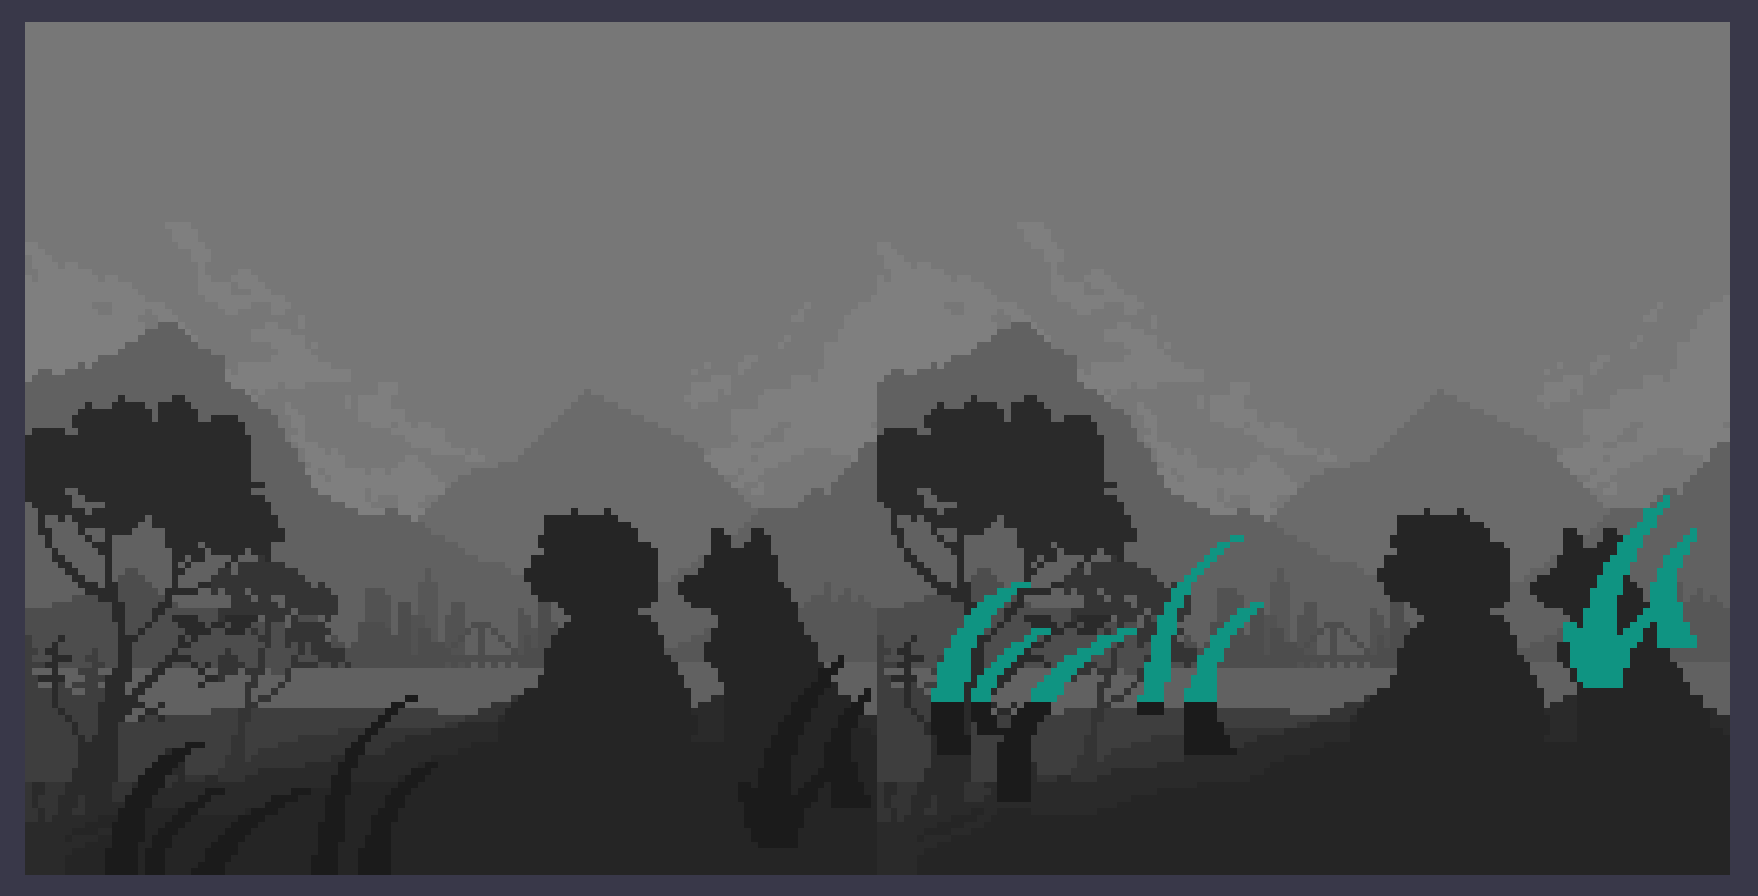
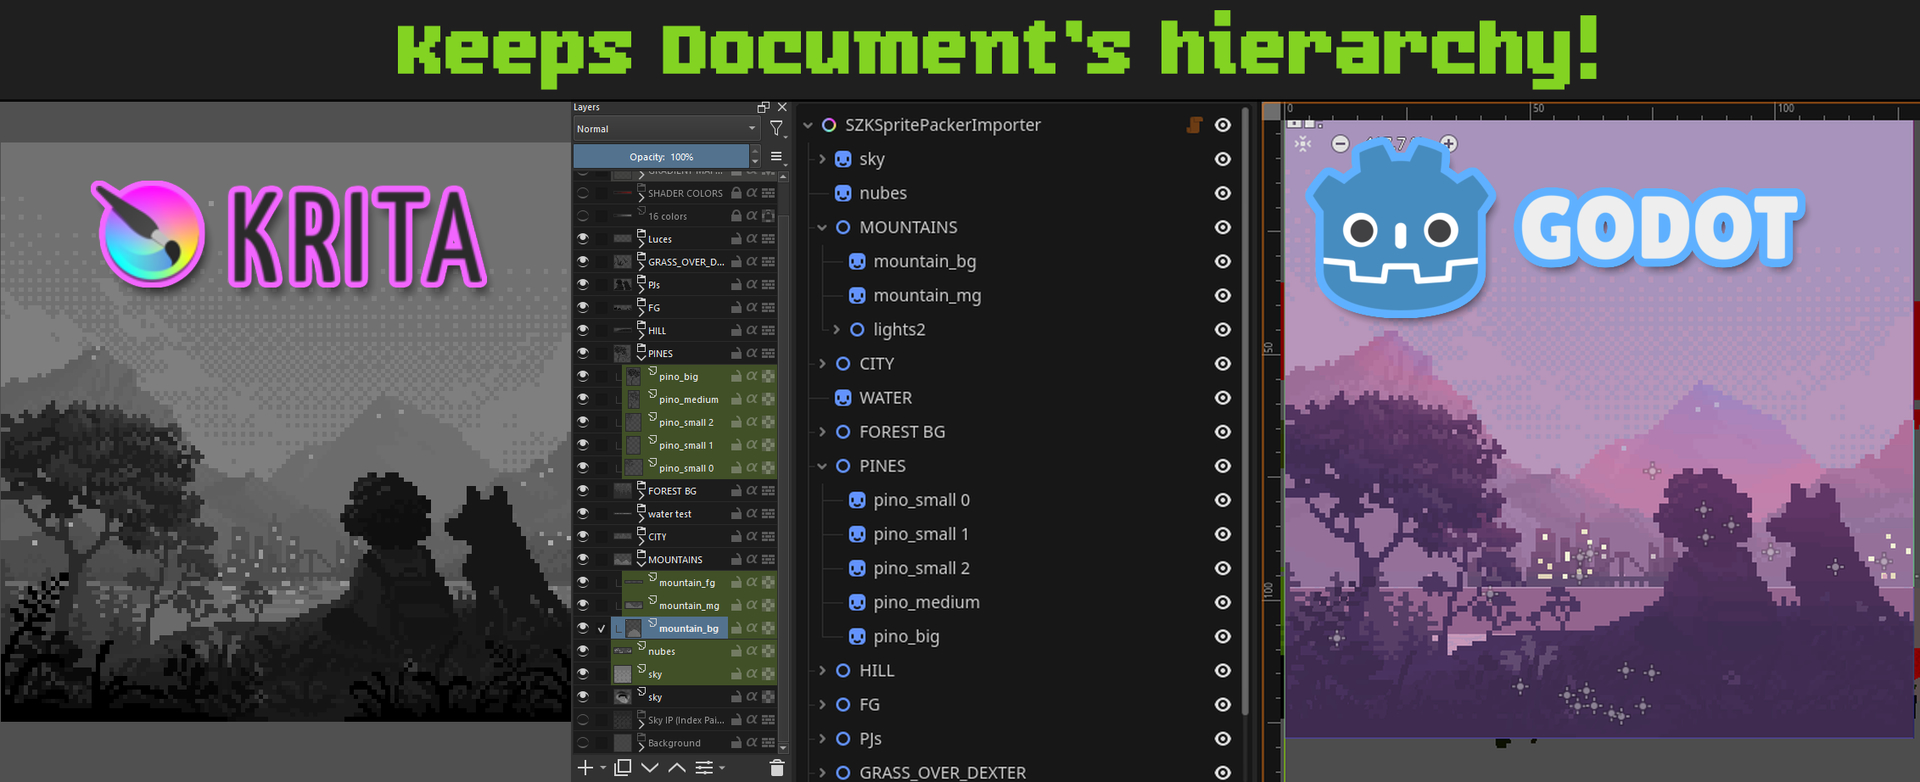
While I was working on this animation I liked to use the export tab since it was very fast to export all my sprites whenever I made a change.
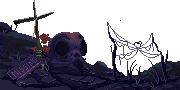
But I had a recurring problem; despite I had each layer/sprite separated on groups, I ended adding some filters/effects on top to tweak the whole illustration on the top of the document. And that made that exporting the layers/groups below, didn’t had applied those changes.
Like I was getting this for one sprite:
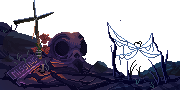
But I wanted this (not only the fire is different, also the colors because of the filter layer):
For that I made the options to crop and mask the selection. That way I could export the whole document but masking and croping it to my selection/sprites, and made things easier.
(This is useful if you are doing some gamedev related stuff).
Also, I noticed that I was using a lot the export tab to export the separated pieces of the illustration to my game engine, and I didn’t want them to be scaled. So instead of having to change the scale, I simply added 2 buttons for exporting them at x1 scale.
I solved some bugs in the color replace tool; I noticed that it was only replacing the pixels of the layers that were inside the canvas’ rect (and when you moved them you could see the previous color unchanged):
This update is specially useful for people interested in gamedev (and more specifically for those using Godot! ). It was made mostly while working on that illustration, and with the aim of improving my workflow with that and future illustrations and solving some problems I had.
I added some options I missed in other spritepackers, 2 different ways for exporting the spritesheet (one is meant for animated sprites), and some more things (see “Bonus” section below).
This is a tool I made for easily edit the sprites/layers’ channels in krita, in order to make some VFX with shaders later in Godot.
Krita has very useful filter layers for editing all layers, but “commiting” their changes into the actual layers (so you can use them later in other tools), is hard. So I made this for being able to easily encode some information in the RGB channels in all my sprites.
It was very useful for me when I was making that illustration above, since it contained lots of sprites (specially grass), and it helped me to avoid placing them one by one (which would have been very tedious).
Mostly bug fixes, but I also added 1 little feature I’m using a lot for backgrounds and repettive elements!
Pattern Offset
Basically, in the K-Sprite editor, when you have the dither/pattern option enabled:
You were able to draw patterns by drawing in the matrix of the Index Painting tab:
Now you can offset the pattern it by pressing the arrow keys:
I used that a lot while I was working on this drawing, but I missed that I was able to move the pattern in some places (like the balconies and their decoration, to fit propperly)
Offseting without moving the cursor/mouse will make the new offseted pattern to filter the previous one.
This was originally a “happy (code) accident”. My original intention was to simply offset the pattern. But after playing with both approaches, I found this behaviour way more versatile and fun. Basically you can obtain tons of new patterns from a single one, just by “executing some combos” with the arrows.
Just remember that if you want to recall the original pattern with the offset applied, you just have to move the cursor a bit to redraw it.
Fixed Bugs
[K-Sprite] Using the bezier curve with an active selection in K-Sprite didn’t mask the curve outside the selection.
When changing a pattern presset (in the Index Painting tab), the SpinBox with the size didn’t update. (This was a bit tedious if you wanted to edit a presset by changing its size).
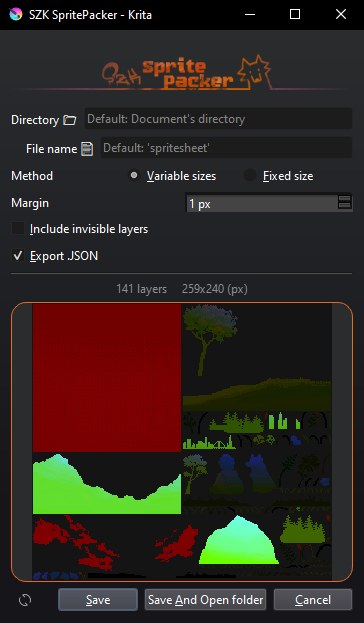
Fixed an error when exporting the .JSON in the Sprite Packer
I added a button for opening the git-page of the SZK SpritePacker Importer and I overrid by mistake a method used when saving the .JSON, and I didn’t notice (thanks to the person who reported it!)