I’m commenting because I have a question. I apologize in advance that the question may be awkward because my native language is not English. I’ve read everything, but I don’t understand it because of my lack of English skills. How can I create a new layer by any chance? I was wondering how to create a layer that gives the same effect to the template you shared, not just the usual new layer. You wrote a tutorial on the template, but I didn’t understand exactly. I am so Sorry. This template is so perfect that I really want to use it.
Thank you for your response. @AhabGreybeard I’m using a 5.2.2 version of KRITA. I downloaded it from *(https://krita.org/) . I’m using a Windows 10 operating system. I downloaded it and decompressed it. After decompressing it, I clicked to open it in KRITA.
I see the problem.
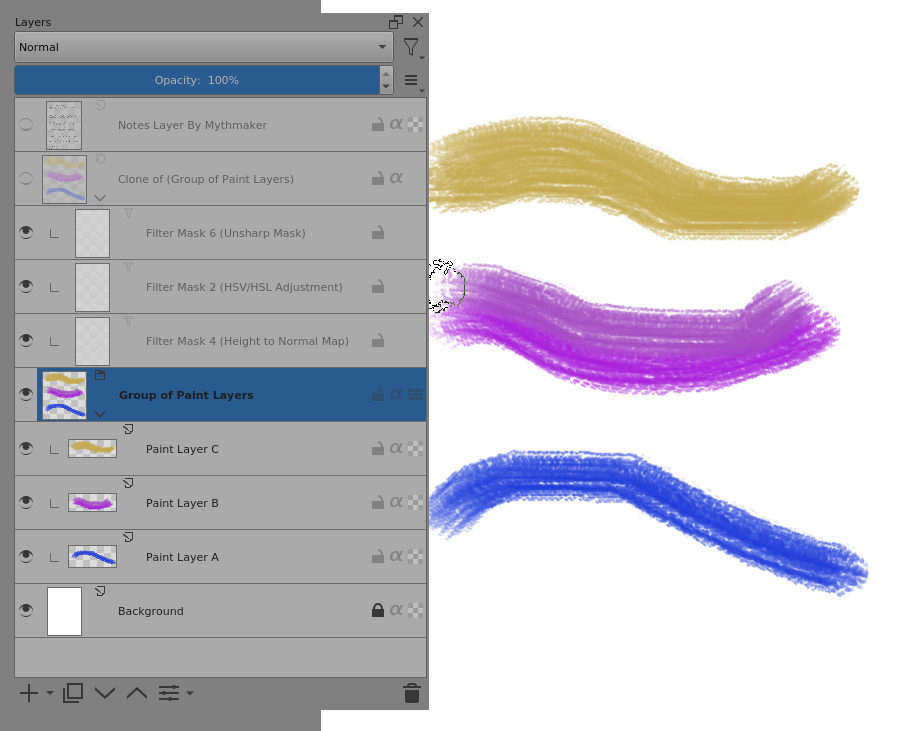
The Impasto effect is created by applying filters to a Clone of the original paint layer.
So, it only works for paint applied to the original paint layer.
Your new paint layer will not be cloned and so there will be no Impasto effects.
What you’d need to do is create a new document with the same structure but instead of a single paint layer you would make a group of paint layers then make a Clone of that group and place it above the group of paint layers.
Then apply the filters to the clone in the same way.
You can copy and paste the filter layers from the original document to the new document.
Note: Do not try this in the original document and do not try to modify the original document clone in any way. If you do then you’ll break it.
@AhabGreybeard Thank you for your response. I’m perfectly Newbie. In fact, it was my first time encountering Krita without even logging in, and it wasn’t until I came across this issue that I logged in and joined the community for the first time.
I didn’t expect to receive such a sincere response to the first question. I was touched, and I really appreciate your response. However, since I’m Newbie, I think I’ll have to study a little more about the features you explained.
I’m sorry to keep asking. Do you happen to have any tutorials on how to apply filters to clones and replicate them? I can’t find them even if I search them on YouTube.
It’s about learning all the individual little tools and techniques then applying them with practical exercises and experiments.
This takes time and patience and you will make mistakes, which should be 'learning experiences.
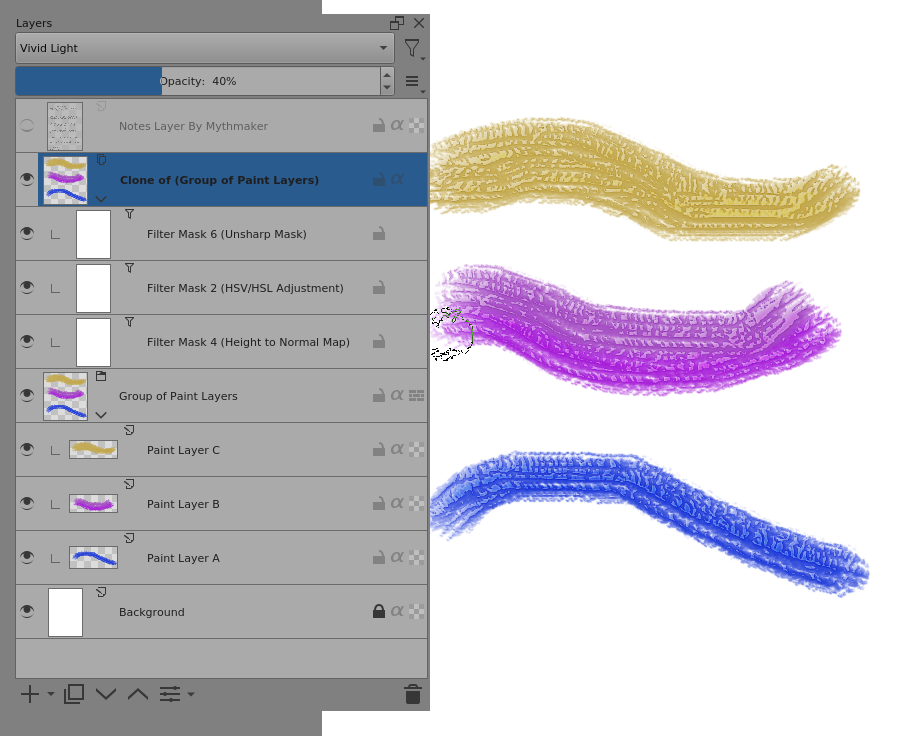
I’ve made a grouped version of ‘Krita Impasto Template 2.kra’ by doing exactly as I said earlier in this topic.
Notice that the Clone layer has a layer blending mode of Vivid Light and an Opacity of 40%. This is explained in the Notes layer that was originally made by Mthymaker.
That and the settings of the individual Filter Layers control the overall effect.
Mythmaker made three different files that have variations of those various effects to give three different overall properties when painting.
In the Notes, Mythmaker advises that a textured brush should be uised.
@Mthymaker, Do you have the original text for those notes for the three files?
That would be useful for people who need to use a translation service to get them into their native language.
Here is the Grouped Impasto Template 2.kra file for download and use:
If you have a problem then you can make a new topic about it but please read the manual and also watch this series of video tutorials that are made for beginners:
Watch the earliest ones first:
I’m not sure about this ‘Mthymaker’ you keep referring to, but I think I might be able to help with this…
Here’s the general text from the templates:
Use oily brushes for best effect i.e. colour smudge
brushes with bristle brush tips. It’s Better to turn
off any brush texture pattern for a thick impasto
effect.
Paint on the layer labelled as ‘paint layer’.
The impasto effect is created by cloning the paint layer,
then adding filter mask layers to the clone. I’ve found
many different combinations can be used to achieve
variations on the effect.
The clone layer needs to be set to a layer style that
applies the effect to the original paint layer: ‘Overlay’,
‘soft light’, and ‘vivid light’ work well for this. Opacity
may need to be adjusted (vivid is harsh at full opacity).
A hue/saturation/lightness (HSV/HSL) filter mask layer
may be needed on the clone layer if the applied effects
are changing the colour and/or the value of the paint
layer.
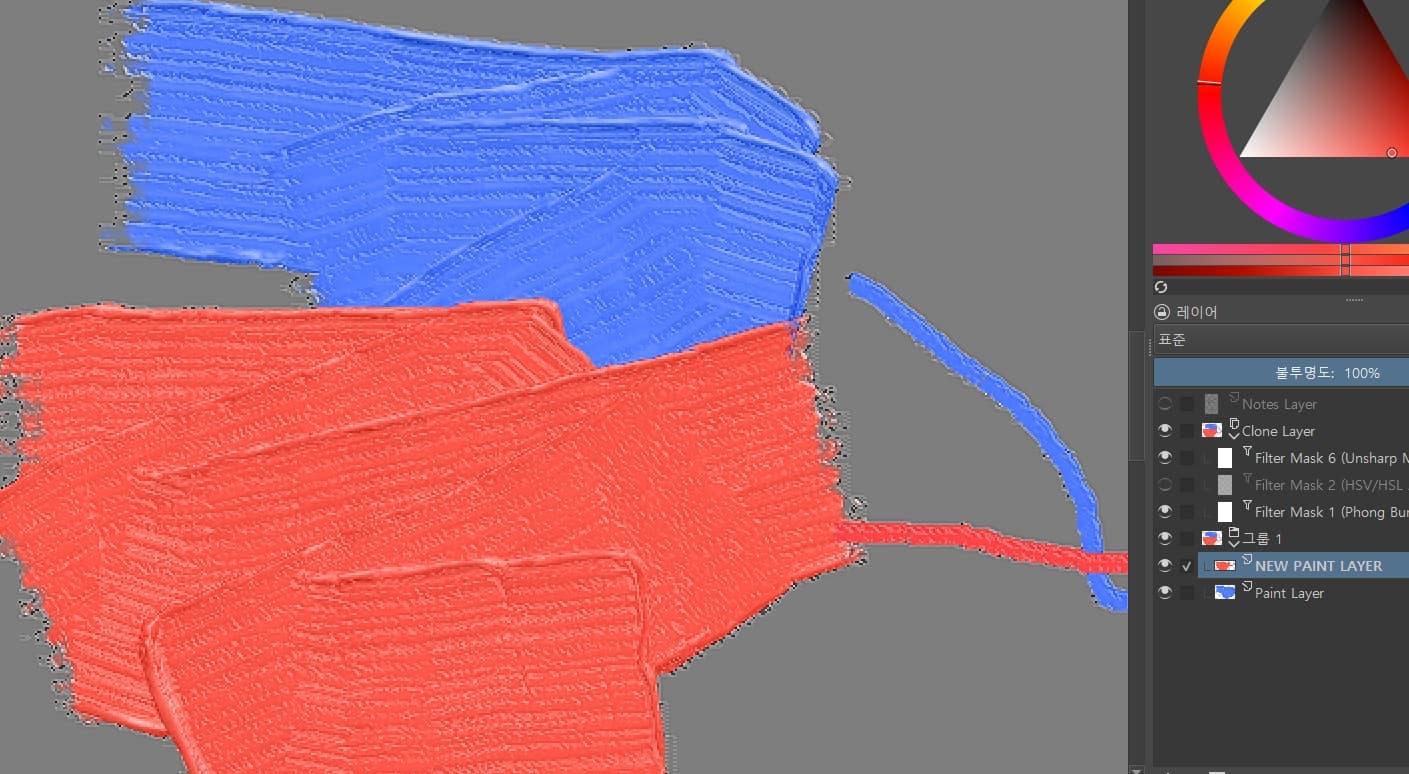
Note: Darker colours will indent / cut-in to lighter
ones (vice versa for light over dark). I haven’t found
any way around this, but it can be reversed by altering
light position (e.g. in phong bumpmap settings).
You will also likely notice some stepping / contouring
in strokes - this will vary with layer settings and brushes.
You can make these notes invisible by pressing the eye symbol
next to ‘notes layer’ in the layers window. Or just delete
the layer altogether!
I posted those templates back in 2020. Since then we’ve had developments in the brush engines that allow us to add thickness effects directly to brush presets (using the ‘lightness’ property with brush tips). This provided a much simpler and more effective way to achieve impasto style brush effects.
There are still benefits to the template method - such as it being not destructive and can be used in real-time or as a post effect. It can also be applied to anything, whereas the lightness effect is currently available for the pixel or colour-smudge engines (most presets use one of these two).
If your main interest is the impasto effect then I would definitely look at the lightness bushes as a preference over this. The best example of what can be done with those so far is emilm’s set:
I feel the main benefit of learning this layered effect now is the understanding gained - That opens up possibilities when trying achieve other effects.
@Mythmaker I was in trouble because I couldn’t translate the letters on the layer, but thank you very much for writing it down so kindly.
I’m already using this brush. When I combine it with the template you shared, it feels perfect and has a wonderful texture. Thank you so much for sharing a good template and letting me know so much.
Your template is so cool! I wish you all the best today.