I created a script that automatically closes small gaps and performs continuous area selection. I made it with the help of many people on this site. Thanks to all of you.
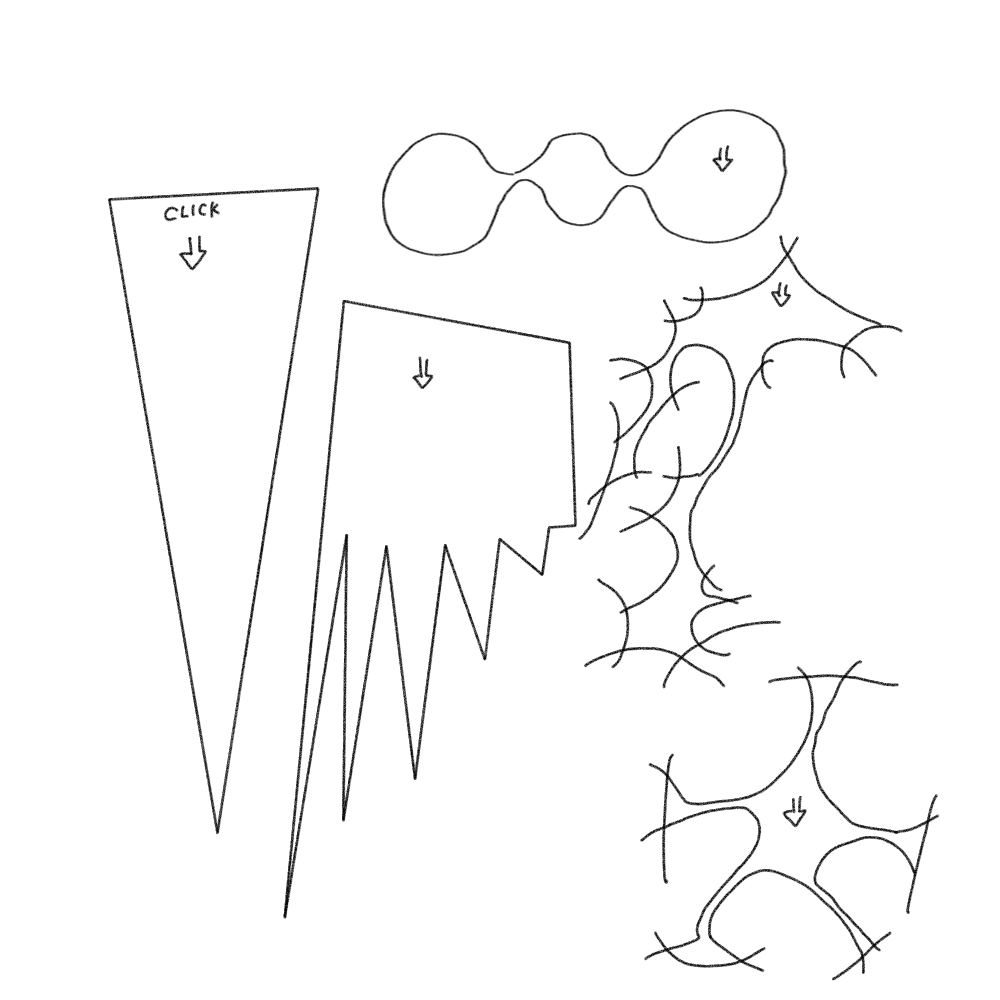
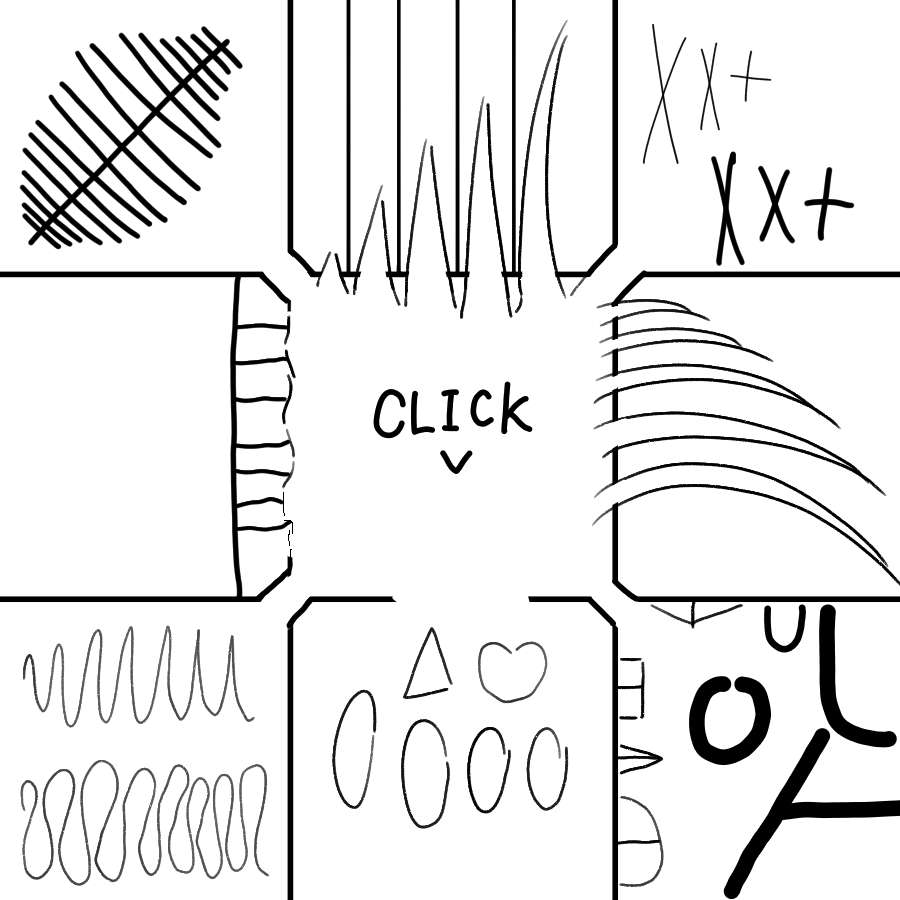
<test picture
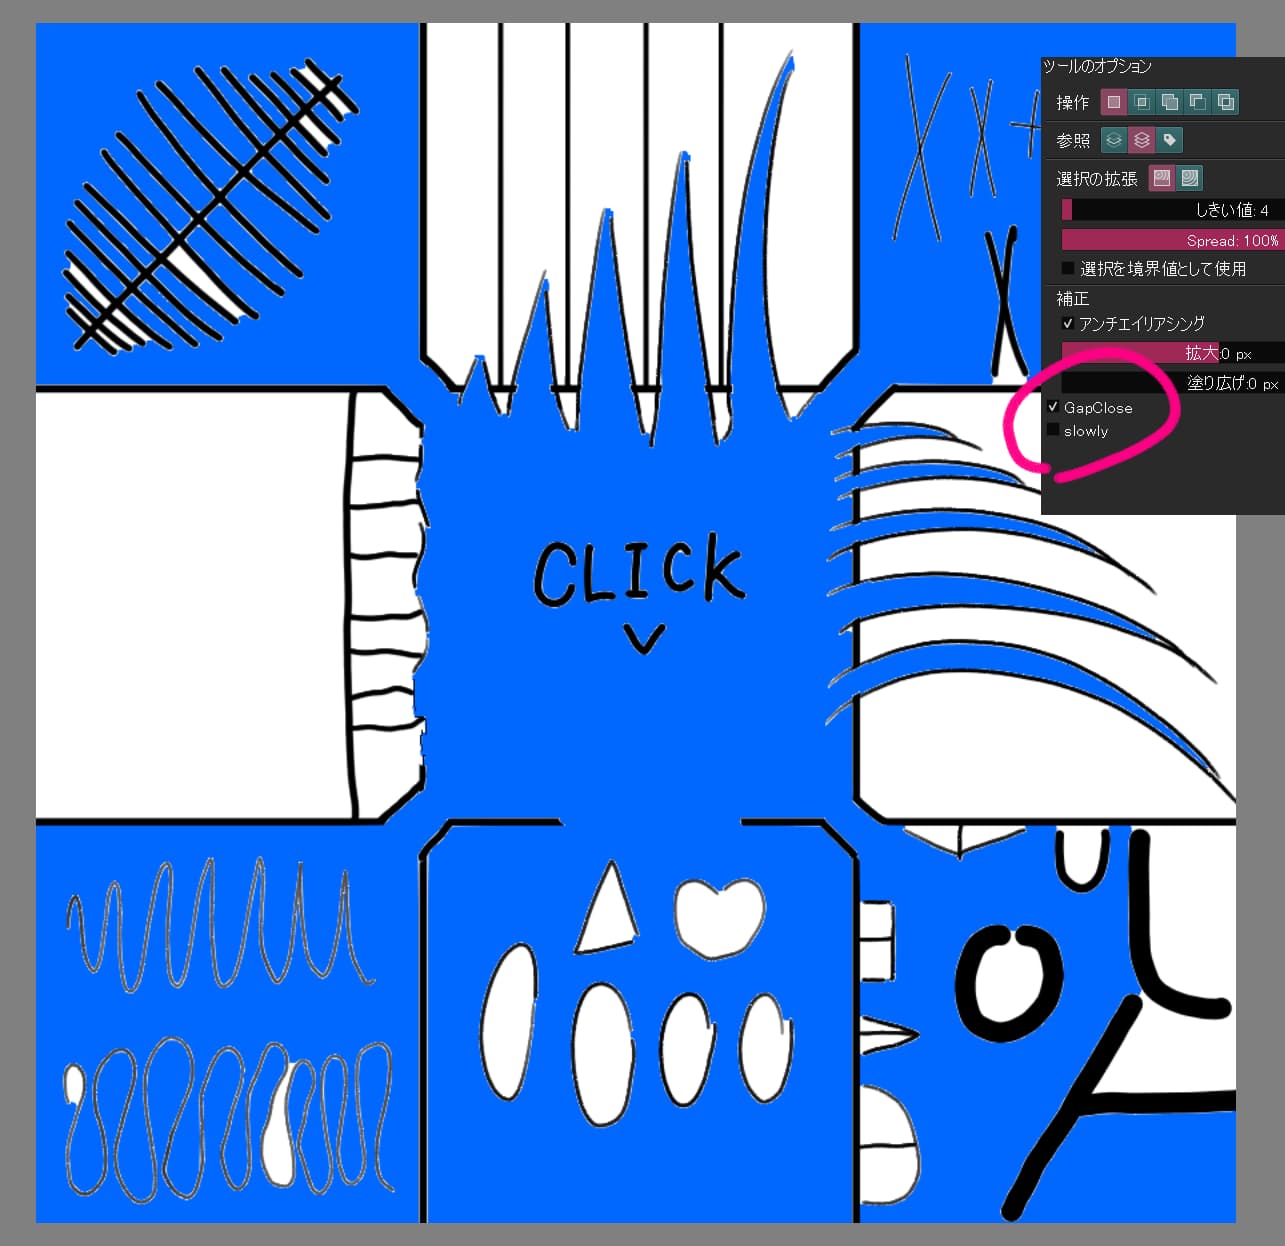
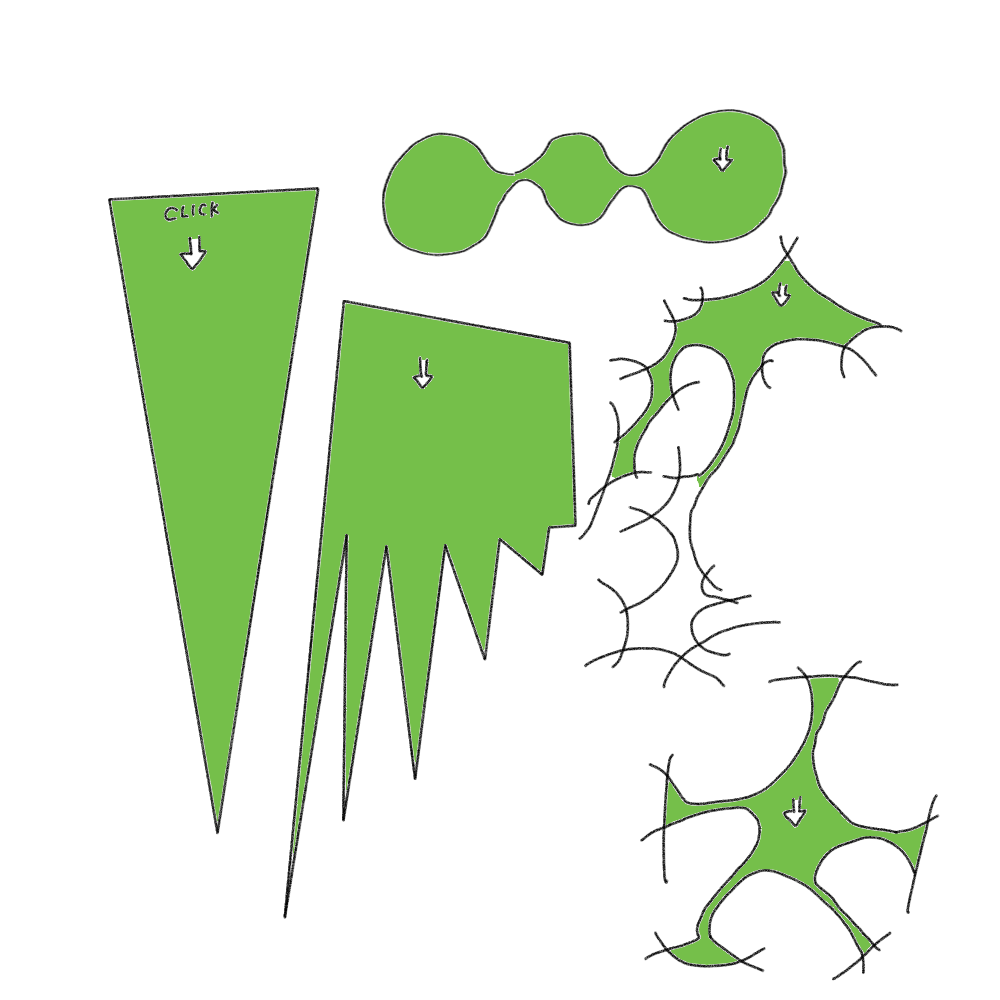
<Fill in the resulting selection
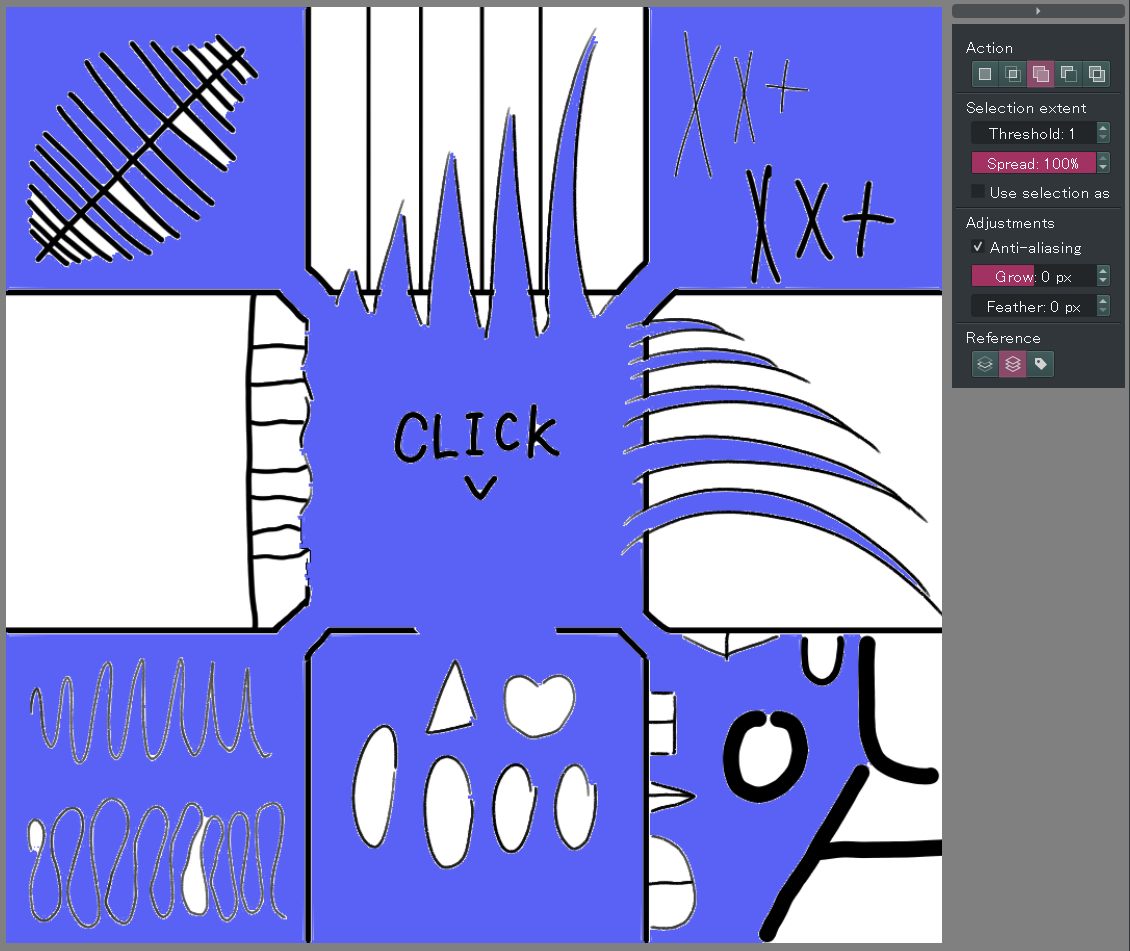
You can try it out by setting up this script in Ten Scripts and running the script at any cursor position. If it works correctly, you can make the selections shown in the image above. (coloring is not included in the code)
from struct import iter_unpack
from krita import *
from PyQt5.QtCore import (
        Qt,
        QPoint,
        QPointF,
        QTimer,
        QEvent)
from PyQt5.QtGui import (
        QImage,
        QPainter,
        QColor,
        QTabletEvent,
        QCursor)
from PyQt5.QtWidgets import (
        QWidget,
        QApplication)
import time


def find_current_canvas():

    q_window = application.activeWindow().qwindow()
    q_stacked_widget = q_window.centralWidget()
    q_mdi_area = q_stacked_widget.currentWidget()
    q_mdi_sub_window = q_mdi_area.currentSubWindow()
    view = q_mdi_sub_window.widget()
    for c in view.children():
        if c.metaObject().className() == 'KisCanvasController':
            viewport = c.viewport()
            canvas = viewport.findChild(QWidget)
            return canvas

def click_canvas(global_pos=None):#click action

    if global_pos is None:
        global_pos = pos#これが現在のカーソル位置
        global_posF = QPointF(global_pos)
        posF = QPointF(canvas.mapFromGlobal(global_pos))
    else:
        global_pos = pos
        global_posF = QPointF(global_pos)
        posF = QPointF(canvas.mapFromGlobal(global_pos))
    device = QTabletEvent.Stylus
    pointer_type = QTabletEvent.Pen
    pressure = 1
    x_tilt = 0
    y_tilt = 0
    tangential_pressure = 0.0
    rotation = 0.0
    z_pos = 0
    key_state = Qt.NoModifier
    unique_id = 1234
    button = Qt.LeftButton
    buttons = Qt.LeftButton

    table_press = QTabletEvent(
            QEvent.TabletPress,
            posF,
            global_posF,
            device,
            pointer_type,
            pressure,
            x_tilt,
            y_tilt,
            tangential_pressure,
            rotation,
            z_pos,
            key_state,
            unique_id,
            button,
            buttons)

    table_release = QTabletEvent(
            QEvent.TabletRelease,
            posF,
            global_posF,
            device,
            pointer_type,
            pressure,
            x_tilt,
            y_tilt,
            tangential_pressure,
            rotation,
            z_pos,
            key_state,
            unique_id,
            button,
            buttons)

    if not canvas.isActiveWindow():
        canvas.activateWindow()

    QApplication.sendEvent(canvas, table_press)
    QApplication.sendEvent(canvas, table_release)
    activeDoc.waitForDone()

def edgeDetectFilter(node):

    filt = application.filter('edge detection')
    configParameters = filt.configuration()
    configParameters.setProperties({
            'horizRadius': 1,
            'lockAspect': True,
            'output': 'pythagorean',
            'transparency': True,
            'type': 'prewitt',
            'vertRadius': 1})
    filt.setConfiguration(configParameters)
    filt.apply(node, 0, 0, w, h)
    activeDoc.waitForDone()

def createSelection(node, filterFunc):#Converting an image to  selection

    bounds = node.bounds()
    x, y = bounds.left(), bounds.top()
    width, height = bounds.width(), bounds.height()
    #プロジェクションを使ってるから画面に出さないといけない
    pixelData = bytes(node.projectionPixelData(x, y, width, height))
    selectionData = bytearray(width * height)

    for i, rgba in enumerate(iter_unpack('>BBBB', pixelData)):
        selectionData[i] = filterFunc(*rgba)

    newSelection = Selection()
    newSelection.setPixelData(selectionData, x, y, width, height)
    return newSelection

def transparentFilter(r, g, b, a):#不透明度の閾値を数値で決める
    return 255 if a > 1 else 0#aが何より大きかったら完全に選択するか
#使い方selection = createSelection(doc.activeNode(), transparentFilter)

def fillColor(node, colorx):#選択範囲に関係なく全面が色づく

    image = QImage(w, h, QImage.Format_ARGB32)
    image.fill(colorx)

    pixel_ptr = image.constBits()
    pixels = bytes(pixel_ptr.asarray(image.byteCount()))
    node.setPixelData(pixels, 0, 0, w, h)
    activeDoc.waitForDone()

def makeProcessedLine():
    #Make the entire image a line drawing
    lineNode = rootCopy.duplicate()
    edgeDetectFilter(lineNode)#エッジを出す
    #To Selection
    ProcessedLineSe = createSelection(lineNode, transparentFilter)

    return ProcessedLineSe

def reactsToGap():
    #Scope to fill in the gap location
    reactsToGapSe = processedLineSe.duplicate()
    eraseLineSe = processedLineSe.duplicate()

    reactsToGapSe.grow(1, 1)#この辺で調整
    reactsToGapSe.grow(1, 1)
    reactsToGapSe.grow(1, 1)

    activeDoc.setSelection(reactsToGapSe)
    reactsToGapSe.shrink(4, 4, True)

    reactsToGapSe.subtract(eraseLineSe)
    reactsToGapSe.grow(2, 2)

    return reactsToGapSe

def exclusionZone():
    #Scope for eliminating unwanted parts of the lid.
    selectionPL1 = processedLineSe.duplicate()
    selectionPL2 = processedLineSe.duplicate()
    selectionPL3 = processedLineSe.duplicate()

    #Apex
    activeDoc.setSelection(selectionPL1)
    selectionPL1.grow(3, 3)
    selectionPL1.shrink(6, 6, True)

    activeDoc.setSelection(selectionPL2)
    selectionPL2.grow(7, 7)#このへんの数字はいじりようがある
    selectionPL2.shrink(3, 3, True)

    selectionPL3.grow(1, 1)
    selectionPL2.subtract(selectionPL3)

    selectionPL1.add(selectionPL2)

    return selectionPL1

def fillExpantion():#Expand the selection inside the line

    s = activeDoc.selection()
    s2 = s.duplicate()

    for i in range(6):
        s2.subtract(processedLineSe)
        s2.grow(1, 1)

    s2.intersect(reactsToGapSe)#蓋と拡大する範囲の交錯部分をプラス
    s2.intersect(allSe)

    s.add(s2)
    activeDoc.setSelection(s)

def makeCloser():
    #赤いレイヤを用意 clip red layer
    redNode = activeDoc.createNode("redNode", "paintlayer")
    fillColor(redNode, Qt.red)
    allSe.copy(redNode)

    closerNode = activeDoc.createNode("closerNode", "paintlayer")
    closerNode.setBlendingMode("not_converse")#否定逆論理

    processedLineSe2 = processedLineSe.duplicate()
    activeDoc.setSelection(processedLineSe2)#最も狭い隙間を閉じるもの
    processedLineSe2.grow(1, 1)
    processedLineSe2.shrink(2, 2, True)

    reactsToGapSe.grow(1, 1)
    reactsToGapSe.add(processedLineSe2)
    reactsToGapSe.subtract(exSe)#フタ完成

    reactsToGapSe.paste(closerNode, 0, 0)#クローザーを設置
    rootNode.addChildNode(closerNode, topNode)

    application.action('deselect').trigger()#変な選択あるから一旦掃除
    activeDoc.waitForDone()

    click_canvas()

    fillExpantion()

    closerNode.remove()


application = Krita.instance()
activeDoc = application.activeDocument()
activeLayer = activeDoc.activeNode()
rootNode = activeDoc.rootNode()
topNode = activeDoc.topLevelNodes().pop()
w = activeDoc.width()
h = activeDoc.height()
allSe = Selection()
allSe.select(0, 0, w, h, 255)
# time.sleep(2)
pos = QCursor.pos()#起動時点のカーソル位置

#Avoid having the same tool twice in a row.
application.action('PanTool').trigger()#連続で同じツールを持たないよう回避
application.action('KisToolSelectContiguous').trigger()#select tool

rootCopy = activeDoc.createNode("rootCopy", "paintlayer")
rootNodepix = rootNode.projectionPixelData(0, 0, w, h)
rootCopy.setPixelData(rootNodepix,0, 0, w, h)#ノード全体に画像貼り付け

canvas = find_current_canvas()
processedLineSe = makeProcessedLine()
reactsToGapSe = reactsToGap()
exSe = exclusionZone()
makeCloser()

activeDoc.setActiveNode(activeLayer)

#Make an ant march appear.
application.action('invert_selection').trigger()#アリの行進
application.action('invert_selection').trigger()
(If you enable time.sleep(2) on line 246, you can also use it in the scripter, since execution will be after two seconds.)
However, it is not yet a practical script for the following reasons
Current problems and suggestions for improvement
- Slow operation when targeting images larger than 1000Pix.
- It does not respond when the active layer is a group layer.Why does it work when used in Scripter…?
- There are small areas that fail to be painted.
- Can’t I use shrink() for selections without activeDoc.setSelection()?
- Is there a way to use continuous selection without click action? If there is another, the code might run faster.
I will continue to tweak and improve this script. If anyone has ideas on how to make this better, I would appreciate it if you would share them with me. I am a programming beginner so if you can share your code with me, that would be great.
Translated at DeepL