Krita-Blender Workflow Bridge Plugin
It’s a plugin I’ve developed for my own work, It’s still pretty experimental and it’s not as elaborate as Yuntoko’s Blender Layer, but it allows a new approach to a process mixing 2D and 3D. This plugin creates a workflow bridge between Krita and Blender, aimed primarily at illustrators and comic creators. It facilitates the transition from sketching in Krita to working with 3D scenes in Blender, and back again with a “3D scene to 2D layers” system, allowing artists to more easily use mixed process with both 2D drawing and 3D elements.
You can find a video guide and a more detailed readme on the project’s GitLab: 2D_to_3D_workflow / Krita Blender Workflow Bridge · GitLab
Features
-
Link group layer to a blender scene. automatically set the camera resolution and import sketch as a camera background image.
-
Extract 2D layers from your 3D scene while preserving the scene’s lighting consistency.
-
Automatically import rendered 3D scenes back into the Krita layer group as layers while preserving blender objects organization and scene structure.
Installation
For now, this plugin only works on Windows (I haven’t tested other operating systems)
Krita
- Install Krita (any 5.2.X version might work)
- Download the zip file of the plugin : Download Plugin as ZIP.
- Launch Krita, go to
Tools→Script→Import Python Plugin From File ...and select the downloaded zip file. - On the
Activate Plugins?popup window pressYes - Restart Krita
- Create a new document and get the docker UI by going to
Settings→Dockers→Blender Workflow Bridge
Blender
- Install Blender (only versions 4.1.X or 4.2.X workd for now, version 4.3.x will be aded soon)
How It Works
Step 1: Sketching in Krita
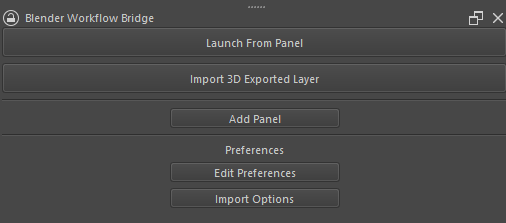
- For each drawing (comic strip panel) use the Add Panel button in the “Krita Blender Workflow Bridge” docker to automatically create the base setup (the panel group layer).
- Inside the “panel_template” paint layer, define the boundaries of the drawing (or the comic strip panel). It can be any shape you want (it will automatically be converted to a rectangle when working on blender).
- Sketch in the panel group layer. You can add new layers to the panel group layer or draw directly on the panel template layer (but doing so could altere his scale).
For comics, eatch panel drawing must be in his own panel group layer.
Step 2 (optional): Manage blender scene setings
Under Edit Preferences in the docker :
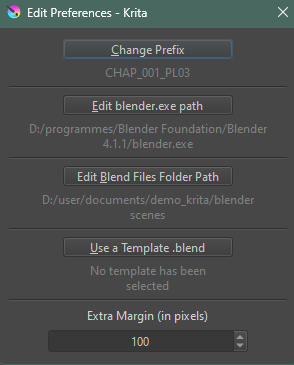
- Set a template Blender scene of your choice (any .blend you have, without a template scene, the script will generate a default blender scene)
- Set an extra margin around your panel template. (This extra margin will allow you some room to move layer around once back in krita, default is 100 pixels.)
Step 3: Create the panel Blender scene
Once your sketch is ready, follow these steps to export the panel to Blender:
- Select any layer of the panel group you want to work on.
- Use the shortcut
Ctrl+Alt+Bor open the “Blender Workflow Bridge” docker and click “Launch From Panel”. The first time you use it in a new krita file it will ask you for neded informations before creating the blender scene.
Step 4: Build the blender scene
Do not hesitate to use versioning, the krita plug-in will allways oppen the scene with the highest number at the end.
If you need to modify the sketch or the panel template after starting your work on the Blender scene, save it and close Blender, update the sketch or the extra margin, and repeat step 3 for that pannel.
Step 5: Blender to Krita Export
When your work in Blender is complete, you can export the scene back into Krita:
-
Ensure the Blender plugin is runing by opening the the “Export Layers Tools” UI panel in the right menu bar of the Blender display port. (you dont have to install the plugin, it will be run when launching from the krita plugin).
-
Check that the pivot points of the objects are centered (they are used to calculate the distance to the camera)
-
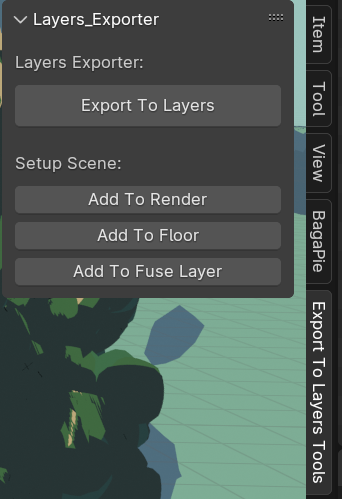
Use the Setup Scene buttons to setup your export. All objects you want as layer must be in the
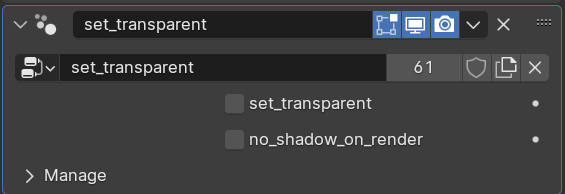
object_to_rendercollection, fuse collections can be used to export multiple object as a single layer and thefloorcollection will be made transparent with holdout to prevent objects from clipping through. The other objects will simply be transparent but will emit their shadows normally when rendering other layers, unless the user changes the parameters of the “set transparent” geometry node added automatically to the objects (for now, alpha textures shadow will not work and appear as opaque on render).
- If necessary, you can organize objects using collections inside of objects_to_render that will translate to layer group on Krita. Do not create subcollections thought (except with fuse collections) and be carefull about the fact that collections of objects of varrying depth might mess up layers order.
-
Ensure correct object masking, objects left out of the
objects_to_rendercollection will not be masked when rendering layers, causing them to appear in every layer render. -
Click “Export To Layers”
Step 6: Importing into Krita
-
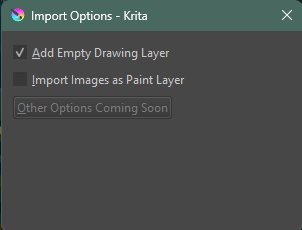
Set your import preferences in the “Import Options” menu.
-
select any layer from the panel’s layer group whose layers you wish to import
-
In Krita, click the “Import 3D Exported Layers” button in the Krita Blender Workflow Bridge docker.
-
A path selection dialog should automatically open at the location of the rendered images for this panel, if not, If not, it should be in the path you designated to save the Blender scene.
The plugin will match the exported layers to the appropriate Krita panel. If a match is found, you can choose to import the layers directly into the panel group or into a new Krita file. If no match is found, only the option to import into a new Krita file will appear.
Additional Features
- Renders History: Access previous renders from the history stored in the render folder.
- File versioning: Use file vertioning both on krita and blender to keep an history of your work. The skript will oppen the blender scene with the highest number at the end.
- Save Multiple Krita Files Blender Scene At The Same Location: By giving the same path and prefix to 2 krita files, you can have your blender scenes stored in the same folder structure. (Just make sure not to give the same name to two different panel layer groups.)
- Reuse scene: Although reusability has not yet been directly implemented, it is possible to use the “add template” option in the “edit preferences” menu to reuse an allready created scene.
Upcoming Features and improovements
Folder management

- This system manages Blender folders and files in a rigid manner because it was initially created for my own use, and I didn’t want to handle it manually. I am now considering removing all this folder management and letting the user manage their directory structure, simply specifying the path to the Blender scene regardless of its folder. This way, the script would allow linking a panel group layer to any scene on the computer, and the user would be free to choose any folder to store their renders. While this approach requires more user input, it could be less restrictive than the current folder management system.
Alpha objects shadows
- Currently, objects with an alpha texture are a limitation, as they are assigned an “opaque shadows” shader for rendering. This is a complex issue to solve but can be quite problematic in certain scenarios, so I plan to address it.
Scene Reuse and Linking Enhancements
- Improved Scene Reuse: Enable better reuse of scenes with the following capabilities:
- Link two templates to the same scene, but to two different cameras.
- Create linked scenes that allow users to unlink specific elements if needed for greater flexibility (this could be done by user if the folder management is updated).
Layer Pass Import
- Support for Multiple Passes: Introduce the ability to import various passes for each layer.
- Initial implementation will focus on Shadow Passes, catering to Non-Photorealistic Rendering (NPR) workflows.
Render Update Option
- Advanced Render Update: Complete the partially developed render update functionality to:
- Optimize rendering workflows.
- Ensure consistency during iterative rendering processes.